1. Find "Accounts"
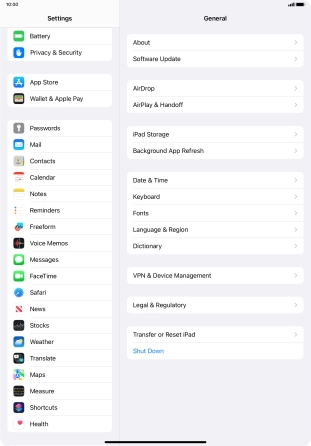
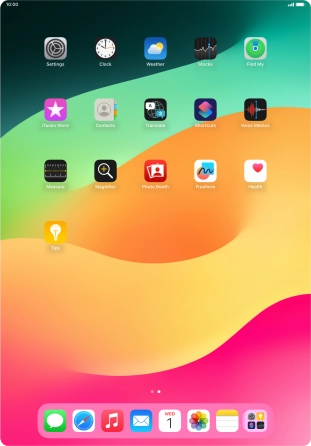
Press Settings.
![](http://wmstatic.global.ssl.fastly.net/ml/7150124-f-2ef041b2-7cf5-4c4f-ab06-63ca76171e8e.png?width=312&height=446)
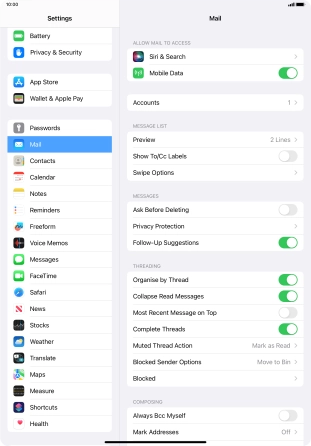
Press Mail.
![](http://wmstatic.global.ssl.fastly.net/ml/7150124-f-87e4eab6-fc92-4a80-8451-bfd7e5b2639a.png?width=312&height=446)
Press Accounts.
![](http://wmstatic.global.ssl.fastly.net/ml/7150124-f-ddca6d91-dbfe-4c3d-be91-1f46c2c7d02f.png?width=312&height=446)
2. Create new email account
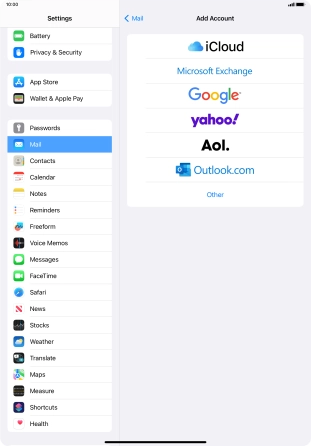
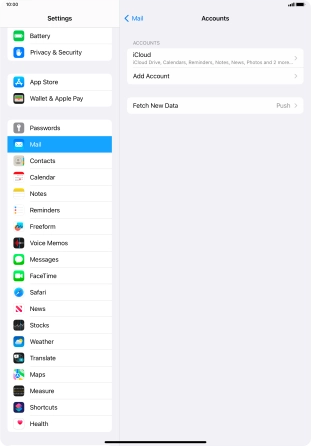
Press Add Account.
![](http://wmstatic.global.ssl.fastly.net/ml/7150124-f-bb35431d-c948-4eec-9bf2-01cf15a01759.png?width=312&height=446)
Press Microsoft Exchange.
![](http://wmstatic.global.ssl.fastly.net/ml/7150124-f-a1822d62-4f8b-42e9-906f-a81d82b61f42.png?width=312&height=446)
3. Enter email address
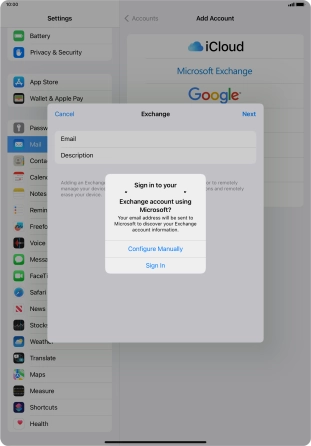
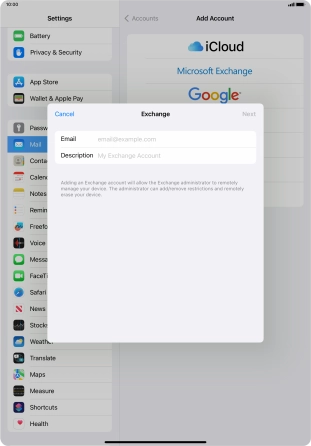
Press Email and key in your email address.
![](http://wmstatic.global.ssl.fastly.net/ml/7150124-f-a5bc80da-6326-47fb-8cc6-9ce21c638326.png?width=312&height=446)
4. Enter email account name
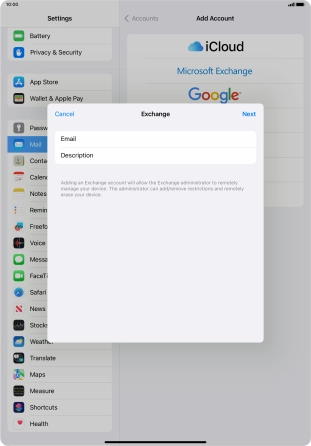
Press Description and key in the required name.
![](http://wmstatic.global.ssl.fastly.net/ml/7150124-f-d47a8efc-ee1a-4c85-9b34-0497dd4b955c.png?width=312&height=446)
Press Next.
![](http://wmstatic.global.ssl.fastly.net/ml/7150124-f-d47a8efc-ee1a-4c85-9b34-0497dd4b955c.png?width=312&height=446)
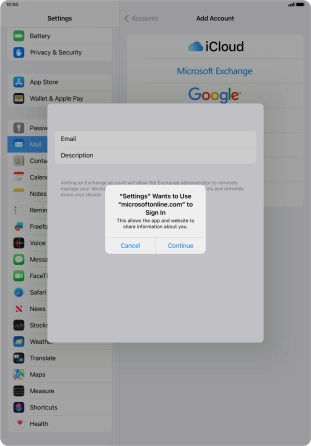
Press Sign In.
![](http://wmstatic.global.ssl.fastly.net/ml/7150124-f-97e48606-8118-4ab3-b7b5-2545ec915eed.png?width=312&height=446)
Press Continue.
![](http://wmstatic.global.ssl.fastly.net/ml/7150124-f-8f051765-93de-475f-8ef3-3187c060f8f0.png?width=312&height=446)
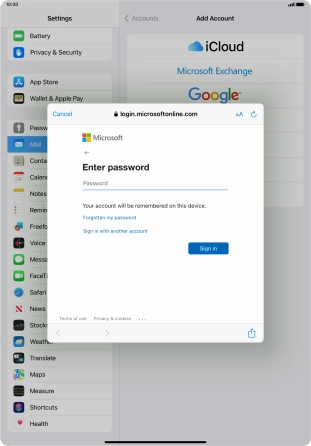
5. Enter password
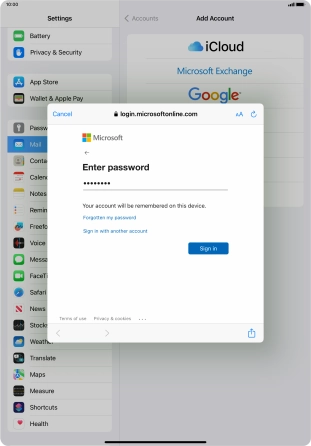
Press Password and key in the password for your email account.
![](http://wmstatic.global.ssl.fastly.net/ml/7150124-f-a6ce1989-163a-40aa-8b0a-132198e04bad.png?width=312&height=446)
Press Sign in.
![](http://wmstatic.global.ssl.fastly.net/ml/7150124-f-201f58c4-02f9-439d-83aa-ded8119991b7.png?width=312&height=446)
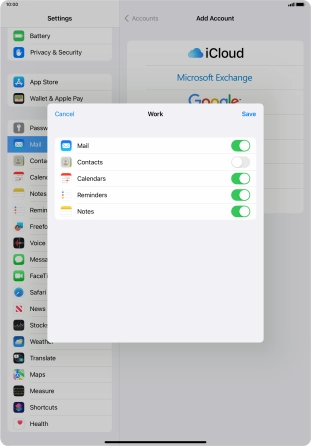
6. Select settings for synchronisation of data
Press the indicators next to the required data types to turn synchronisation of each data type on or off.
![](http://wmstatic.global.ssl.fastly.net/ml/7150124-f-11fb8ede-81bb-4269-b992-dc1cd88a917d.png?width=312&height=446)
Press Save. Your email account has now been set up. To select more settings for e.g. SSL encryption and retrieval of new email messages, proceed with the following steps.
![](http://wmstatic.global.ssl.fastly.net/ml/7150124-f-11fb8ede-81bb-4269-b992-dc1cd88a917d.png?width=312&height=446)
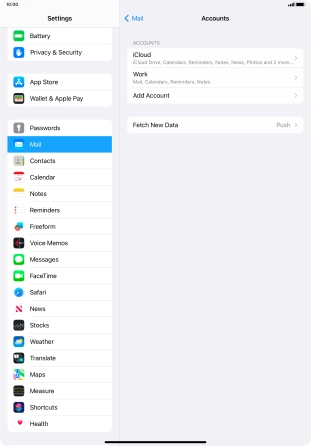
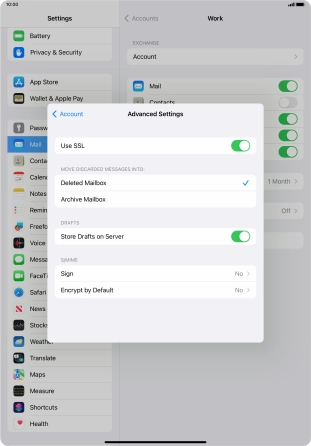
7. Turn SSL encryption on or off
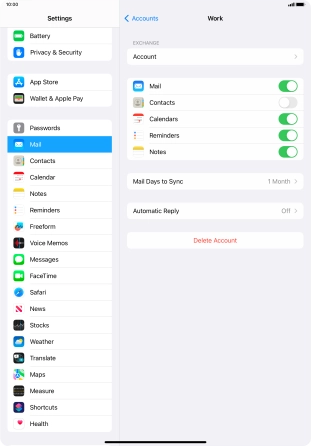
Press the name of the Exchange email account you've just set up.
![](http://wmstatic.global.ssl.fastly.net/ml/7150124-f-723b9047-d1f8-42bf-b056-5403a6db5d20.png?width=312&height=446)
Press Account.
![](http://wmstatic.global.ssl.fastly.net/ml/7150124-f-6081e4af-aa80-4e4f-9d59-c82cc4295fbf.png?width=312&height=446)
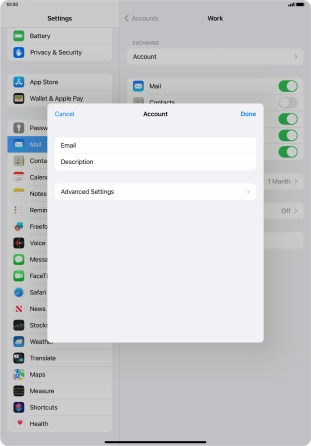
Press Advanced Settings.
![](http://wmstatic.global.ssl.fastly.net/ml/7150124-f-22a08845-f667-432d-966f-d822e1956803.png?width=312&height=446)
Press the indicator next to "Use SSL" to turn the function on or off.
![](http://wmstatic.global.ssl.fastly.net/ml/7150124-f-26276f29-b197-4adb-9c47-d1744ff00e9c.png?width=312&height=446)
Press arrow left.
![](http://wmstatic.global.ssl.fastly.net/ml/7150124-f-26276f29-b197-4adb-9c47-d1744ff00e9c.png?width=312&height=446)
Press Done.
![](http://wmstatic.global.ssl.fastly.net/ml/7150124-f-22a08845-f667-432d-966f-d822e1956803.png?width=312&height=446)
Press arrow left.
![](http://wmstatic.global.ssl.fastly.net/ml/7150124-f-6081e4af-aa80-4e4f-9d59-c82cc4295fbf.png?width=312&height=446)
8. Select setting for retrieval of new email messages
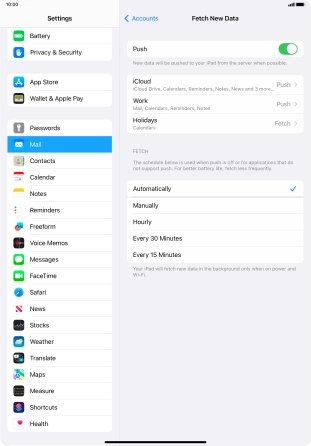
Press Fetch New Data.
![](http://wmstatic.global.ssl.fastly.net/ml/7150124-f-723b9047-d1f8-42bf-b056-5403a6db5d20.png?width=312&height=446)
Press the indicator next to "Push" to turn the function on or off.
![](http://wmstatic.global.ssl.fastly.net/ml/7150124-f-5be8255f-37e3-4772-9675-dd896e2167ba.png?width=312&height=446)
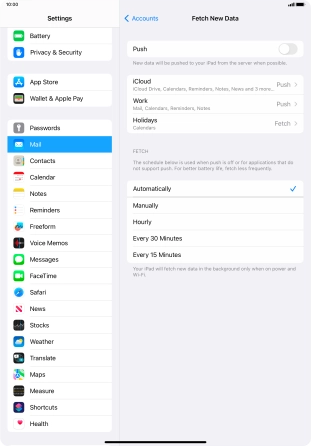
If you turn off the function, press the required setting.
![](http://wmstatic.global.ssl.fastly.net/ml/7150124-f-2ffce986-203b-4082-8b83-ff43e8442db3.png?width=312&height=446)
Press the required email account and follow the instructions on the screen to select settings for the specific account.
![](http://wmstatic.global.ssl.fastly.net/ml/7150124-f-2ffce986-203b-4082-8b83-ff43e8442db3.png?width=312&height=446)
9. Return to the home screen
Slide your finger upwards starting from the bottom of the screen to return to the home screen.
![](http://wmstatic.global.ssl.fastly.net/ml/7150124-f-2ffce986-203b-4082-8b83-ff43e8442db3.png?width=312&height=446)