1. Find "Use QR Code"
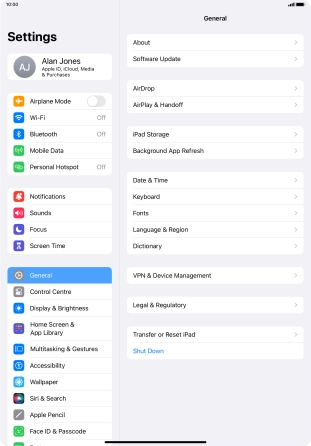
Press Settings.
![](http://wmstatic.global.ssl.fastly.net/ml/7150124-f-2ef041b2-7cf5-4c4f-ab06-63ca76171e8e.png?width=312&height=446)
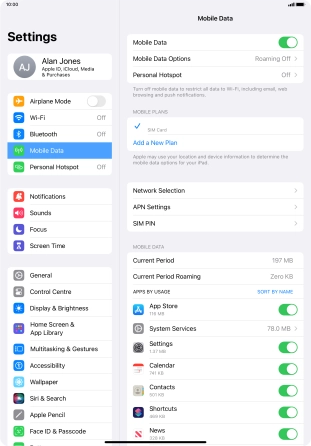
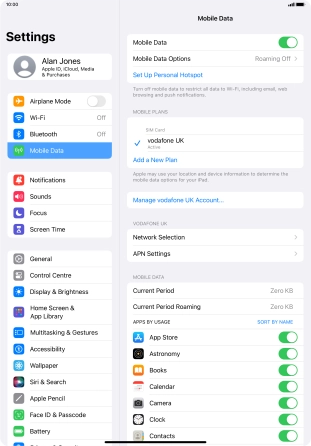
Press Mobile Data.
![](http://wmstatic.global.ssl.fastly.net/ml/7150124-f-796fdb8a-7579-4d47-a339-d8d182a6e8c5.png?width=312&height=446)
Press Add a New Plan.
![](http://wmstatic.global.ssl.fastly.net/ml/7150124-f-70d07957-ce0c-4e0f-9b57-474269a7cbae.png?width=312&height=446)
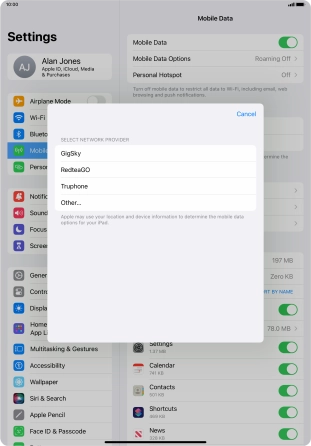
Press Other....
![](http://wmstatic.global.ssl.fastly.net/ml/7150124-f-937a2bad-eb78-4d86-82eb-c16b0c5653c1.png?width=312&height=446)
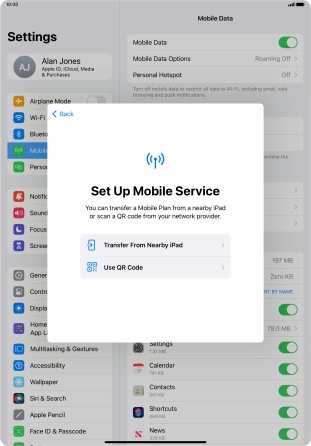
Press Use QR Code.
![](http://wmstatic.global.ssl.fastly.net/ml/7150124-f-43e67b48-e296-43a7-8359-01a826de0b66.png?width=312&height=446)
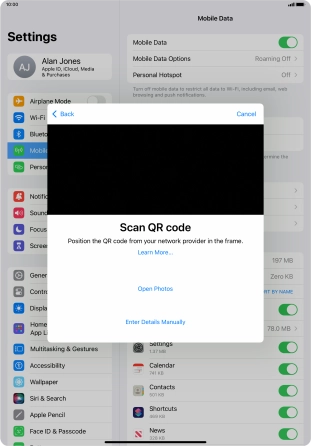
2. Scan QR code
Place the QR code you've received inside the tablet camera frame to scan the code. If you’ve deleted your eSIM, you can re-add it using your existing QR code. If you’re having problems, see our FAQ.
![](http://wmstatic.global.ssl.fastly.net/ml/7150124-f-b5af0fbd-8d70-4fb9-bc06-137bf0c98d3b.png?width=312&height=446)
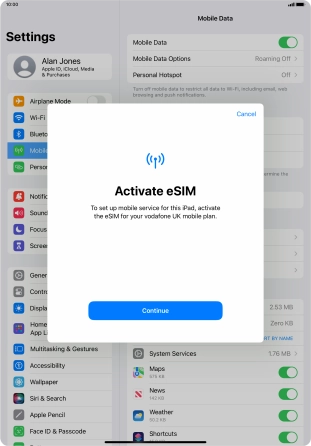
3. Activate eSIM
Press Continue.
![](http://wmstatic.global.ssl.fastly.net/ml/7150124-f-f7db1479-fa5f-4503-82f9-271f76b94b67.png?width=312&height=446)
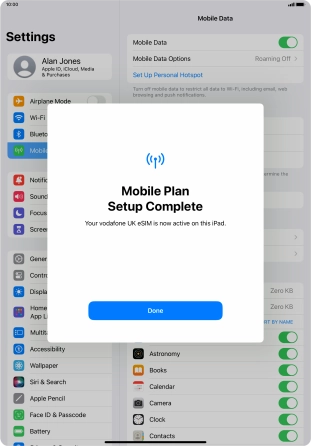
Press Done.
![](http://wmstatic.global.ssl.fastly.net/ml/7150124-f-d6864b80-d27a-453d-becf-1d1fc4667e7e.png?width=312&height=446)
4. Return to the home screen
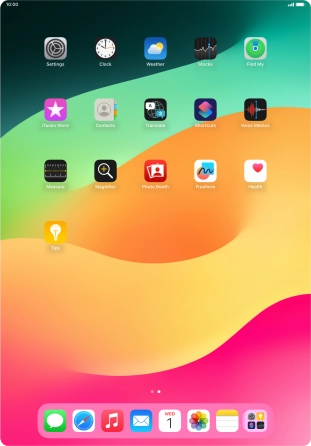
Slide your finger upwards starting from the bottom of the screen to return to the home screen.
![](http://wmstatic.global.ssl.fastly.net/ml/7150124-f-a2c902a2-f32b-4b56-a038-47138deb47c2.png?width=312&height=446)