![Apple iPad Pro 13 (2024)](http://wmstatic.global.ssl.fastly.net/ml/7280624-f-5ad4ddde-b344-4556-82c0-ebdcc696cf2a.png?width=150&height=320)
Apple iPad Pro 13 (2024)
iPadOS 17
1 Find "Accounts"
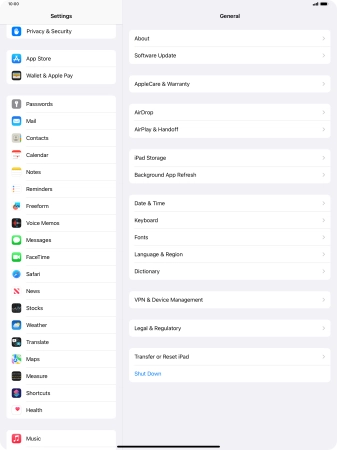
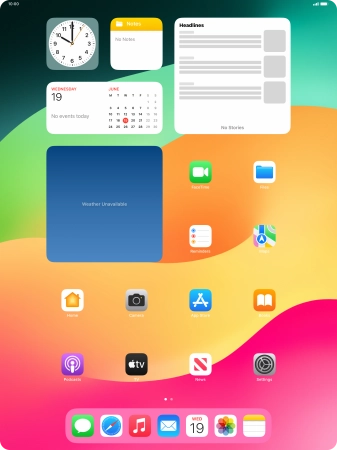
Press Settings.
![](http://wmstatic.global.ssl.fastly.net/ml/7280624-f-9a8a74a0-5a46-4f10-9244-c9130d13961e.png?width=338&height=450)
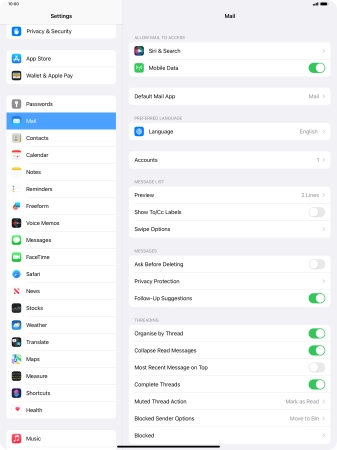
Press Mail.
![](http://wmstatic.global.ssl.fastly.net/ml/7280624-f-449952e5-5c3f-4bea-a071-2b6c683b53a9.png?width=338&height=450)
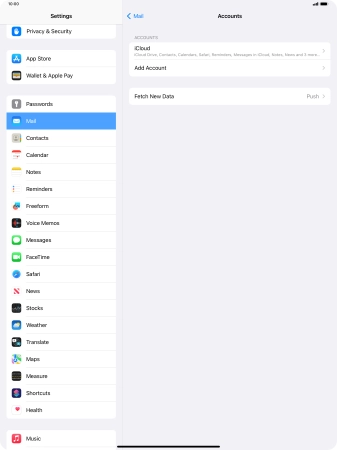
Press Accounts.
![](http://wmstatic.global.ssl.fastly.net/ml/7280624-f-ecee9f55-d3eb-4765-90ad-f30465e425f9.png?width=338&height=450)
2 Create new email account
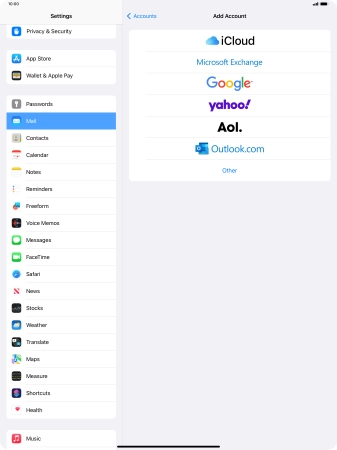
Press Add Account.
![](http://wmstatic.global.ssl.fastly.net/ml/7280624-f-1a7f4371-6cc2-4bf4-91d2-035e449bcb23.png?width=338&height=450)
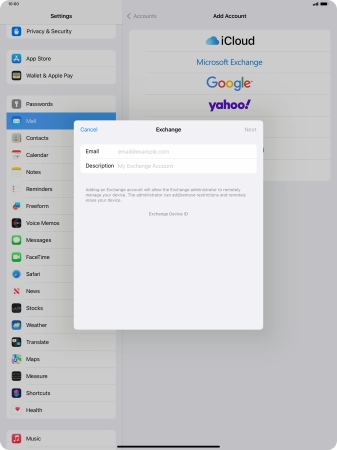
Press Microsoft Exchange.
![](http://wmstatic.global.ssl.fastly.net/ml/7280624-f-fbfc011d-379d-4d84-8511-4b5184e99b99.png?width=338&height=450)
3 Enter email address
Press Email and key in your email address.
![](http://wmstatic.global.ssl.fastly.net/ml/7280624-f-e29ffbda-6627-4159-aae5-622ca6a87542.png?width=338&height=450)
4 Enter email account name
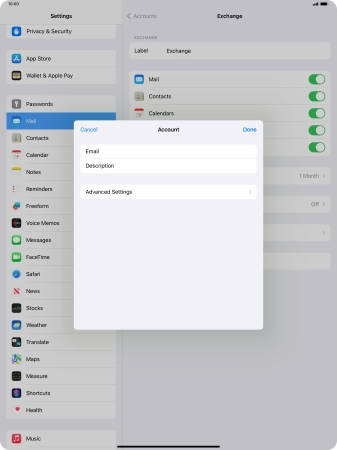
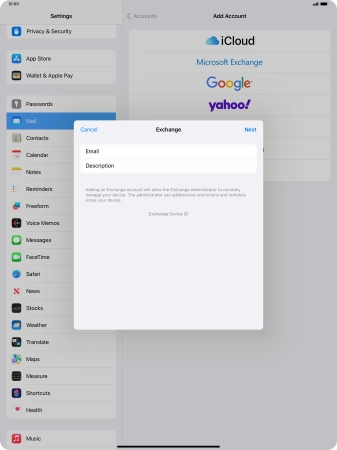
Press Description and key in the required name.
![](http://wmstatic.global.ssl.fastly.net/ml/7280624-f-841b4577-8be1-4bb4-9a86-e7beb340dad0.png?width=338&height=450)
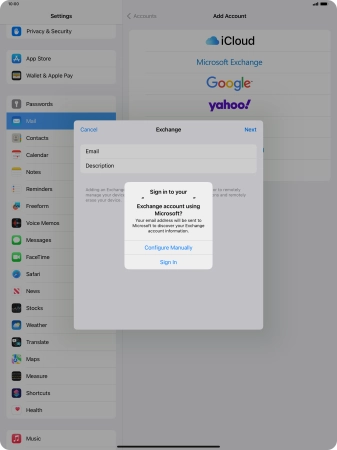
Press Next.
![](http://wmstatic.global.ssl.fastly.net/ml/7280624-f-841b4577-8be1-4bb4-9a86-e7beb340dad0.png?width=338&height=450)
Press Sign In.
![](http://wmstatic.global.ssl.fastly.net/ml/7280624-f-7e91a494-5143-44bc-9bc4-433bd5b1f7f2.png?width=338&height=450)
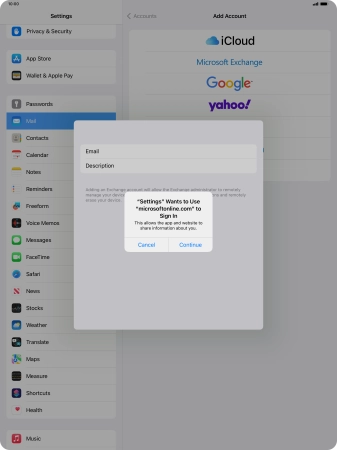
Press Continue.
![](http://wmstatic.global.ssl.fastly.net/ml/7280624-f-d2385eca-4ef6-4339-8666-ea0e60614375.png?width=338&height=450)
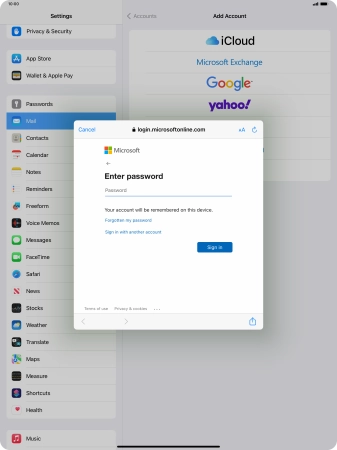
5 Enter password
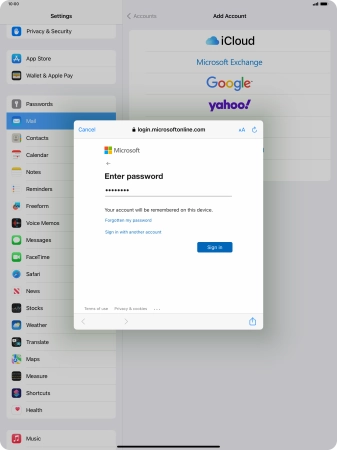
Press Password and key in the password for your email account.
![](http://wmstatic.global.ssl.fastly.net/ml/7280624-f-fdd7e58c-2f13-447e-b5d3-81dc78b55ecf.png?width=338&height=450)
Press Sign in.
![](http://wmstatic.global.ssl.fastly.net/ml/7280624-f-b98d00dc-e41b-40d3-a4f4-23a7ac46d28b.png?width=338&height=450)
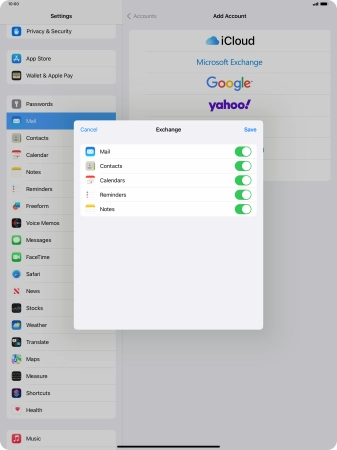
6 Select settings for synchronisation of data
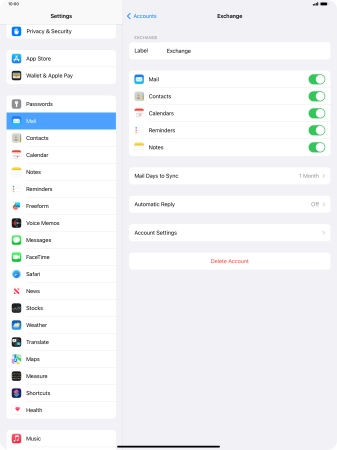
Press the indicators next to the required data types to turn synchronisation of each data type on or off.
![](http://wmstatic.global.ssl.fastly.net/ml/7280624-f-adea462d-ff72-410e-9771-662c23a26d9d.png?width=338&height=450)
Press Save. Your email account has now been set up. To select more settings for e.g. SSL encryption and retrieval of new email messages, proceed with the following steps.
![](http://wmstatic.global.ssl.fastly.net/ml/7280624-f-adea462d-ff72-410e-9771-662c23a26d9d.png?width=338&height=450)
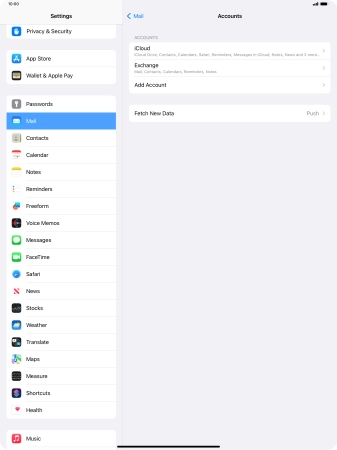
7 Turn SSL encryption on or off
Press the name of the Exchange email account you've just set up.
![](http://wmstatic.global.ssl.fastly.net/ml/7280624-f-a7e0f0bd-56c8-4a3e-8c01-b70fc1f3f24c.png?width=338&height=450)
Press Account Settings.
![](http://wmstatic.global.ssl.fastly.net/ml/7280624-f-ff00ea64-9c12-4fa4-ae24-360b675a58cd.png?width=338&height=450)
Press Advanced Settings.
![](http://wmstatic.global.ssl.fastly.net/ml/7280624-f-ef91cc41-74f7-44c7-af19-52c3eb66ff33.png?width=338&height=450)
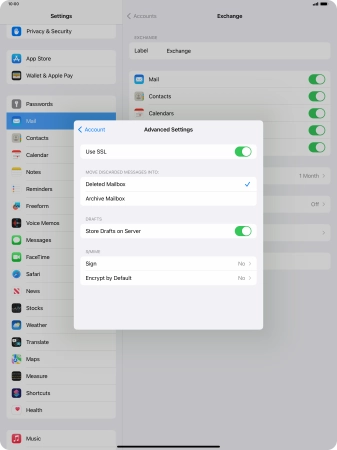
Press the indicator next to "Use SSL" to turn the function on or off.
![](http://wmstatic.global.ssl.fastly.net/ml/7280624-f-155a0497-e97d-4531-bc17-87b32799c5e4.png?width=338&height=450)
Press arrow left.
![](http://wmstatic.global.ssl.fastly.net/ml/7280624-f-155a0497-e97d-4531-bc17-87b32799c5e4.png?width=338&height=450)
Press Done.
![](http://wmstatic.global.ssl.fastly.net/ml/7280624-f-ef91cc41-74f7-44c7-af19-52c3eb66ff33.png?width=338&height=450)
Press arrow left.
![](http://wmstatic.global.ssl.fastly.net/ml/7280624-f-ff00ea64-9c12-4fa4-ae24-360b675a58cd.png?width=338&height=450)
8 Select setting for retrieval of new email messages
Press Fetch New Data.
![](http://wmstatic.global.ssl.fastly.net/ml/7280624-f-a7e0f0bd-56c8-4a3e-8c01-b70fc1f3f24c.png?width=338&height=450)
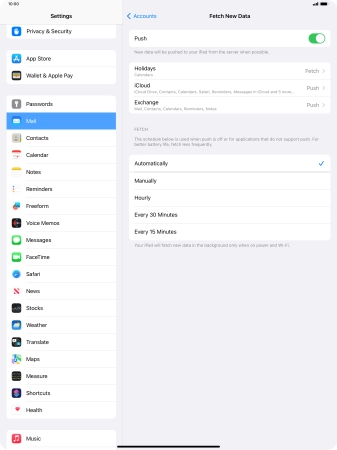
Press the indicator next to "Push" to turn the function on or off.
![](http://wmstatic.global.ssl.fastly.net/ml/7280624-f-b6086b60-caa0-4c75-87e9-e8f59c6d6589.png?width=338&height=450)
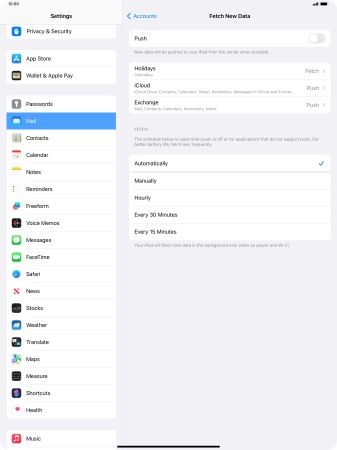
If you turn off the function, press the required setting.
![](http://wmstatic.global.ssl.fastly.net/ml/7280624-f-8edc9e0b-aeb3-40e7-afd9-cb2f4f6a3471.png?width=338&height=450)
Press the required email account and follow the instructions on the screen to select settings for the specific account.
![](http://wmstatic.global.ssl.fastly.net/ml/7280624-f-8edc9e0b-aeb3-40e7-afd9-cb2f4f6a3471.png?width=338&height=450)
9 Return to the home screen
Slide your finger upwards starting from the bottom of the screen to return to the home screen.
![](http://wmstatic.global.ssl.fastly.net/ml/7280624-f-8edc9e0b-aeb3-40e7-afd9-cb2f4f6a3471.png?width=338&height=450)