![Apple Watch Ultra](http://wmstatic.global.ssl.fastly.net/ml/7030225-f-7a04f441-bcde-48f7-b3f4-0689bbd8f240.png?width=150&height=320)
Apple Watch Ultra
watchOS 11
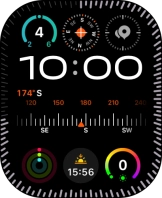
1 Find "Search"
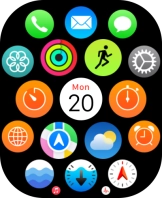
Press the Digital Crown.
![](http://wmstatic.global.ssl.fastly.net/ml/7030225-f-e0d32d62-1ba9-43fd-9c14-87a00391d15e.png?width=162&height=200)
Press the Maps icon.
![](http://wmstatic.global.ssl.fastly.net/ml/7030225-f-ec569a11-85bd-4d13-953a-447a539017a3.png?width=162&height=200)
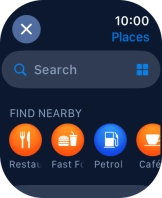
Press the search icon.
![](http://wmstatic.global.ssl.fastly.net/ml/7030225-f-91c294f8-c586-4da6-bdeb-1f1087fe4b5d.png?width=162&height=200)
Press Search.
![](http://wmstatic.global.ssl.fastly.net/ml/7030225-f-170db2a1-0470-4358-af0f-06420350ec19.png?width=162&height=200)
2 Find destination using voice
Press the input icon.
![](http://wmstatic.global.ssl.fastly.net/ml/7030225-f-b26355eb-9608-4e1c-a73c-9af38efcf07b.png?width=162&height=200)
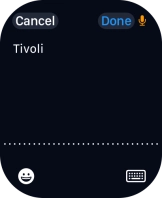
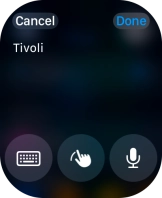
Press the microphone icon to turn on voice input.
To use voice input, you need to turn on dictation.
![](http://wmstatic.global.ssl.fastly.net/ml/7030225-f-fc4704cb-774a-48a0-8d76-f72f4f64f34a.png?width=162&height=200)
Say "[the required destination]".
![](http://wmstatic.global.ssl.fastly.net/ml/7030225-f-9e1e21ed-f941-4ad9-9979-4490c2e81501.png?width=162&height=200)
Press Done.
![](http://wmstatic.global.ssl.fastly.net/ml/7030225-f-9eb6a08b-582f-44cf-baf0-a5953d3616d8.png?width=162&height=200)
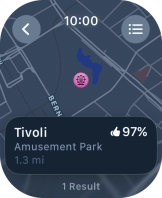
Press the required destination.
![](http://wmstatic.global.ssl.fastly.net/ml/7030225-f-66da9e63-1403-475d-9674-54001777a6f7.png?width=162&height=200)
3 Find destination using text input
Press the input icon.
![](http://wmstatic.global.ssl.fastly.net/ml/7030225-f-b26355eb-9608-4e1c-a73c-9af38efcf07b.png?width=162&height=200)
Press the keypad icon.
![](http://wmstatic.global.ssl.fastly.net/ml/7030225-f-fc4704cb-774a-48a0-8d76-f72f4f64f34a.png?width=162&height=200)
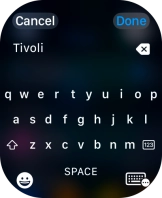
Key in the required destination and press Done.
![](http://wmstatic.global.ssl.fastly.net/ml/7030225-f-fc4704cb-774a-48a0-8d76-f72f4f64f34a.png?width=162&height=200)
Press the required destination.
![](http://wmstatic.global.ssl.fastly.net/ml/7030225-f-66da9e63-1403-475d-9674-54001777a6f7.png?width=162&height=200)
4 Select transport type
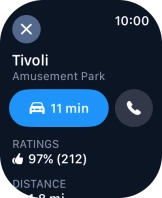
Press the start journey icon.
![](http://wmstatic.global.ssl.fastly.net/ml/7030225-f-d5cb0c88-c6ab-4fad-8c7f-f94e3f66ba23.png?width=162&height=200)
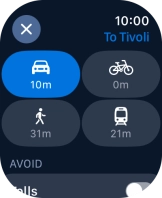
Press the transport type icon.
![](http://wmstatic.global.ssl.fastly.net/ml/7030225-f-29906a3f-9c75-4c8a-b58e-6b10aed5dbae.png?width=162&height=200)
Press the required transport type.
![](http://wmstatic.global.ssl.fastly.net/ml/7030225-f-140aac73-70e6-45cb-8f79-53deff20605f.png?width=162&height=200)
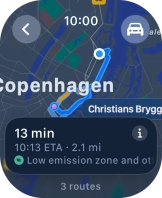
5 Plan route to destination
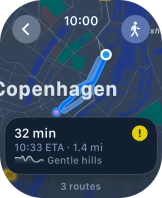
Turn the Digital Crown to see the suggested routes.
![](http://wmstatic.global.ssl.fastly.net/ml/7030225-f-5ca666d0-35f5-4340-b98d-d6c4068f7281.png?width=162&height=200)
Press the required route.
![](http://wmstatic.global.ssl.fastly.net/ml/7030225-f-5ca666d0-35f5-4340-b98d-d6c4068f7281.png?width=162&height=200)
6 Follow the directions
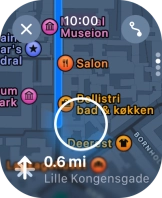
Follow the instructions on the screen to go to the required destination.
![](http://wmstatic.global.ssl.fastly.net/ml/7030225-f-bb97e72e-5067-4010-a4a0-5153d6bb8e7f.png?width=162&height=200)
7 See route overview
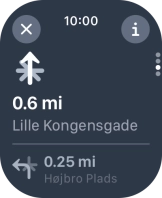
Slide your finger upwards on the screen to see an overview of the route.
![](http://wmstatic.global.ssl.fastly.net/ml/7030225-f-bb97e72e-5067-4010-a4a0-5153d6bb8e7f.png?width=162&height=200)
8 Exit navigation
Press the end icon.
![](http://wmstatic.global.ssl.fastly.net/ml/7030225-f-2611b429-8478-4302-8e43-f6188fe951ee.png?width=162&height=200)
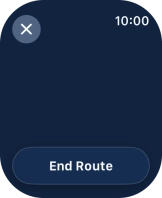
Press End Route.
![](http://wmstatic.global.ssl.fastly.net/ml/7030225-f-f91768d7-6c90-4544-a162-c0b12de8e0ce.png?width=162&height=200)
9 Return to the home screen
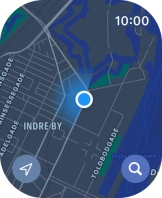
Press the Digital Crown several times to return to standby mode.
![](http://wmstatic.global.ssl.fastly.net/ml/7030225-f-91c294f8-c586-4da6-bdeb-1f1087fe4b5d.png?width=162&height=200)