![Google Pixel 9](http://wmstatic.global.ssl.fastly.net/ml/7130924-f-9e4c035c-af87-4de7-b87d-d64f3baea4f9.png?width=150&height=320)
Google Pixel 9
Android 14
1. Find "Organise"
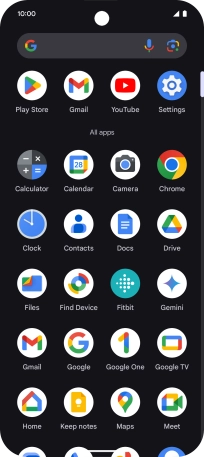
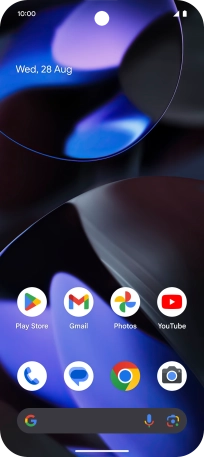
Slide your finger upwards on the screen.
![](http://wmstatic.global.ssl.fastly.net/ml/7130924-f-bceaac50-d3b8-46b1-94bf-c7ccc65408de.png?width=204&height=462)
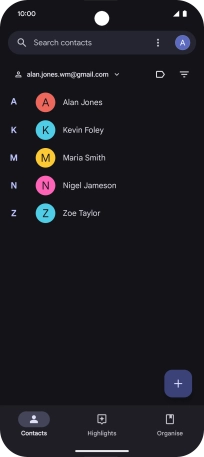
Press Contacts.
![](http://wmstatic.global.ssl.fastly.net/ml/7130924-f-47c3400d-fa67-475f-9a90-301f5418a420.png?width=204&height=462)
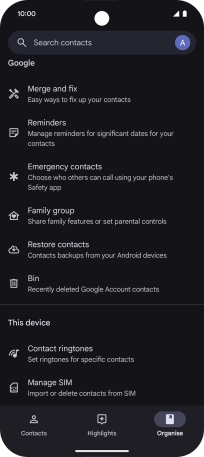
Press Organise.
![](http://wmstatic.global.ssl.fastly.net/ml/7130924-f-a3f4b9e8-7b10-46a1-8307-1166ca612f59.png?width=204&height=462)
2. Import contacts from your SIM to your Google account
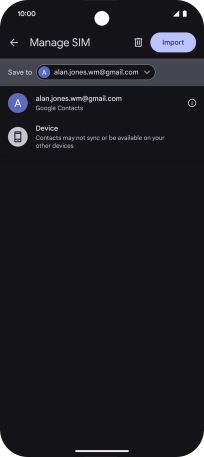
Press Manage SIM.
![](http://wmstatic.global.ssl.fastly.net/ml/7130924-f-138917d3-48c9-45e9-bf34-9f9d25ccb995.png?width=204&height=462)
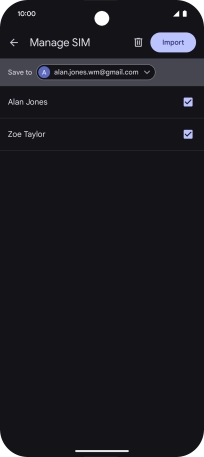
Press the drop down list next to "Save to".
![](http://wmstatic.global.ssl.fastly.net/ml/7130924-f-b157e318-ab0a-465d-8b50-9c783a22a6b9.png?width=204&height=462)
Press the required Google account.
![](http://wmstatic.global.ssl.fastly.net/ml/7130924-f-ce1ad76c-22e3-4361-89d7-f91bb8b57050.png?width=204&height=462)
Press the fields next to the required contacts to select them.
![](http://wmstatic.global.ssl.fastly.net/ml/7130924-f-b157e318-ab0a-465d-8b50-9c783a22a6b9.png?width=204&height=462)
Press Import.
![](http://wmstatic.global.ssl.fastly.net/ml/7130924-f-b157e318-ab0a-465d-8b50-9c783a22a6b9.png?width=204&height=462)
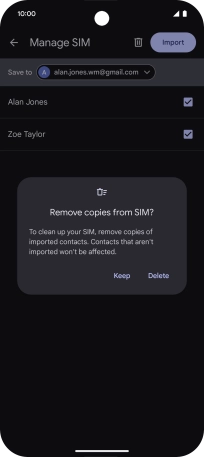
If you want to keep the copied contacts on your SIM, press Keep.
![](http://wmstatic.global.ssl.fastly.net/ml/7130924-f-a358e5ab-e88a-469e-9176-9148d4087540.png?width=204&height=462)
If you want to delete the copied contacts from your SIM, press Delete.
![](http://wmstatic.global.ssl.fastly.net/ml/7130924-f-a358e5ab-e88a-469e-9176-9148d4087540.png?width=204&height=462)
3. Return to the home screen
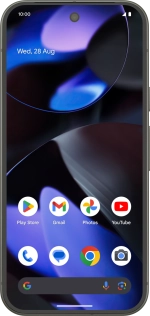
Slide your finger upwards starting from the bottom of the screen to return to the home screen.
![](http://wmstatic.global.ssl.fastly.net/ml/7130924-f-138917d3-48c9-45e9-bf34-9f9d25ccb995.png?width=204&height=462)