![Google Pixel 9 Pro](http://wmstatic.global.ssl.fastly.net/ml/7091024-f-f8bcd746-0e65-4dcc-b3c0-e4e5c71fa103.png?width=150&height=320)
Google Pixel 9 Pro
Android 14
1. Find "Organise"
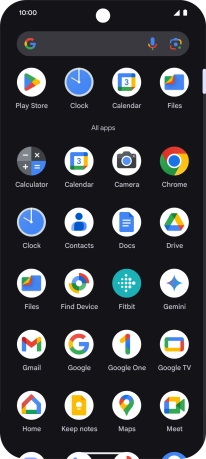
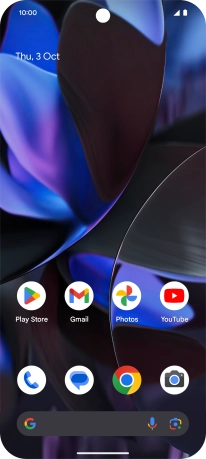
Slide your finger upwards on the screen.
![](http://wmstatic.global.ssl.fastly.net/ml/7091024-f-57497305-ab3d-4b90-9e6d-865bd936ad55.png?width=206&height=464)
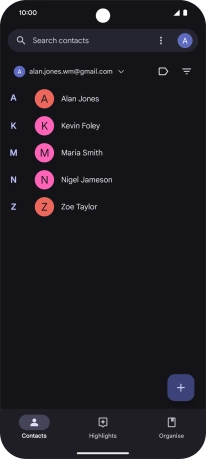
Press Contacts.
![](http://wmstatic.global.ssl.fastly.net/ml/7091024-f-1b77de0a-ada0-437a-a1c3-18d3875611e0.png?width=206&height=464)
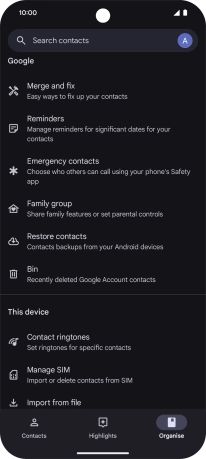
Press Organise.
![](http://wmstatic.global.ssl.fastly.net/ml/7091024-f-21c810b1-5011-45c7-a48f-bc6de0f70f42.png?width=206&height=464)
2. Import contacts from your SIM to your Google account
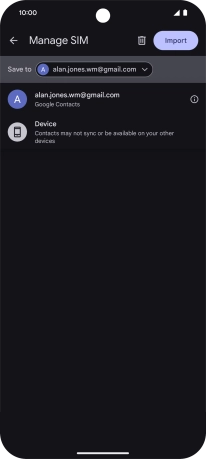
Press Manage SIM.
![](http://wmstatic.global.ssl.fastly.net/ml/7091024-f-d2115948-9786-4365-acb4-43d5f17320ce.png?width=206&height=464)
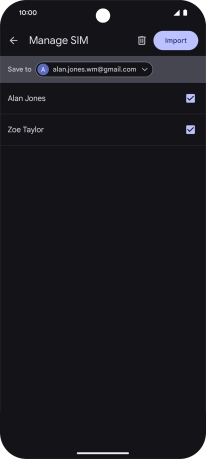
Press the drop down list next to "Save to".
![](http://wmstatic.global.ssl.fastly.net/ml/7091024-f-eb6e6f9b-e0a6-4185-931e-85a75c62a774.png?width=206&height=464)
Press the required Google account.
![](http://wmstatic.global.ssl.fastly.net/ml/7091024-f-23bbaed8-8bdc-4c26-bf5a-913d831e0d0c.png?width=206&height=464)
Press the fields next to the required contacts to select them.
![](http://wmstatic.global.ssl.fastly.net/ml/7091024-f-eb6e6f9b-e0a6-4185-931e-85a75c62a774.png?width=206&height=464)
Press Import.
![](http://wmstatic.global.ssl.fastly.net/ml/7091024-f-eb6e6f9b-e0a6-4185-931e-85a75c62a774.png?width=206&height=464)
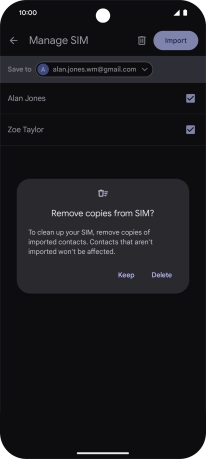
If you want to keep the copied contacts on your SIM, press Keep.
![](http://wmstatic.global.ssl.fastly.net/ml/7091024-f-da7fcbd1-985f-4e52-8fca-68ad146c2953.png?width=206&height=464)
If you want to delete the copied contacts from your SIM, press Delete.
![](http://wmstatic.global.ssl.fastly.net/ml/7091024-f-da7fcbd1-985f-4e52-8fca-68ad146c2953.png?width=206&height=464)
3. Return to the home screen
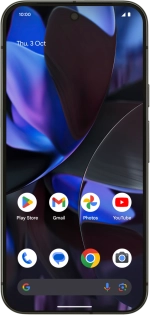
Slide your finger upwards starting from the bottom of the screen to return to the home screen.
![](http://wmstatic.global.ssl.fastly.net/ml/7091024-f-d2115948-9786-4365-acb4-43d5f17320ce.png?width=206&height=464)