![Honor 200 Lite](http://wmstatic.global.ssl.fastly.net/ml/7140225-f-21172bc2-0b40-48f0-81f2-e261dcecf3d9.png?width=150&height=320)
Honor 200 Lite
Android 14
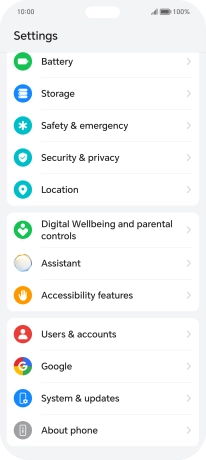
1 Find "Users & accounts"
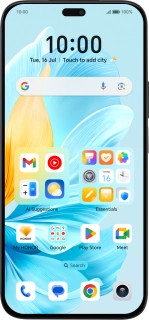
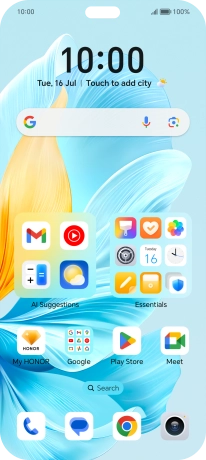
Press the settings icon.
![](http://wmstatic.global.ssl.fastly.net/ml/7140225-f-2a89c386-1f73-490b-8caf-35c8a14dee61.png?width=206&height=464)
Press Users & accounts.
![](http://wmstatic.global.ssl.fastly.net/ml/7140225-f-4817bbf9-d64f-471c-9d14-89a9f2880a37.png?width=206&height=464)
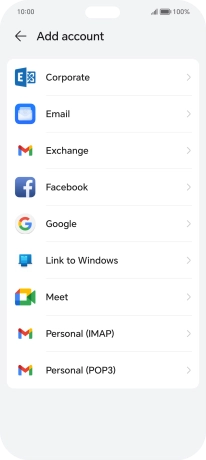
2 Create new email account
Press Add account.
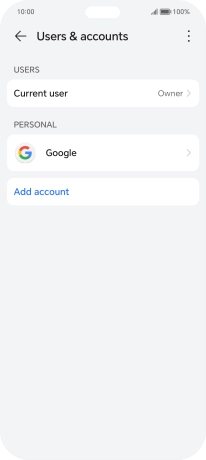
![](http://wmstatic.global.ssl.fastly.net/ml/7140225-f-080aa1d1-6e2e-412a-915c-efde11a76de5.png?width=206&height=464)
3 Select server type
Press Exchange.
![](http://wmstatic.global.ssl.fastly.net/ml/7140225-f-cb47793c-b898-466f-882b-bc82c3bc6d8a.png?width=206&height=464)
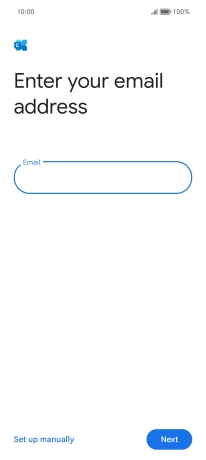
4 Enter email address
Press the field below "Email" and key in your email address.
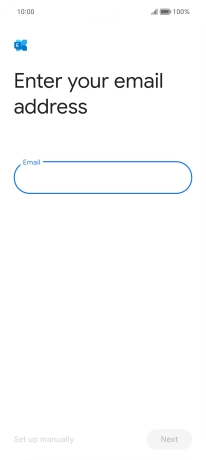
![](http://wmstatic.global.ssl.fastly.net/ml/7140225-f-1e95d0dd-d278-4647-9f0e-019612305763.png?width=206&height=464)
Press Next.
![](http://wmstatic.global.ssl.fastly.net/ml/7140225-f-14bfb7c6-793f-47d5-b526-8fc591925b1b.png?width=206&height=464)
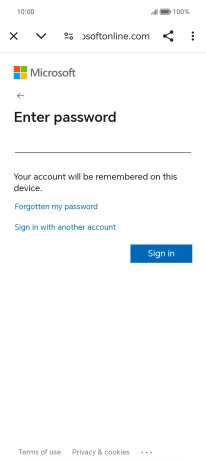
5 Enter password
Press Password and key in the password for your email account.
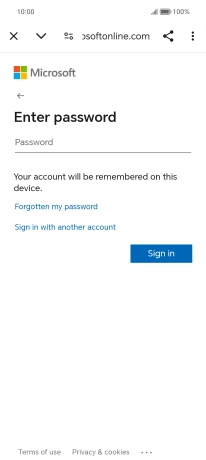
![](http://wmstatic.global.ssl.fastly.net/ml/7140225-f-c4a5bc6f-1043-470f-83e2-4a1274cb52f5.png?width=206&height=464)
Press Sign in.
![](http://wmstatic.global.ssl.fastly.net/ml/7140225-f-34443ed1-f6b9-4532-8c1e-3be00943891d.png?width=206&height=464)
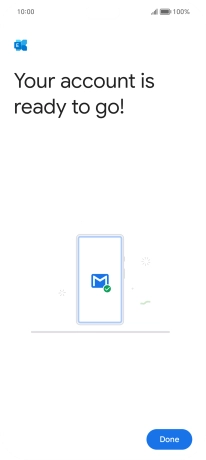
Press Done.
![](http://wmstatic.global.ssl.fastly.net/ml/7140225-f-847142be-f4ff-40bd-84a9-7a4947b46639.png?width=206&height=464)
6 Enter email account name
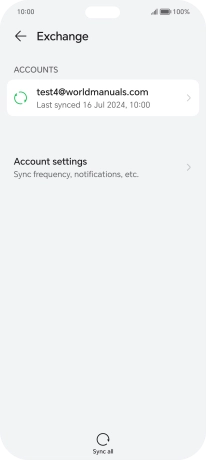
Press the required account type.
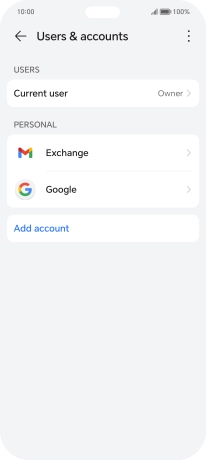
![](http://wmstatic.global.ssl.fastly.net/ml/7140225-f-3ceccb2f-55bf-4d38-9026-f73e41b29b3f.png?width=206&height=464)
Press Account settings.
![](http://wmstatic.global.ssl.fastly.net/ml/7140225-f-0f7b84dc-d800-4030-a261-3e009bb37533.png?width=206&height=464)
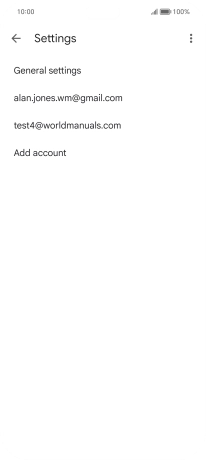
Press the required email account.
![](http://wmstatic.global.ssl.fastly.net/ml/7140225-f-6df6d840-6bdc-4c2b-aa8c-aa8ea7669a72.png?width=206&height=464)
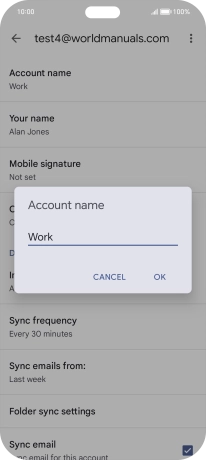
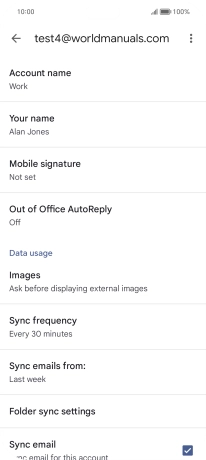
Press Account name and key in the required name.
![](http://wmstatic.global.ssl.fastly.net/ml/7140225-f-e2c84bee-baad-4f77-9ac4-5ea614ec72c1.png?width=206&height=464)
Press OK.
![](http://wmstatic.global.ssl.fastly.net/ml/7140225-f-f0a038d8-86a5-479c-b0ec-5c3a62f8b851.png?width=206&height=464)
7 Enter sender name
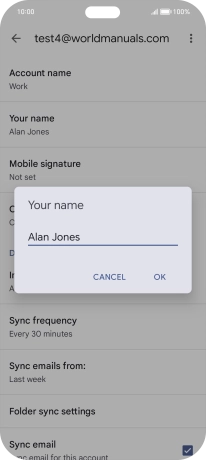
Press Your name and key in the required sender name.
![](http://wmstatic.global.ssl.fastly.net/ml/7140225-f-e2c84bee-baad-4f77-9ac4-5ea614ec72c1.png?width=206&height=464)
Press OK.
![](http://wmstatic.global.ssl.fastly.net/ml/7140225-f-2ca62489-2f39-452b-9b6c-fbefe414cdaf.png?width=206&height=464)
8 Select setting for retrieval of new email messages
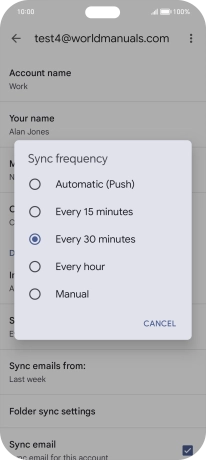
Press Sync frequency.
![](http://wmstatic.global.ssl.fastly.net/ml/7140225-f-e2c84bee-baad-4f77-9ac4-5ea614ec72c1.png?width=206&height=464)
Press the required setting.
![](http://wmstatic.global.ssl.fastly.net/ml/7140225-f-f932b56c-4164-409a-8916-e02c07aafe61.png?width=206&height=464)
9 Turn on email message synchronisation
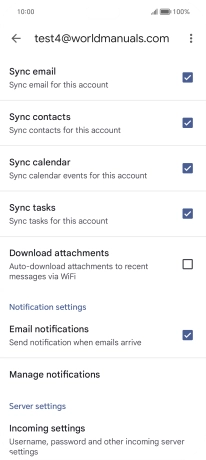
Press the field next to "Sync email" to turn on the function.
![](http://wmstatic.global.ssl.fastly.net/ml/7140225-f-a4063024-e74a-461d-be2b-884c9da9884b.png?width=206&height=464)
10 Select data types for synchronisation
Press the fields next to the required data types to turn synchronisation on or off.
![](http://wmstatic.global.ssl.fastly.net/ml/7140225-f-a4063024-e74a-461d-be2b-884c9da9884b.png?width=206&height=464)
11 Turn email message notifications on or off
Press the field next to "Email notifications" to turn the function on or off.
![](http://wmstatic.global.ssl.fastly.net/ml/7140225-f-a4063024-e74a-461d-be2b-884c9da9884b.png?width=206&height=464)
12 Return to the home screen
Slide your finger upwards starting from the bottom of the screen to return to the home screen.
![](http://wmstatic.global.ssl.fastly.net/ml/7140225-f-a4063024-e74a-461d-be2b-884c9da9884b.png?width=206&height=464)