![Lenovo Tab M10 Plus (3rd Gen)](http://wmstatic.global.ssl.fastly.net/ml/7110124-f-8de091d7-a25d-4442-aae1-4e2af9adf3bf.png?width=150&height=320)
Lenovo Tab M10 Plus (3rd Gen)
Android 13
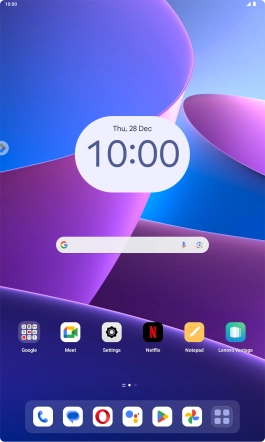
1 Find "Network and Internet"
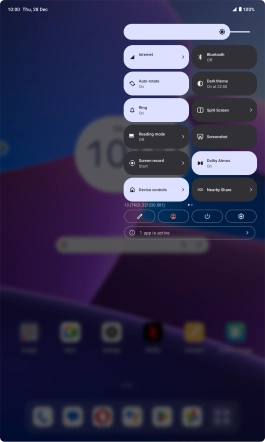
Slide your finger downwards starting from the top right side of the screen.
![](http://wmstatic.global.ssl.fastly.net/ml/7110124-f-421a5507-4a65-4fea-bf0b-404b314e2ba1.png?width=266&height=442)
Press the settings icon.
![](http://wmstatic.global.ssl.fastly.net/ml/7110124-f-b5b53053-e7bb-4011-9a09-7705de2d3423.png?width=266&height=442)
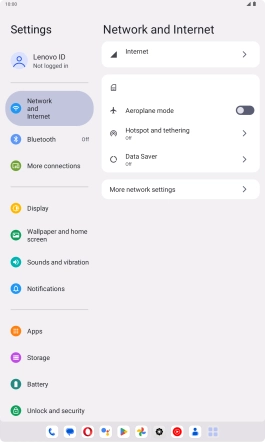
Press Network and Internet.
![](http://wmstatic.global.ssl.fastly.net/ml/7110124-f-5f019dff-3773-40c8-a94a-dee1934f3b08.png?width=266&height=442)
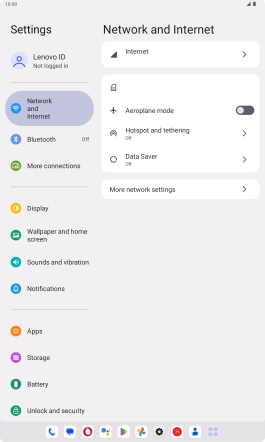
2 Select network manually
Press the name of the SIM.
![](http://wmstatic.global.ssl.fastly.net/ml/7110124-f-486f7d5d-e428-4a43-bbe8-e8a5b30a8537.png?width=266&height=442)
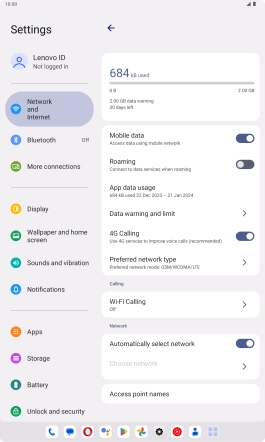
Press the indicator next to "Automatically select network" to turn off the function and wait while your tablet searches for networks.
![](http://wmstatic.global.ssl.fastly.net/ml/7110124-f-54951287-db57-4353-a2f3-29d551bf1ee3.png?width=266&height=442)
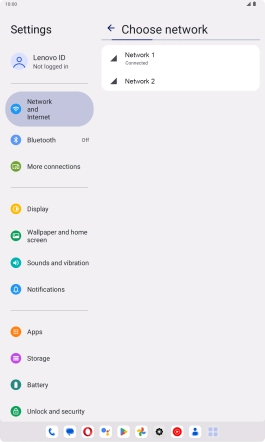
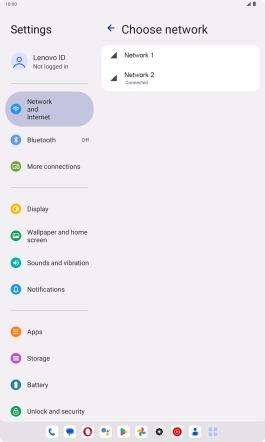
Press the required network.
![](http://wmstatic.global.ssl.fastly.net/ml/7110124-f-1eefe8fe-a3ac-4cdf-ad24-5dea7805939e.png?width=266&height=442)
Press arrow left.
![](http://wmstatic.global.ssl.fastly.net/ml/7110124-f-dda26a10-08cb-4228-ab48-03e358127cea.png?width=266&height=442)
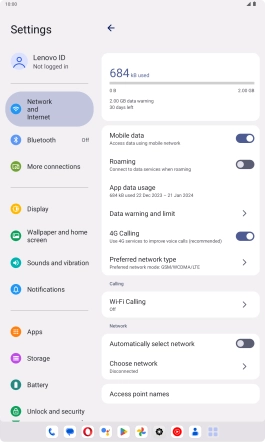
3 Select network automatically
Press the indicator next to "Automatically select network" to turn on the function.
![](http://wmstatic.global.ssl.fastly.net/ml/7110124-f-b3436edd-4a18-4d8b-a301-885f8dfe75b6.png?width=266&height=442)
4 Return to the home screen
Slide your finger upwards starting from the bottom of the screen to return to the home screen.
![](http://wmstatic.global.ssl.fastly.net/ml/7110124-f-54951287-db57-4353-a2f3-29d551bf1ee3.png?width=266&height=442)