![Motorola Moto G50](http://wmstatic.global.ssl.fastly.net/ml/7151223-f-8302073b-ec21-4d75-a3d4-31f23d72a19b.png?width=150&height=320)
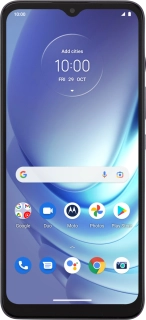
Motorola Moto G50
Android 11.0
1 Find "Accounts"
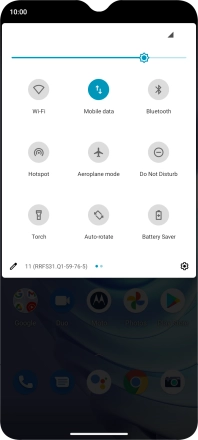
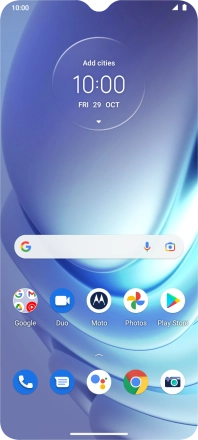
Slide two fingers downwards starting from the top of the screen.
![](http://wmstatic.global.ssl.fastly.net/ml/7151223-f-89362757-6514-456c-8a0b-e99500036bfb.png?width=198&height=440)
Press the settings icon.
![](http://wmstatic.global.ssl.fastly.net/ml/7151223-f-c60b7dc2-a472-47bc-9209-d326efb11e39.png?width=198&height=440)
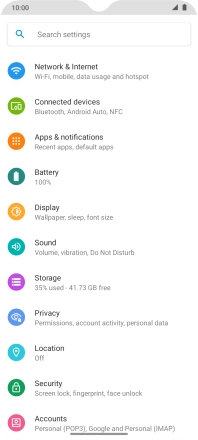
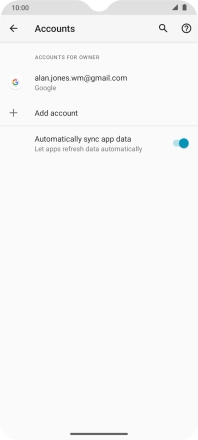
Press Accounts.
![](http://wmstatic.global.ssl.fastly.net/ml/7151223-f-936fcf0b-5e0d-4feb-a1d2-f1193d271751.png?width=198&height=440)
2 Create new email account
Press Add account.
![](http://wmstatic.global.ssl.fastly.net/ml/7151223-f-22c05dfa-1637-47e1-9a0e-619673567dac.png?width=198&height=440)
3 Select server type
Press Exchange.
![](http://wmstatic.global.ssl.fastly.net/ml/7151223-f-ee058f7d-9099-421d-8714-49632ea8c119.png?width=198&height=440)
4 Enter email address
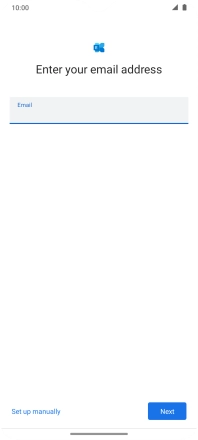
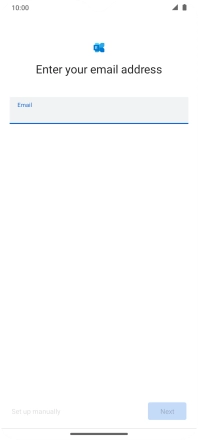
Press the field below "Email" and key in your email address.
![](http://wmstatic.global.ssl.fastly.net/ml/7151223-f-65e205f3-35d2-4cd7-abbe-ebb74ac5f37f.png?width=198&height=440)
Press Next.
![](http://wmstatic.global.ssl.fastly.net/ml/7151223-f-9cfd2c41-9e42-4845-8cfe-6716feb2ed60.png?width=198&height=440)
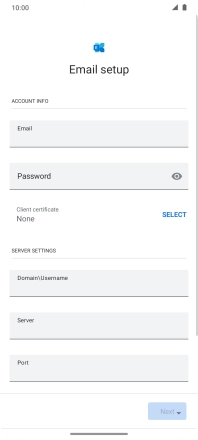
5 Enter password
Press Password and key in the password for your email account.
![](http://wmstatic.global.ssl.fastly.net/ml/7151223-f-25e90ea1-ba31-4ced-b583-d1d3ca469cce.png?width=198&height=440)
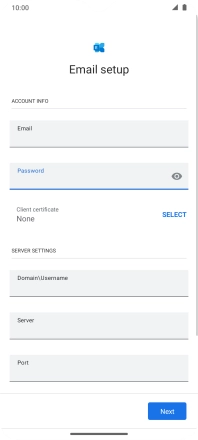
6 Select client certificate
To turn on the function, press SELECT and follow the instructions on the screen to install the required certificate.
![](http://wmstatic.global.ssl.fastly.net/ml/7151223-f-99bfdfea-0c5d-4e96-aa93-a120f8a2fdc8.png?width=198&height=440)
7 Enter domain and username
Press the field below "Domain\Username" and key in the domain and username separated by a "\".
![](http://wmstatic.global.ssl.fastly.net/ml/7151223-f-99bfdfea-0c5d-4e96-aa93-a120f8a2fdc8.png?width=198&height=440)
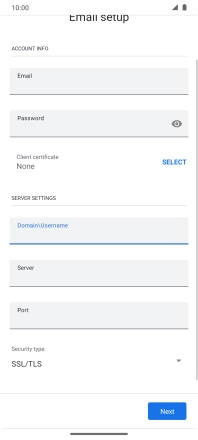
8 Select server address
Press the field below "Server" and key in the server address.
![](http://wmstatic.global.ssl.fastly.net/ml/7151223-f-5ddc79b0-cffe-49d7-9846-36f41ca0986d.png?width=198&height=440)
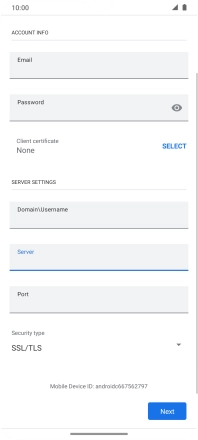
9 Enter port number
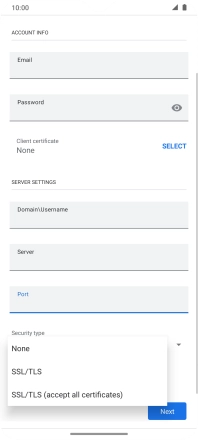
Press the field below "Port" and key in the required port number.
![](http://wmstatic.global.ssl.fastly.net/ml/7151223-f-5cd412a3-d93d-474d-9dda-3e753211e962.png?width=198&height=440)
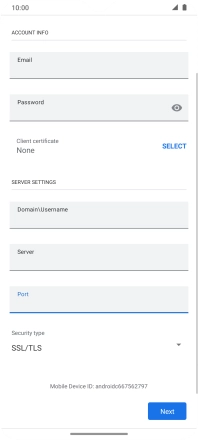
10 Turn SSL encryption on or off
Press the drop down list below "Security type".
![](http://wmstatic.global.ssl.fastly.net/ml/7151223-f-85cf1991-e6dd-45d3-930e-5d0400bec814.png?width=198&height=440)
Press the required setting.
![](http://wmstatic.global.ssl.fastly.net/ml/7151223-f-34c3abcf-f547-44ae-a8e3-991309b8b869.png?width=198&height=440)
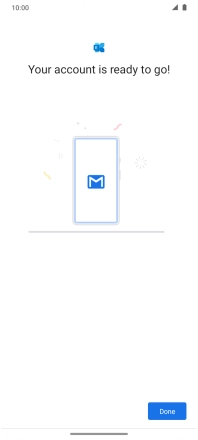
Press Next and follow the instructions on the screen to finish setting up your phone.
![](http://wmstatic.global.ssl.fastly.net/ml/7151223-f-85cf1991-e6dd-45d3-930e-5d0400bec814.png?width=198&height=440)
Press Done.
![](http://wmstatic.global.ssl.fastly.net/ml/7151223-f-d83d68fe-f995-4c10-b0cc-638aebac28e8.png?width=198&height=440)
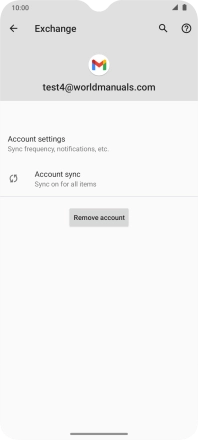
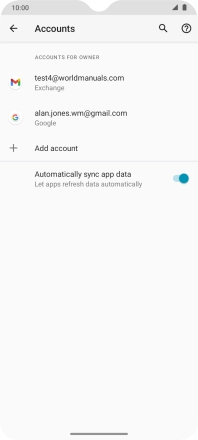
11 Select email account settings
Press the required account.
![](http://wmstatic.global.ssl.fastly.net/ml/7151223-f-3bf08500-4168-4401-a033-859bf34422e5.png?width=198&height=440)
Press Account settings.
![](http://wmstatic.global.ssl.fastly.net/ml/7151223-f-dd376bc8-b877-48ad-8c80-adfc51c19922.png?width=198&height=440)
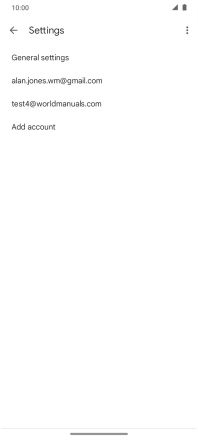
Press the required email account.
![](http://wmstatic.global.ssl.fastly.net/ml/7151223-f-166dfeee-a796-422f-bb55-7680145a2966.png?width=198&height=440)
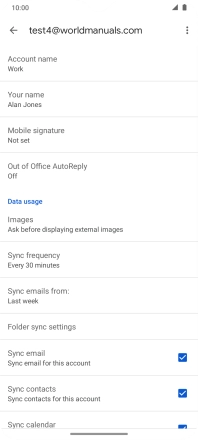
12 Enter account name
Press Account name.
![](http://wmstatic.global.ssl.fastly.net/ml/7151223-f-96bde800-67bd-42d3-8195-6e448faa826c.png?width=198&height=440)
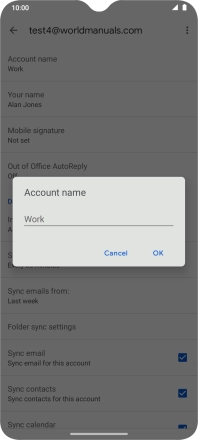
Key in the required account name and press OK.
![](http://wmstatic.global.ssl.fastly.net/ml/7151223-f-a0fd0576-4a94-4bbe-b9c6-4f65335cac0f.png?width=198&height=440)
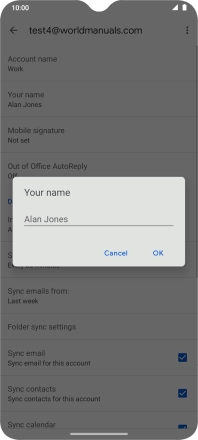
13 Enter sender name
Press Your name.
![](http://wmstatic.global.ssl.fastly.net/ml/7151223-f-96bde800-67bd-42d3-8195-6e448faa826c.png?width=198&height=440)
Key in the required sender name and press OK.
![](http://wmstatic.global.ssl.fastly.net/ml/7151223-f-e6e2aaae-8f28-4e8a-a9eb-fe27c22c979b.png?width=198&height=440)
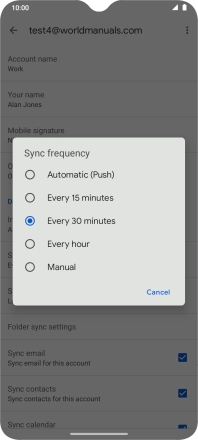
14 Select settings for retrieval of new email messages
Press Sync frequency.
![](http://wmstatic.global.ssl.fastly.net/ml/7151223-f-96bde800-67bd-42d3-8195-6e448faa826c.png?width=198&height=440)
Press the required setting.
![](http://wmstatic.global.ssl.fastly.net/ml/7151223-f-7910e136-7dc9-4c8a-8631-6fc8537ea562.png?width=198&height=440)
15 Turn on email message synchronisation
Press the field next to "Sync email" to turn on the function.
![](http://wmstatic.global.ssl.fastly.net/ml/7151223-f-96bde800-67bd-42d3-8195-6e448faa826c.png?width=198&height=440)
16 Turn contact synchronisation on or off
Press the field next to "Sync contacts" to turn the function on or off.
![](http://wmstatic.global.ssl.fastly.net/ml/7151223-f-96bde800-67bd-42d3-8195-6e448faa826c.png?width=198&height=440)
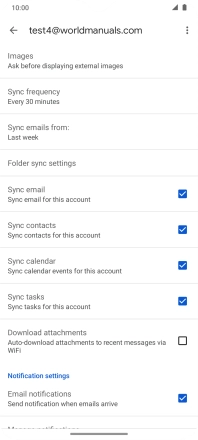
17 Turn calendar synchronisation on or off
Press the field next to "Sync calendar" to turn the function on or off.
![](http://wmstatic.global.ssl.fastly.net/ml/7151223-f-f405ff9b-abae-4cfb-80b1-848f7c107037.png?width=198&height=440)
18 Turn email message notifications on or off
Press the field next to "Email notifications" to turn the function on or off.
![](http://wmstatic.global.ssl.fastly.net/ml/7151223-f-f405ff9b-abae-4cfb-80b1-848f7c107037.png?width=198&height=440)
19 Return to the home screen
Slide your finger upwards starting from the bottom of the screen to return to the home screen.
![](http://wmstatic.global.ssl.fastly.net/ml/7151223-f-f405ff9b-abae-4cfb-80b1-848f7c107037.png?width=198&height=440)