![Motorola Moto G53 5G](http://wmstatic.global.ssl.fastly.net/ml/7270224-f-070e7963-3b56-45c7-8672-a054e8b30d77.png?width=150&height=320)
Motorola Moto G53 5G
Android 13
1. Find "Google"
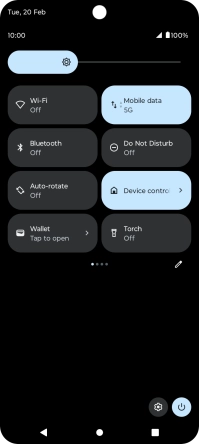
Slide two fingers downwards starting from the top of the screen.
![](http://wmstatic.global.ssl.fastly.net/ml/7270224-f-dff6f9aa-4d3d-47d6-b0ef-0d33f13030e2.png?width=200&height=444)
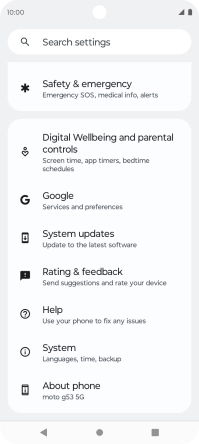
Press the settings icon.
![](http://wmstatic.global.ssl.fastly.net/ml/7270224-f-38c3df7c-88d7-42d1-addf-69e9e701f9e8.png?width=200&height=444)
Press Google.
![](http://wmstatic.global.ssl.fastly.net/ml/7270224-f-52c2ae18-094a-42a1-a19b-60d55c8045fd.png?width=200&height=444)
2. Turn on automatic Google One backup
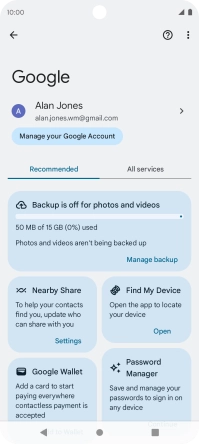
Press Manage Backup.
![](http://wmstatic.global.ssl.fastly.net/ml/7270224-f-29f101a7-35f2-4554-a6d2-04644df539eb.png?width=200&height=444)
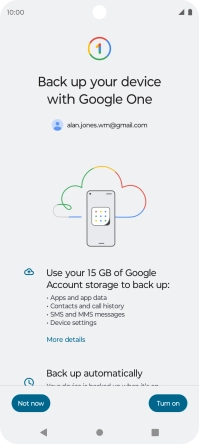
Press Turn on to turn on the function.
The phone memory will be backed up automatically when your phone is charging, the screen lock is turned on and a Wi-Fi connection is established.
![](http://wmstatic.global.ssl.fastly.net/ml/7270224-f-dbe926aa-d156-4a66-91c3-be1cefa939d3.png?width=200&height=444)
3. Turn automatic back up using mobile network on or off
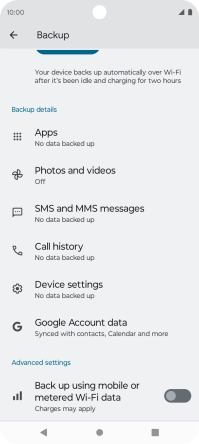
Press the indicator next to "Back up using mobile or metered Wi-Fi data" to turn the function on or off.
The phone memory will be backed up automatically using the mobile network when no Wi-Fi networks are within range.
![](http://wmstatic.global.ssl.fastly.net/ml/7270224-f-b54b6b83-956c-4bf5-b94c-37a5cc5bba6e.png?width=200&height=444)
4. Back up phone memory to Google One
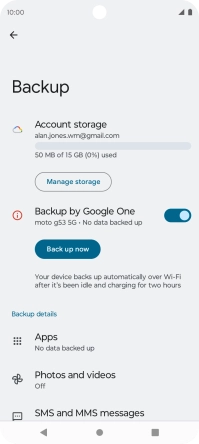
Press Back up now and wait while the phone memory is backed up.
![](http://wmstatic.global.ssl.fastly.net/ml/7270224-f-382a7bd1-ee3d-4f1c-aa9d-bdf3b86e8816.png?width=200&height=444)
5. Return to the home screen
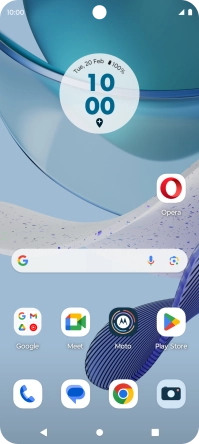
Press the Home key to return to the home screen.
![](http://wmstatic.global.ssl.fastly.net/ml/7270224-f-382a7bd1-ee3d-4f1c-aa9d-bdf3b86e8816.png?width=200&height=444)