![Motorola Moto G53 5G](http://wmstatic.global.ssl.fastly.net/ml/7270224-f-070e7963-3b56-45c7-8672-a054e8b30d77.png?width=150&height=320)
Motorola Moto G53 5G
Android 13
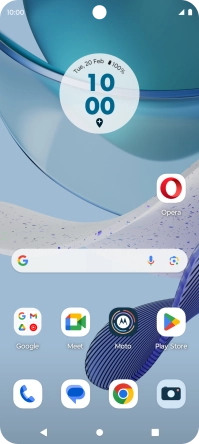
1. Find "Contacts"
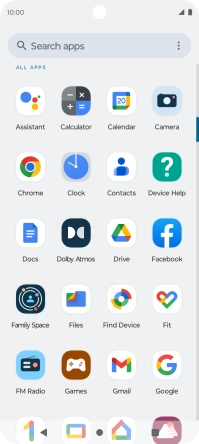
Slide your finger upwards on the screen.
![](http://wmstatic.global.ssl.fastly.net/ml/7270224-f-dff6f9aa-4d3d-47d6-b0ef-0d33f13030e2.png?width=200&height=444)
Press Contacts.
![](http://wmstatic.global.ssl.fastly.net/ml/7270224-f-5bb823ad-c5c3-4b3e-9dbd-8f5ca388e65d.png?width=200&height=444)
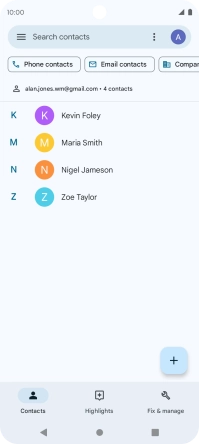
2. Create contact
Press the new contact icon.
![](http://wmstatic.global.ssl.fastly.net/ml/7270224-f-414d9bd5-d60b-4717-9ad4-ab2daeaa567e.png?width=200&height=444)
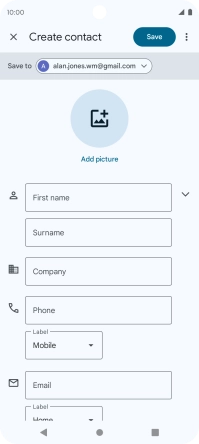
3. Select address book
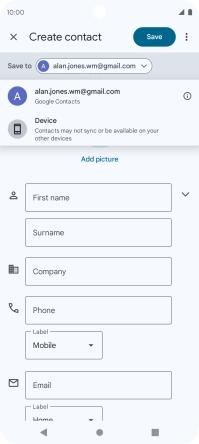
Press the drop down list next to "Save to".
![](http://wmstatic.global.ssl.fastly.net/ml/7270224-f-98b72f56-89e3-4b57-a8dc-e996db98452c.png?width=200&height=444)
Press the required Google account.
![](http://wmstatic.global.ssl.fastly.net/ml/7270224-f-75330b8c-276b-412b-8504-da1305870b15.png?width=200&height=444)
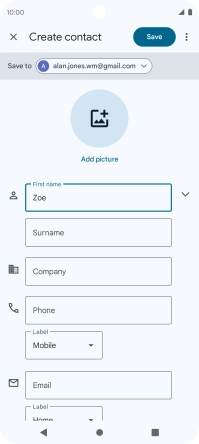
4. Enter first name
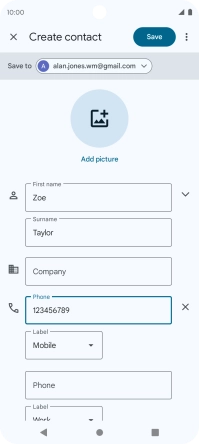
Press First name and key in the required first name.
![](http://wmstatic.global.ssl.fastly.net/ml/7270224-f-98b72f56-89e3-4b57-a8dc-e996db98452c.png?width=200&height=444)
5. Enter last name
Press Surname and key in the required last name.
![](http://wmstatic.global.ssl.fastly.net/ml/7270224-f-0f5ebc26-e8ed-4d3a-b6db-13d2880083a8.png?width=200&height=444)
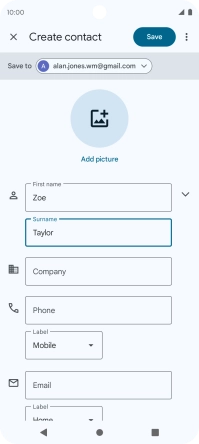
6. Enter phone number
Press Phone and key in the phone number.
Follow the instructions on the screen to add more information such as an email address and a personal ring tone.
![](http://wmstatic.global.ssl.fastly.net/ml/7270224-f-b727afeb-8ad7-443c-883f-62f0f35d9af2.png?width=200&height=444)
7. Save contact
Press Save.
![](http://wmstatic.global.ssl.fastly.net/ml/7270224-f-2eb2e426-20fc-4f8f-8f38-bcb2c09713d0.png?width=200&height=444)
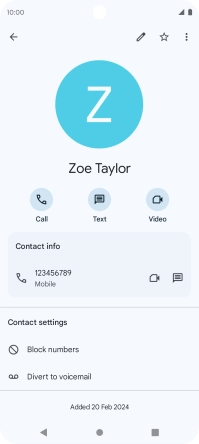
8. Return to the home screen
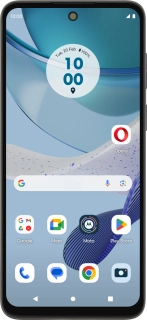
Press the Home key to return to the home screen.
![](http://wmstatic.global.ssl.fastly.net/ml/7270224-f-329a8114-43cc-49d9-9f16-225460424642.png?width=200&height=444)