![Nokia C22](http://wmstatic.global.ssl.fastly.net/ml/7050924-f-36cea04c-9861-4836-a32e-1e0b224b1e45.png?width=150&height=320)
Nokia C22
Android 13 (Go edition)
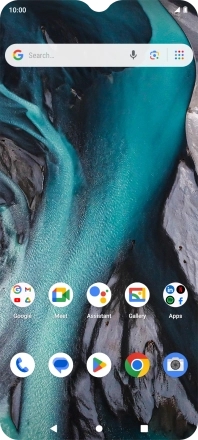
1. Find "Contacts"
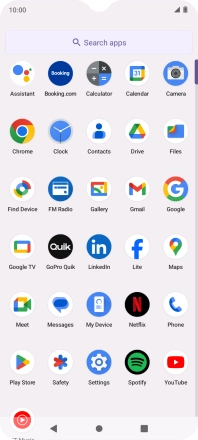
Slide your finger upwards on the screen.
![](http://wmstatic.global.ssl.fastly.net/ml/7050924-f-b2d17ece-d4fb-4642-bc35-9639a7ec10c3.png?width=198&height=440)
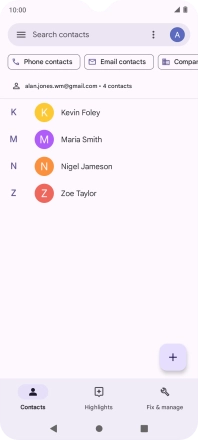
Press Contacts.
![](http://wmstatic.global.ssl.fastly.net/ml/7050924-f-f75a29dc-aa91-4a11-b21d-0e50c9637456.png?width=198&height=440)
2. Create contact
Press the new contact icon.
![](http://wmstatic.global.ssl.fastly.net/ml/7050924-f-cc782e8a-df73-456a-a8d7-e364edd0d38b.png?width=198&height=440)
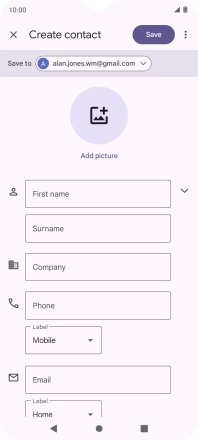
3. Select address book
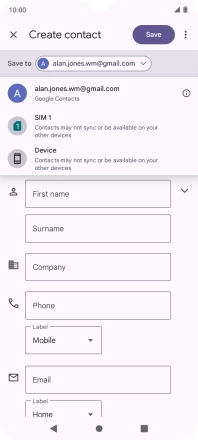
Press the drop down list next to "Save to".
![](http://wmstatic.global.ssl.fastly.net/ml/7050924-f-5f6d22b1-ff09-428d-a109-0306f3a2c5f2.png?width=198&height=440)
Press the required Google account.
![](http://wmstatic.global.ssl.fastly.net/ml/7050924-f-105e3dd7-3d03-4be6-a4a9-b33c84223cc7.png?width=198&height=440)
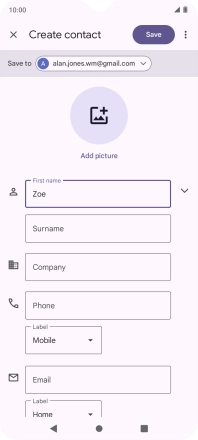
4. Enter first name
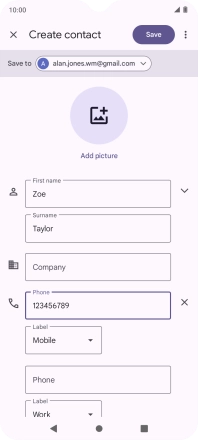
Press First name and key in the first name.
![](http://wmstatic.global.ssl.fastly.net/ml/7050924-f-5f6d22b1-ff09-428d-a109-0306f3a2c5f2.png?width=198&height=440)
5. Enter last name
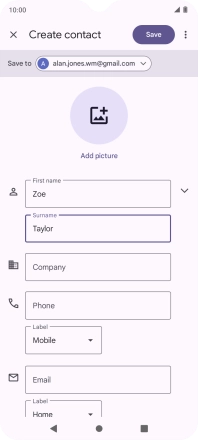
Press Surname and key in the last name.
![](http://wmstatic.global.ssl.fastly.net/ml/7050924-f-da35c33b-d42a-4a4d-9cf0-eff2c82676e8.png?width=198&height=440)
6. Enter phone number
Press Phone and key in the phone number.
Follow the instructions on the screen to add more information such as an email address and a personal ring tone.
![](http://wmstatic.global.ssl.fastly.net/ml/7050924-f-ad6d7a38-d499-4f63-8838-521436228042.png?width=198&height=440)
7. Save contact
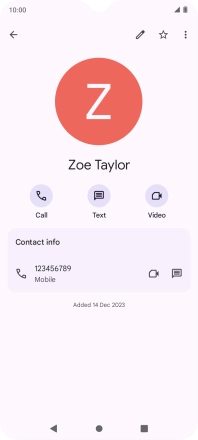
Press Save.
![](http://wmstatic.global.ssl.fastly.net/ml/7050924-f-cc19dc19-155f-4316-b89a-923ecce65214.png?width=198&height=440)
8. Return to the home screen
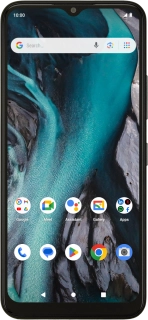
Press the Home key to return to the home screen.
![](http://wmstatic.global.ssl.fastly.net/ml/7050924-f-22558397-8e92-4816-b0cb-89e95d2969a5.png?width=198&height=440)