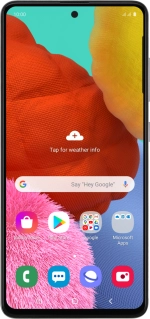
![Samsung Galaxy A51](http://wmstatic.global.ssl.fastly.net/ml/7151223-f-b4bf2131-9672-4038-b87c-726bcc08be37.png?width=150&height=320)
Samsung Galaxy A51
Android 10.0
1. Find "Accounts"
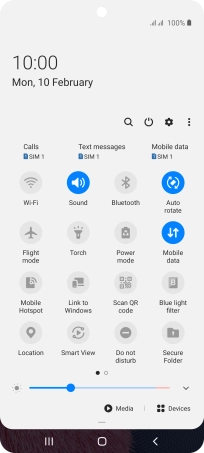
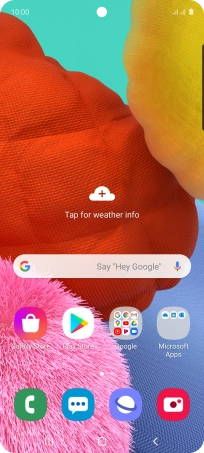
Slide two fingers downwards starting from the top of the screen.
![](http://wmstatic.global.ssl.fastly.net/ml/7151223-f-ba8fe847-7002-4336-9120-a2616927c3ca.png?width=204&height=454)
Press the settings icon.
![](http://wmstatic.global.ssl.fastly.net/ml/7151223-f-c1d3dfac-a61d-4197-84ae-44d0ed1a1757.png?width=204&height=454)
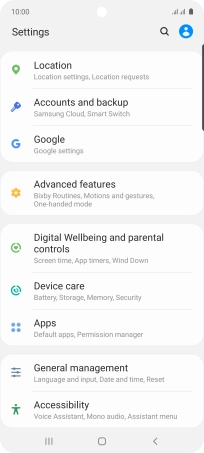
Press Accounts and backup.
![](http://wmstatic.global.ssl.fastly.net/ml/7151223-f-34ac5843-9cd7-4d9b-b991-8c3274242cf9.png?width=204&height=454)
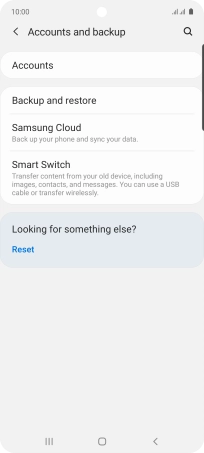
Press Accounts.
![](http://wmstatic.global.ssl.fastly.net/ml/7151223-f-9e460e39-9490-4c5b-b28d-092924556926.png?width=204&height=454)
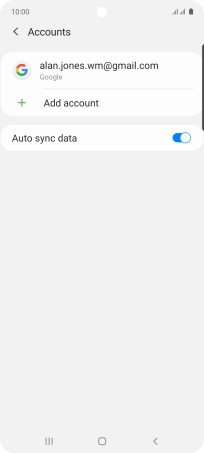
2. Select social network or email account
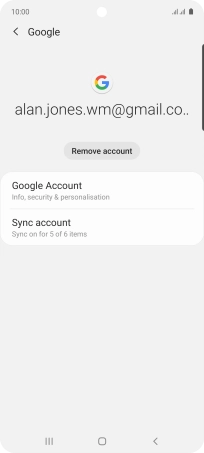
Press the required account.
![](http://wmstatic.global.ssl.fastly.net/ml/7151223-f-a91dc55c-d4c1-4c7e-ad77-93379e98402f.png?width=204&height=454)
3. Copy contacts
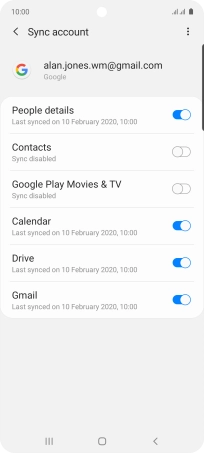
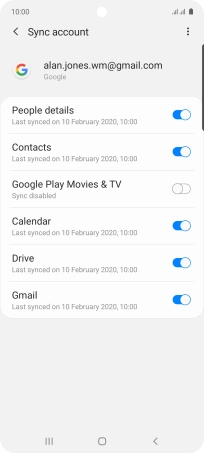
Press Sync account.
![](http://wmstatic.global.ssl.fastly.net/ml/7151223-f-c57536ac-2fc7-487b-8223-072c7aa47aa1.png?width=204&height=454)
Press the indicator next to "Contacts" to turn on the function.
![](http://wmstatic.global.ssl.fastly.net/ml/7151223-f-629e4fa8-40a5-403c-a9a3-759a3c3abea8.png?width=204&height=454)
4. Return to the home screen
Press the Home key to return to the home screen.
![](http://wmstatic.global.ssl.fastly.net/ml/7151223-f-b8b3f264-a015-40ca-b784-963f4c3fa542.png?width=204&height=454)