![Samsung Galaxy S20 FE](http://wmstatic.global.ssl.fastly.net/ml/7151223-f-a0f4ce78-4014-4966-a5b9-a85159072204.png?width=150&height=320)
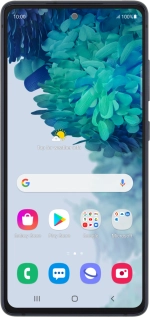
Samsung Galaxy S20 FE
Android 11.0
1. Find "Manage accounts"
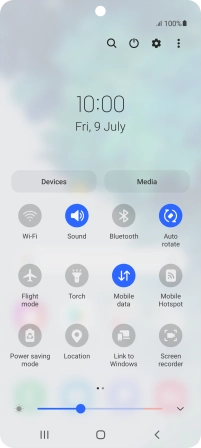
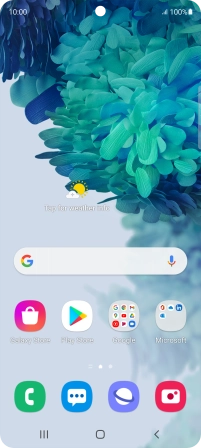
Slide two fingers downwards starting from the top of the screen.
![](http://wmstatic.global.ssl.fastly.net/ml/7151223-f-3e6681c7-0400-41c8-acdd-78d39e48fae0.png?width=202&height=448)
Press the settings icon.
![](http://wmstatic.global.ssl.fastly.net/ml/7151223-f-f4cb5d6e-8105-4e7a-990d-d33c91956a94.png?width=202&height=448)
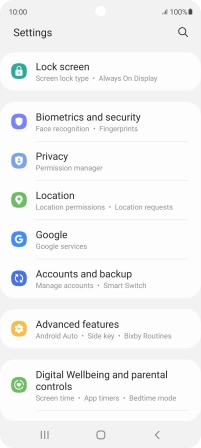
Press Accounts and backup.
![](http://wmstatic.global.ssl.fastly.net/ml/7151223-f-9a8a16de-4d25-4621-a450-a103cba9dac7.png?width=202&height=448)
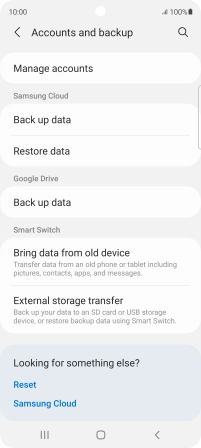
Press Manage accounts.
![](http://wmstatic.global.ssl.fastly.net/ml/7151223-f-d9a4e2f9-2f25-4bde-abad-a2278b23bff5.png?width=202&height=448)
2. Turn automatic synchronisation of content on or off
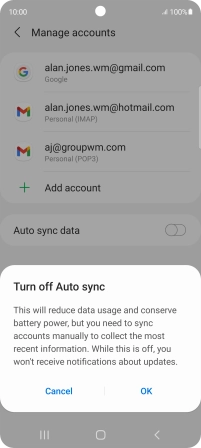
Press the indicator next to "Auto sync data" to turn the function on or off.
![](http://wmstatic.global.ssl.fastly.net/ml/7151223-f-904268b4-2288-4a4e-b15d-1ff8c66cb0ea.png?width=202&height=448)
Press OK.
![](http://wmstatic.global.ssl.fastly.net/ml/7151223-f-c7bc2829-815e-402d-8935-72b4604841a8.png?width=202&height=448)
3. Return to the home screen
Press the Home key to return to the home screen.
![](http://wmstatic.global.ssl.fastly.net/ml/7151223-f-904268b4-2288-4a4e-b15d-1ff8c66cb0ea.png?width=202&height=448)