![Samsung Galaxy Tab S9+ 5G](http://wmstatic.global.ssl.fastly.net/ml/7070324-f-2cafe47e-b3d8-43f1-a436-4ea754ce86a4.png?width=150&height=320)
Samsung Galaxy Tab S9+ 5G
Android 13
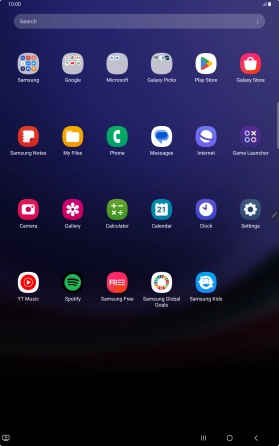
1. Find "Manage contacts"
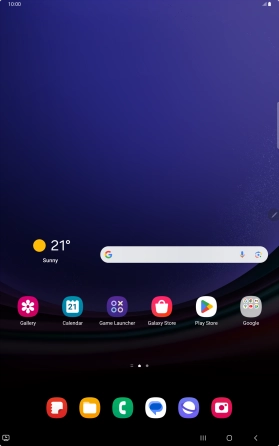
Slide your finger upwards on the screen.
![](http://wmstatic.global.ssl.fastly.net/ml/7070324-f-c82aca1b-a48c-4d14-bb72-8b856b65628c.png?width=280&height=446)
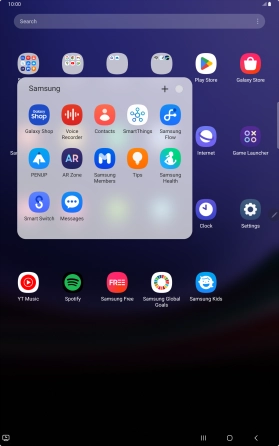
Press Samsung.
![](http://wmstatic.global.ssl.fastly.net/ml/7070324-f-c538c370-fd23-46ed-a6ac-a723cdf24f77.png?width=280&height=446)
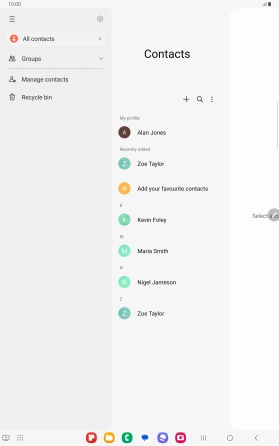
Press Contacts.
![](http://wmstatic.global.ssl.fastly.net/ml/7070324-f-614c936f-b7ae-4ff2-b06f-4f2985f5d6dc.png?width=280&height=446)
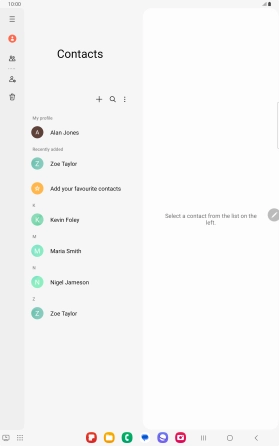
Slide your finger right starting from the left side of the screen.
![](http://wmstatic.global.ssl.fastly.net/ml/7070324-f-05ab952c-a448-40cb-8086-569c4a03a695.png?width=280&height=446)
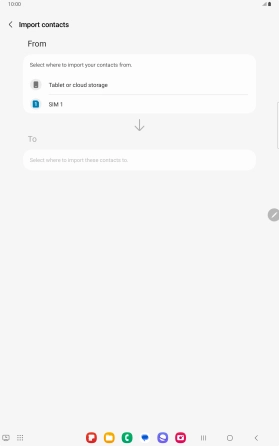
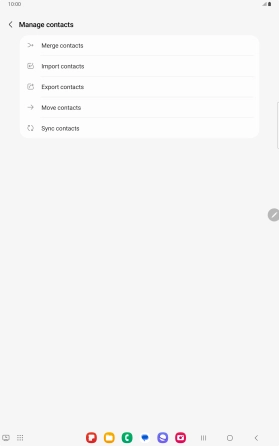
Press Manage contacts.
![](http://wmstatic.global.ssl.fastly.net/ml/7070324-f-367d9679-da5d-4edc-88ca-15125319558d.png?width=280&height=446)
2. Copy contacts from your SIM to your Google account
Press Import contacts.
![](http://wmstatic.global.ssl.fastly.net/ml/7070324-f-aeef467a-e279-44df-a3f1-5426f775ed16.png?width=280&height=446)
Press the name of the SIM.
![](http://wmstatic.global.ssl.fastly.net/ml/7070324-f-af6c8d35-38bd-4a85-81d0-ea01dabc5474.png?width=280&height=446)
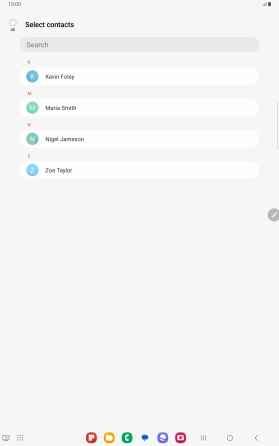
Press the field above "All".
![](http://wmstatic.global.ssl.fastly.net/ml/7070324-f-b0245765-f833-4b8f-9564-e060e758c793.png?width=280&height=446)
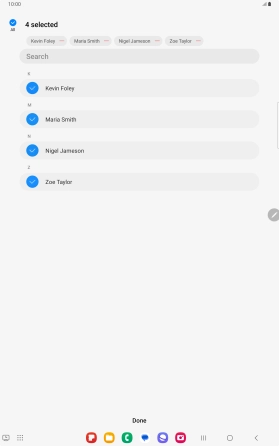
Press Done.
![](http://wmstatic.global.ssl.fastly.net/ml/7070324-f-3c2e94fe-c685-4824-817e-d1fce6abd07e.png?width=280&height=446)
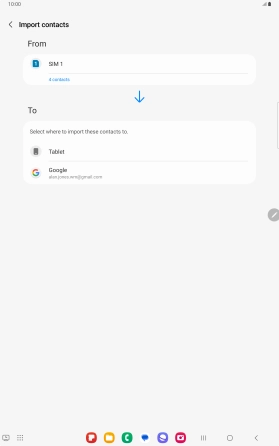
Press the required Google account.
![](http://wmstatic.global.ssl.fastly.net/ml/7070324-f-decdb35d-f41e-4e65-995a-ff3e0b911a1a.png?width=280&height=446)
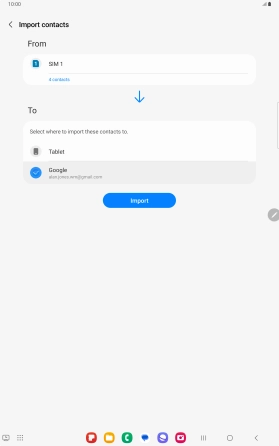
Press Import.
![](http://wmstatic.global.ssl.fastly.net/ml/7070324-f-880df3ca-43ac-43ee-8e53-b93ff3b9c43b.png?width=280&height=446)
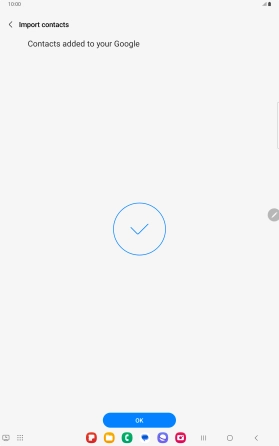
Press OK.
![](http://wmstatic.global.ssl.fastly.net/ml/7070324-f-7a005062-8f3b-4116-8a0a-ebf165316559.png?width=280&height=446)
3. Copy contacts from your Google account to your SIM
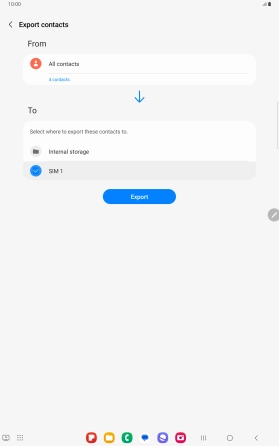
Press Export contacts.
![](http://wmstatic.global.ssl.fastly.net/ml/7070324-f-aeef467a-e279-44df-a3f1-5426f775ed16.png?width=280&height=446)
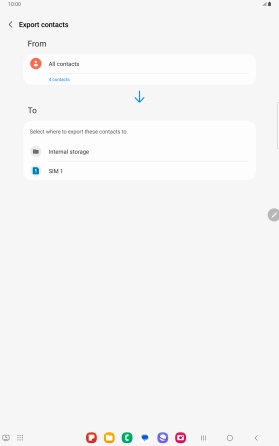
Press the name of the SIM.
![](http://wmstatic.global.ssl.fastly.net/ml/7070324-f-6a7c97f7-5d9a-49f0-a116-4e2f1f753b68.png?width=280&height=446)
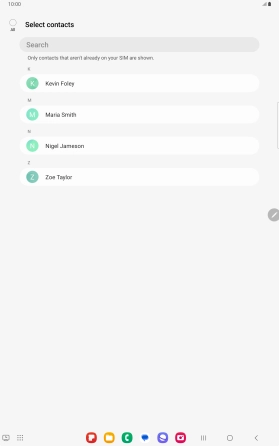
Press the field above "All".
![](http://wmstatic.global.ssl.fastly.net/ml/7070324-f-8657b937-1acc-4be3-bde9-d90aae95f584.png?width=280&height=446)
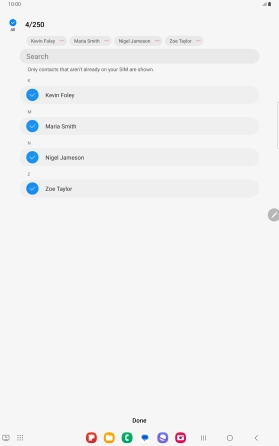
Press Done.
![](http://wmstatic.global.ssl.fastly.net/ml/7070324-f-d869da28-a4fe-41f0-a0a4-a17d5e0b8624.png?width=280&height=446)
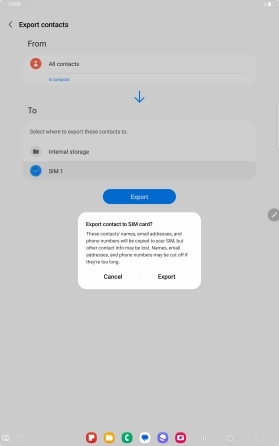
Press Export.
![](http://wmstatic.global.ssl.fastly.net/ml/7070324-f-a9a4b180-48fe-461d-adab-4378af81ec74.png?width=280&height=446)
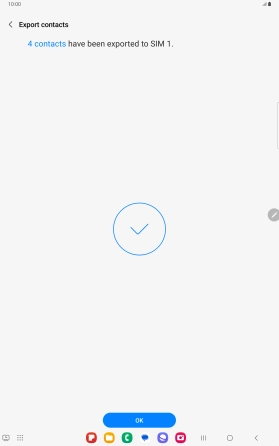
Press Export.
![](http://wmstatic.global.ssl.fastly.net/ml/7070324-f-40dab3fd-3f72-4e71-b9c1-c29e191c93a8.png?width=280&height=446)
Press OK.
![](http://wmstatic.global.ssl.fastly.net/ml/7070324-f-686a986d-aa7a-4de9-a527-1354e4198a8a.png?width=280&height=446)
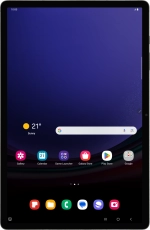
4. Return to the home screen
Press the Home key to return to the home screen.
![](http://wmstatic.global.ssl.fastly.net/ml/7070324-f-aeef467a-e279-44df-a3f1-5426f775ed16.png?width=280&height=446)