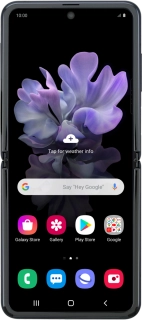
![Samsung Galaxy Z Flip](http://wmstatic.global.ssl.fastly.net/ml/7151223-f-3674ef94-d1c0-4f2f-8587-67bf1eefbfa8.png?width=150&height=320)
Samsung Galaxy Z Flip
Android 10.0
1. Find "Accounts"
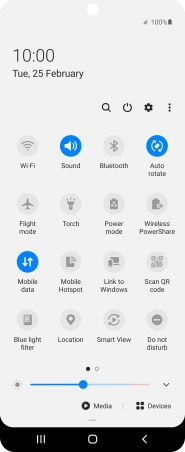
Slide two fingers downwards starting from the top of the screen.
![](http://wmstatic.global.ssl.fastly.net/ml/7151223-f-7e233754-0ce2-412a-8d31-16145fd13566.png?width=186&height=452)
Press the settings icon.
![](http://wmstatic.global.ssl.fastly.net/ml/7151223-f-f9327226-280e-4d18-9321-3c9d2cfa2928.png?width=186&height=452)
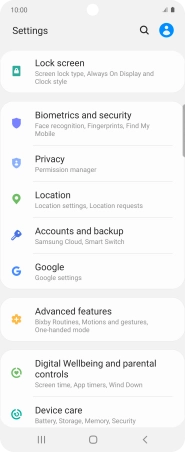
Press Accounts and backup.
![](http://wmstatic.global.ssl.fastly.net/ml/7151223-f-113188a9-7570-452c-a050-b6d6940c652a.png?width=186&height=452)
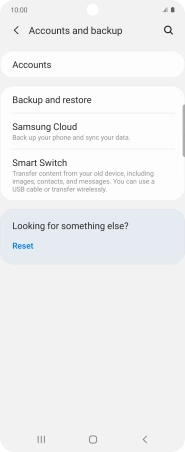
Press Accounts.
![](http://wmstatic.global.ssl.fastly.net/ml/7151223-f-dfef7444-afd9-49de-9055-48ee88beed94.png?width=186&height=452)
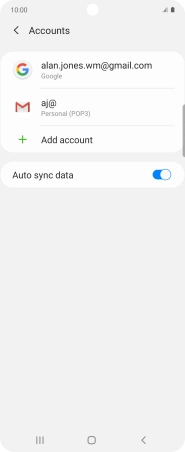
2. Turn automatic synchronisation of content on or off
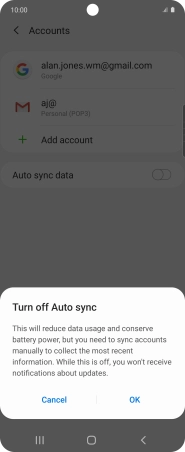
Press the indicator next to "Auto sync data" to turn the function on or off.
![](http://wmstatic.global.ssl.fastly.net/ml/7151223-f-c8caf222-827d-4091-8a8c-2025fe6575bb.png?width=186&height=452)
Press OK.
![](http://wmstatic.global.ssl.fastly.net/ml/7151223-f-bd05c1d2-f62d-4456-a591-149a258d695a.png?width=186&height=452)
3. Return to the home screen
Press the Home key to return to the home screen.
![](http://wmstatic.global.ssl.fastly.net/ml/7151223-f-c8caf222-827d-4091-8a8c-2025fe6575bb.png?width=186&height=452)