![Samsung Galaxy Z Fold4](http://wmstatic.global.ssl.fastly.net/ml/7220224-f-e1d216ee-5079-47d4-a89c-0c6b88d6e821.png?width=150&height=320)
Samsung Galaxy Z Fold4
Android 12.0
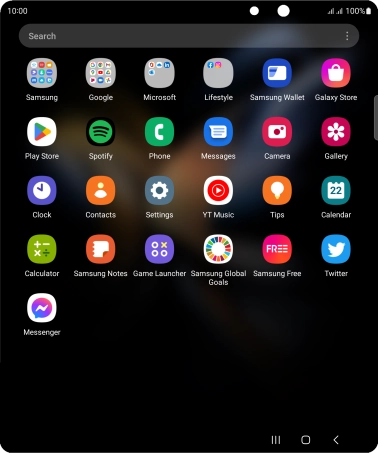
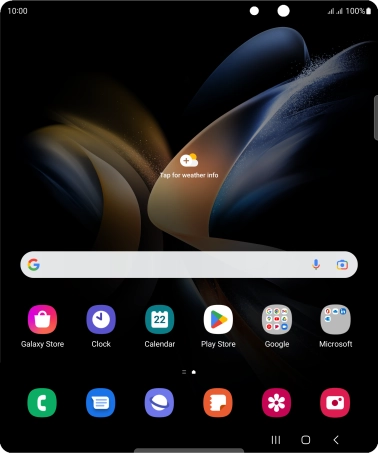
1. Find "Contacts"
Slide your finger upwards on the screen.
![](http://wmstatic.global.ssl.fastly.net/ml/7220224-f-3c58a191-ef36-44df-ac40-5e762f4e7176.png?width=378&height=456)
Press Contacts.
![](http://wmstatic.global.ssl.fastly.net/ml/7220224-f-ec65c7bd-30d3-4f63-8d6d-bdd4ed33a1ec.png?width=378&height=456)
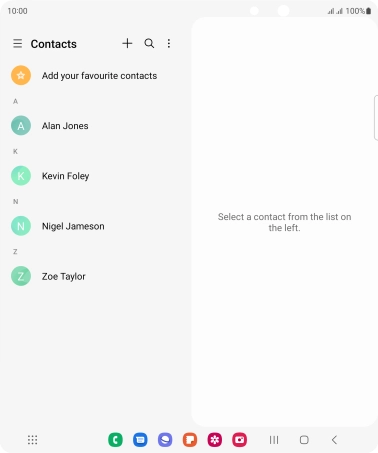
2. Create contact
Press the new contact icon.
![](http://wmstatic.global.ssl.fastly.net/ml/7220224-f-4caffa57-1db4-4794-b410-bcfb2eb65a00.png?width=378&height=456)
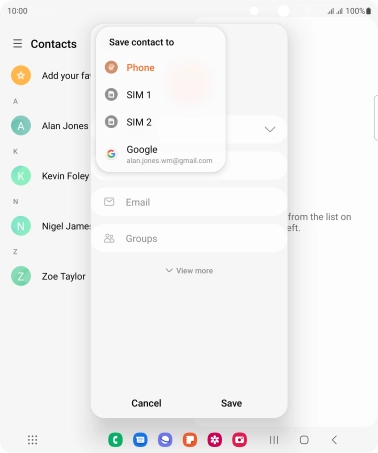
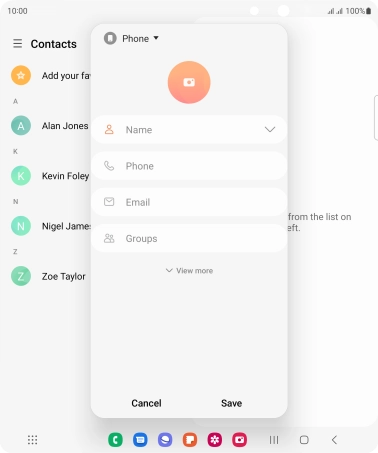
3. Select address book
Press the address book drop down list.
![](http://wmstatic.global.ssl.fastly.net/ml/7220224-f-45bfc969-f452-4221-b842-536129e97c49.png?width=378&height=456)
Press Phone.
![](http://wmstatic.global.ssl.fastly.net/ml/7220224-f-d1a28e3c-e742-4dad-88c8-2345c8feb880.png?width=378&height=456)
4. Enter name
Press Name and key in the required name.
![](http://wmstatic.global.ssl.fastly.net/ml/7220224-f-45bfc969-f452-4221-b842-536129e97c49.png?width=378&height=456)
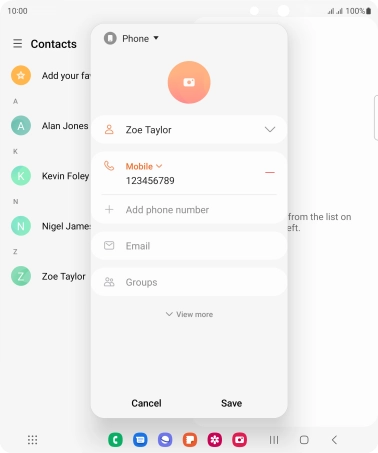
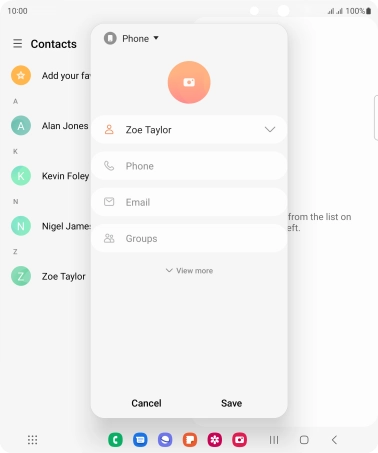
5. Enter phone number
Press Phone and key in the required phone number.
Follow the instructions on the screen to add more information such as an email address and a personal ring tone.
![](http://wmstatic.global.ssl.fastly.net/ml/7220224-f-9a1f4750-a65d-4d34-8bf9-7fa0ac427a58.png?width=378&height=456)
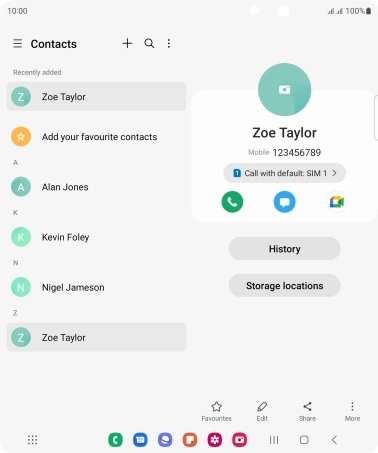
6. Save contact
Press Save.
![](http://wmstatic.global.ssl.fastly.net/ml/7220224-f-4662b414-9fc4-48dd-818f-293f3f11d210.png?width=378&height=456)
7. Return to the home screen
Press the Home key to return to the home screen.
![](http://wmstatic.global.ssl.fastly.net/ml/7220224-f-b6008294-acb1-4d2d-a7ae-97fe1ef08cc5.png?width=378&height=456)