![Sony Xperia 5](http://wmstatic.global.ssl.fastly.net/ml/7151223-f-9fd71301-3a1c-42e5-a9a0-9d37c79e5416.png?width=150&height=320)
Sony Xperia 5
Android 9.0
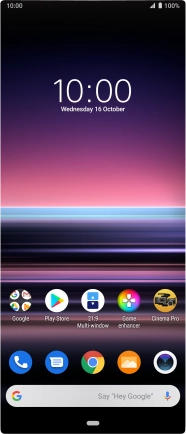
1 Find "Accounts"
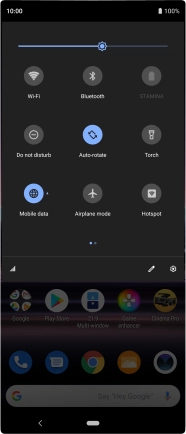
Slide two fingers downwards starting from the top of the screen.
![](http://wmstatic.global.ssl.fastly.net/ml/7151223-f-005dccd8-bbfe-4273-9b08-ff0e8ffa538e.png?width=186&height=434)
Press the settings icon.
![](http://wmstatic.global.ssl.fastly.net/ml/7151223-f-cb3d6005-6bd3-4188-9a42-ad55c8796242.png?width=186&height=434)
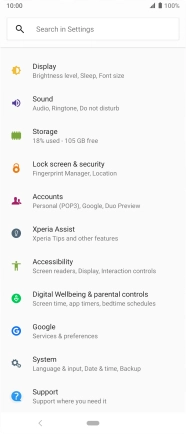
Press Accounts.
![](http://wmstatic.global.ssl.fastly.net/ml/7151223-f-4e2d9f4f-5665-4d6d-a57c-2921416a7081.png?width=186&height=434)
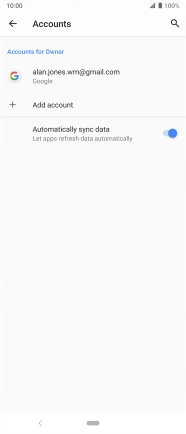
2 Create new email account
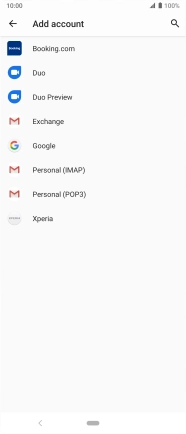
Press Add account.
![](http://wmstatic.global.ssl.fastly.net/ml/7151223-f-2bfd1529-d772-49b6-8827-38da19af78bf.png?width=186&height=434)
Press Exchange.
![](http://wmstatic.global.ssl.fastly.net/ml/7151223-f-73e2e80c-d64d-4eb5-ba8a-da3733a00115.png?width=186&height=434)
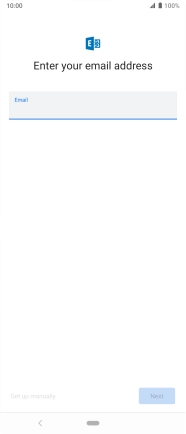
3 Enter email address
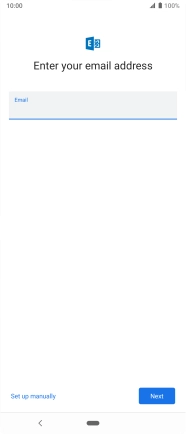
Press the field below "Email" and key in your email address.
![](http://wmstatic.global.ssl.fastly.net/ml/7151223-f-6d16b84e-670c-4518-9d0f-a0a2c9a7359d.png?width=186&height=434)
Press Next.
![](http://wmstatic.global.ssl.fastly.net/ml/7151223-f-3b16c90e-b79b-4c20-96a5-906f472f5215.png?width=186&height=434)
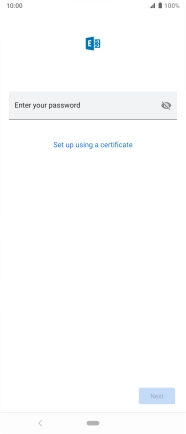
4 Enter password
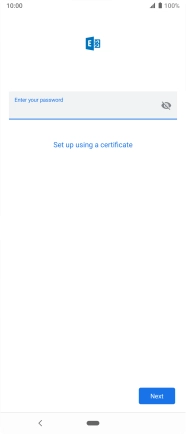
Press Enter your password and key in the password for your email account.
![](http://wmstatic.global.ssl.fastly.net/ml/7151223-f-1e320cb8-2af8-498f-8574-84bd25a46a2c.png?width=186&height=434)
Press Next.
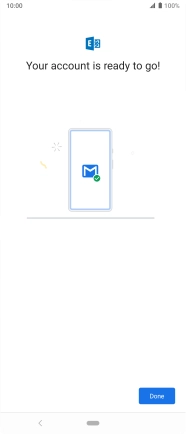
If the screen tells you that the email account has been set up, follow the instructions on the screen to select more settings and finish the setup.
![](http://wmstatic.global.ssl.fastly.net/ml/7151223-f-05c8c1e0-fa2d-4d03-9ee5-86ab47220040.png?width=186&height=434)
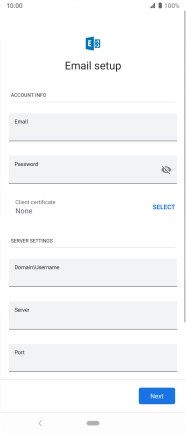
5 Install security certificate
Press SELECT and follow the instructions on the screen to install the required certificate.
![](http://wmstatic.global.ssl.fastly.net/ml/7151223-f-80581a75-03d1-4ae1-9728-849045ed8931.png?width=186&height=434)
6 Enter domain and username
Press the field below "Domain\Username" and key in the domain and username separated by a "\".
![](http://wmstatic.global.ssl.fastly.net/ml/7151223-f-80581a75-03d1-4ae1-9728-849045ed8931.png?width=186&height=434)
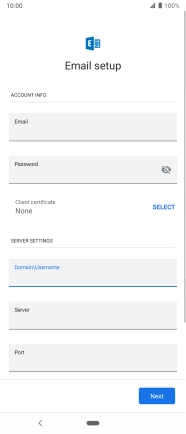
7 Enter server name
Press the field below "Server" and key in the server address.
![](http://wmstatic.global.ssl.fastly.net/ml/7151223-f-f3a59d9f-f61f-4106-9834-4bd8509b886d.png?width=186&height=434)
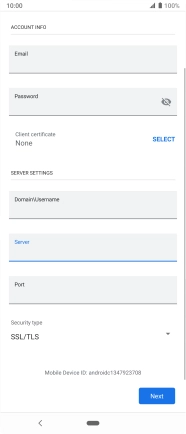
8 Enter port number
Press the field below "Port" and key in the required port number.
![](http://wmstatic.global.ssl.fastly.net/ml/7151223-f-4d1e7b28-1581-4dc2-8591-2dcee190f4a5.png?width=186&height=434)
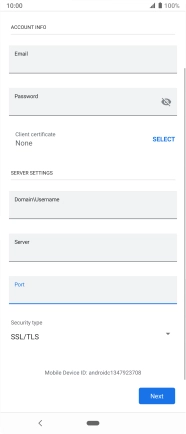
9 Turn SSL encryption on or off
Press the drop down list below "Security type".
![](http://wmstatic.global.ssl.fastly.net/ml/7151223-f-b004c3b4-42d5-47dd-afc4-a75f987cc419.png?width=186&height=434)
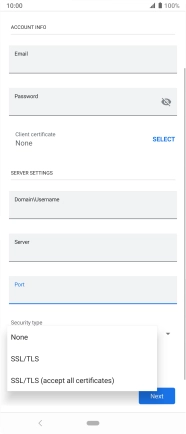
Press the required setting to turn the function on or off.
![](http://wmstatic.global.ssl.fastly.net/ml/7151223-f-df012134-9d9d-4dd4-b2e7-3879df086b4b.png?width=186&height=434)
Press Next and follow the instructions on the screen to turn server synchronisation on or off.
![](http://wmstatic.global.ssl.fastly.net/ml/7151223-f-b004c3b4-42d5-47dd-afc4-a75f987cc419.png?width=186&height=434)
Press Done.
![](http://wmstatic.global.ssl.fastly.net/ml/7151223-f-8169af6a-8743-402d-a1e2-bcdda8da7135.png?width=186&height=434)
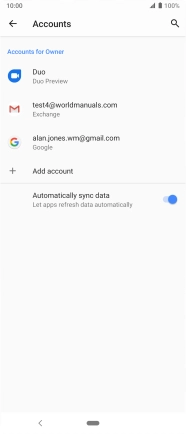
10 Select setting for retrieval of new email messages
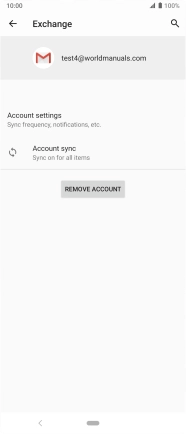
Press the required email account.
![](http://wmstatic.global.ssl.fastly.net/ml/7151223-f-29c32e0f-23b4-41bd-baad-6ade227cc413.png?width=186&height=434)
Press Account settings.
![](http://wmstatic.global.ssl.fastly.net/ml/7151223-f-eba210f3-24d9-462d-a1f1-286517853acc.png?width=186&height=434)
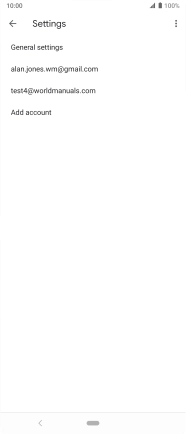
Press the required email account.
![](http://wmstatic.global.ssl.fastly.net/ml/7151223-f-603a355a-bac7-4210-98fe-0b1fc4ddce8c.png?width=186&height=434)
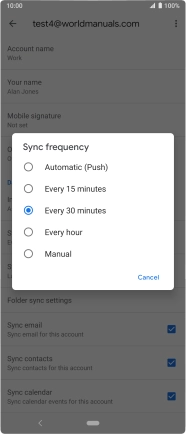
Press Sync frequency.
![](http://wmstatic.global.ssl.fastly.net/ml/7151223-f-05a2becb-2340-423a-8268-a7c403a4ef82.png?width=186&height=434)
Press the required setting.
![](http://wmstatic.global.ssl.fastly.net/ml/7151223-f-6318b1f0-6bab-46c5-a828-aecf54274f76.png?width=186&height=434)
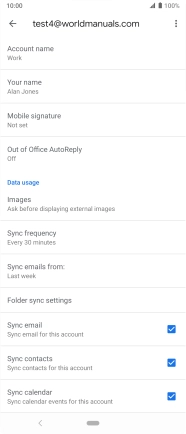
11 Turn on email message synchronisation
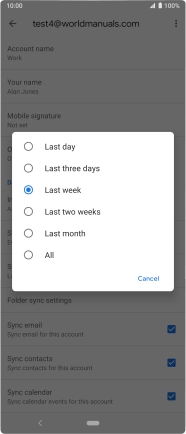
Press Sync emails from: to turn on the function.
![](http://wmstatic.global.ssl.fastly.net/ml/7151223-f-05a2becb-2340-423a-8268-a7c403a4ef82.png?width=186&height=434)
Press the required setting.
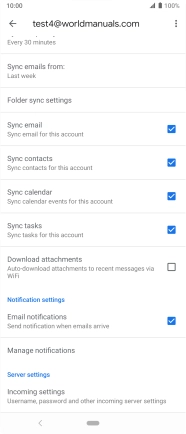
![](http://wmstatic.global.ssl.fastly.net/ml/7151223-f-19815956-487f-4d7f-8a03-0d41cb8f1e41.png?width=186&height=434)
12 Turn contact synchronisation on or off
Press the field next to "Sync contacts" to turn the function on or off.
![](http://wmstatic.global.ssl.fastly.net/ml/7151223-f-060703b6-f222-4985-a4e4-feb470f57a05.png?width=186&height=434)
13 Turn calendar synchronisation on or off
Press the field next to "Sync calendar" to turn the function on or off.
![](http://wmstatic.global.ssl.fastly.net/ml/7151223-f-060703b6-f222-4985-a4e4-feb470f57a05.png?width=186&height=434)
14 Turn email message notifications on or off
Press the field next to "Email notifications" to turn the function on or off.
![](http://wmstatic.global.ssl.fastly.net/ml/7151223-f-060703b6-f222-4985-a4e4-feb470f57a05.png?width=186&height=434)
15 Enter email account name
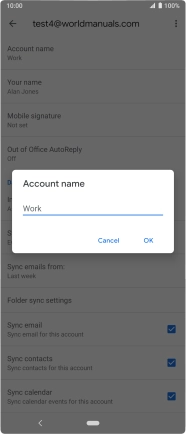
Press Account name and key in the required name.
![](http://wmstatic.global.ssl.fastly.net/ml/7151223-f-05a2becb-2340-423a-8268-a7c403a4ef82.png?width=186&height=434)
Press OK.
![](http://wmstatic.global.ssl.fastly.net/ml/7151223-f-114b98e4-b160-45c2-9cab-46e3b63af426.png?width=186&height=434)
16 Enter sender name
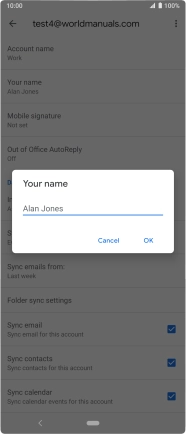
Press Your name and key in the required sender name.
![](http://wmstatic.global.ssl.fastly.net/ml/7151223-f-05a2becb-2340-423a-8268-a7c403a4ef82.png?width=186&height=434)
Press OK.
![](http://wmstatic.global.ssl.fastly.net/ml/7151223-f-5f75e6e6-d5f4-46d3-b832-e4e4ec81d688.png?width=186&height=434)
17 Return to the home screen
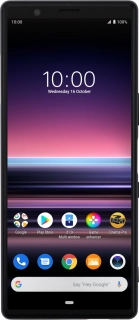
Press the Home key to return to the home screen.
![](http://wmstatic.global.ssl.fastly.net/ml/7151223-f-29c32e0f-23b4-41bd-baad-6ade227cc413.png?width=186&height=434)