![TCL 306](http://wmstatic.global.ssl.fastly.net/ml/7151223-f-ea2b6f96-4582-4dd6-9b00-74547509a6df.png?width=150&height=320)
TCL 306
Android 12.0
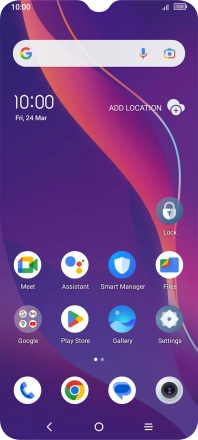
1. Find "Contacts"
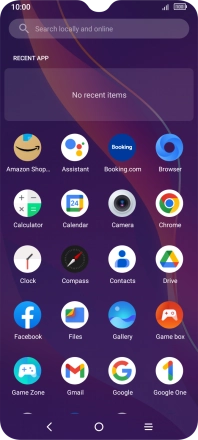
Slide your finger upwards on the screen.
![](http://wmstatic.global.ssl.fastly.net/ml/7151223-f-1f21d219-7452-4c2f-b44c-43e33bce042b.png?width=198&height=440)
Press Contacts.
![](http://wmstatic.global.ssl.fastly.net/ml/7151223-f-a4e4a36a-a127-4e60-a4cf-b6de1d223d32.png?width=198&height=440)
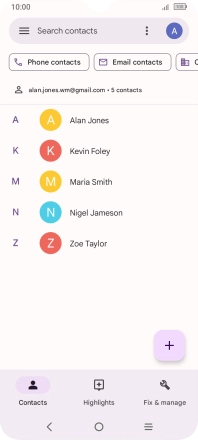
2. Create contact
Press the new contact icon.
![](http://wmstatic.global.ssl.fastly.net/ml/7151223-f-b82d736d-62ab-4b74-8481-caa643845c61.png?width=198&height=440)
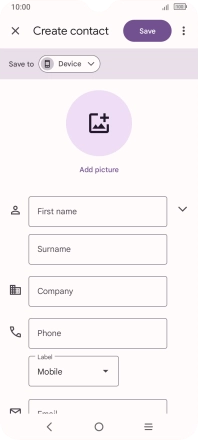
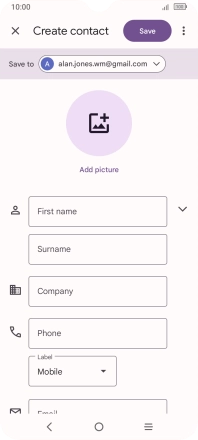
3. Select address book
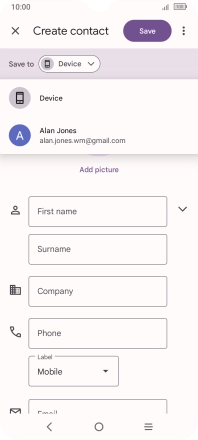
Press the address book drop down list.
![](http://wmstatic.global.ssl.fastly.net/ml/7151223-f-7e1d0d1e-2e7b-46d2-80e5-1e9feff71d7d.png?width=198&height=440)
Press the required Google account.
![](http://wmstatic.global.ssl.fastly.net/ml/7151223-f-9f62b4c9-d500-4790-a3a1-d2832990d242.png?width=198&height=440)
4. Enter name
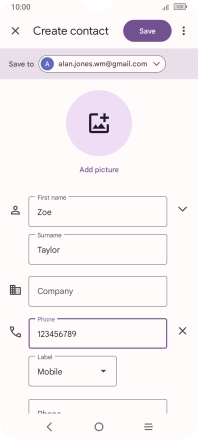
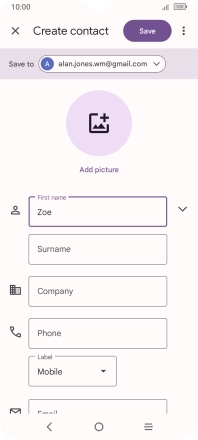
Press First name and key in the required first name.
![](http://wmstatic.global.ssl.fastly.net/ml/7151223-f-557a252a-2ef5-4ea3-80cc-64c49bc78bef.png?width=198&height=440)
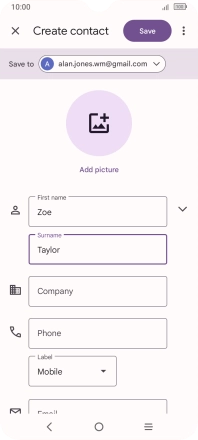
Press Surname and key in the required last name.
![](http://wmstatic.global.ssl.fastly.net/ml/7151223-f-37108e53-a553-48c5-ac38-6ee48d168ffe.png?width=198&height=440)
5. Enter phone number
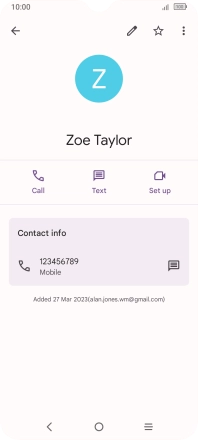
Press Phone and key in the required phone number.
Follow the instructions on the screen to add more information such as email address and date of birth.
![](http://wmstatic.global.ssl.fastly.net/ml/7151223-f-18cb5fb0-4c09-4f3e-b3b1-30be7f584cb9.png?width=198&height=440)
6. Save contact
Press Save.
![](http://wmstatic.global.ssl.fastly.net/ml/7151223-f-8bc362cf-007d-45c2-a248-0c2963785687.png?width=198&height=440)
7. Return to the home screen
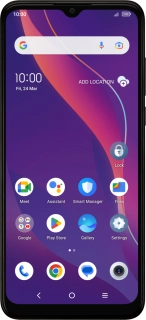
Press the Home key to return to the home screen.
![](http://wmstatic.global.ssl.fastly.net/ml/7151223-f-3856bd6e-0077-43c6-84bc-3372bd8cc981.png?width=198&height=440)