![Xiaomi Redmi Note 11 Pro](http://wmstatic.global.ssl.fastly.net/ml/7151223-f-8c2e6daa-76d2-4827-944a-2a160e97b30e.png?width=150&height=320)
Xiaomi Redmi Note 11 Pro
Android 11.0
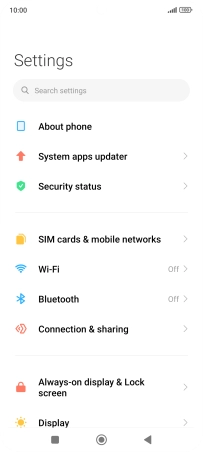
1 Find "Access point names"
Press Settings.
![](http://wmstatic.global.ssl.fastly.net/ml/7151223-f-c01493bd-7b56-418d-9c1d-a82e52ed1fe6.png?width=204&height=452)
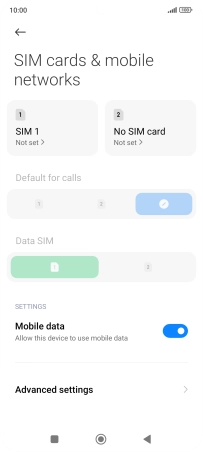
Press SIM cards & mobile networks.
![](http://wmstatic.global.ssl.fastly.net/ml/7151223-f-a0e89c1d-b97c-4303-b554-4806d2b79181.png?width=204&height=452)
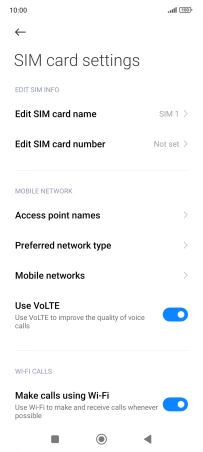
Press the required SIM.
![](http://wmstatic.global.ssl.fastly.net/ml/7151223-f-01c8d0d7-e6e4-4e7b-b402-cae4616abc68.png?width=204&height=452)
Press Access point names.
![](http://wmstatic.global.ssl.fastly.net/ml/7151223-f-98163e74-4228-4a8f-b716-bf2c404f9548.png?width=204&height=452)
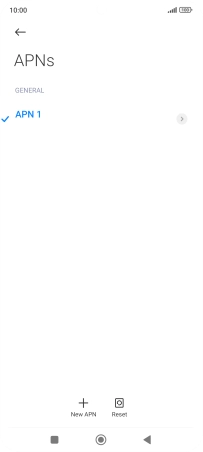
2 Create new data connection
Press New APN.
![](http://wmstatic.global.ssl.fastly.net/ml/7151223-f-e9efb84b-1035-4ab7-a3ea-0ad6c3ccf3ab.png?width=204&height=452)
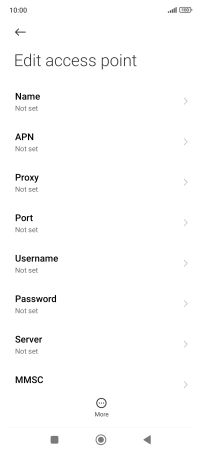
3 Enter a name for the connection
Press Name.
![](http://wmstatic.global.ssl.fastly.net/ml/7151223-f-0c81ae65-a4ba-48b0-a88c-f727481255dc.png?width=204&height=452)
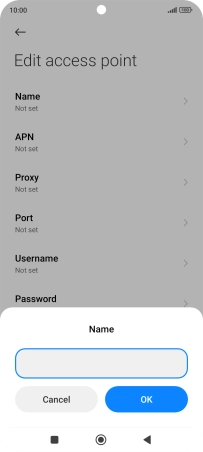
Key in Vodafone Internet and press OK.
![](http://wmstatic.global.ssl.fastly.net/ml/7151223-f-da7e6eca-1361-492d-9027-131f635465bc.png?width=204&height=452)
Vodafone Internet
4 Enter APN
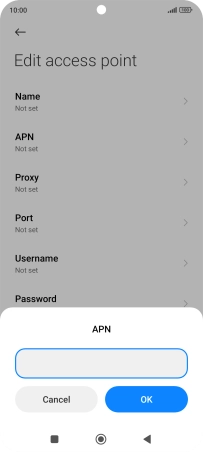
Press APN.
![](http://wmstatic.global.ssl.fastly.net/ml/7151223-f-0c81ae65-a4ba-48b0-a88c-f727481255dc.png?width=204&height=452)
Key in wap.vodafone.co.uk and press OK.
![](http://wmstatic.global.ssl.fastly.net/ml/7151223-f-6e423cdf-049f-4dfc-81dc-ced6bbe45e89.png?width=204&height=452)
wap.vodafone.co.uk
5 Enter username
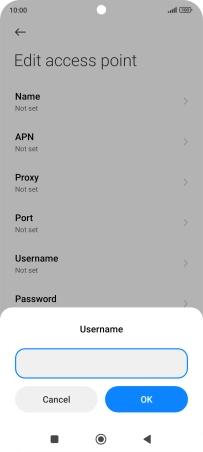
Press Username.
![](http://wmstatic.global.ssl.fastly.net/ml/7151223-f-0c81ae65-a4ba-48b0-a88c-f727481255dc.png?width=204&height=452)
Key in wap and press OK.
![](http://wmstatic.global.ssl.fastly.net/ml/7151223-f-e4c020af-52c1-4b1d-9130-c7f1d7702d86.png?width=204&height=452)
wap
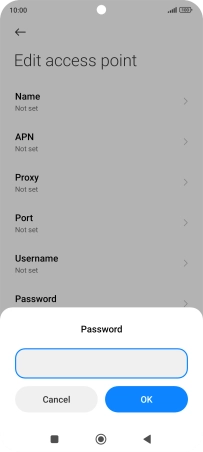
6 Enter password
Press Password.
![](http://wmstatic.global.ssl.fastly.net/ml/7151223-f-0c81ae65-a4ba-48b0-a88c-f727481255dc.png?width=204&height=452)
Key in wap and press OK.
![](http://wmstatic.global.ssl.fastly.net/ml/7151223-f-4da350ef-c74e-487e-85e0-9d8a2ab0517f.png?width=204&height=452)
wap
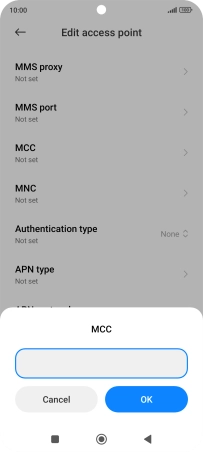
7 Enter country code
Press MCC.
![](http://wmstatic.global.ssl.fastly.net/ml/7151223-f-f0ea41bc-6c2d-439d-9cb9-22cfee9cd8f0.png?width=204&height=452)
Key in 234 and press OK.
![](http://wmstatic.global.ssl.fastly.net/ml/7151223-f-6d05ae92-6c3a-4ec9-a825-2078d7974b2c.png?width=204&height=452)
234
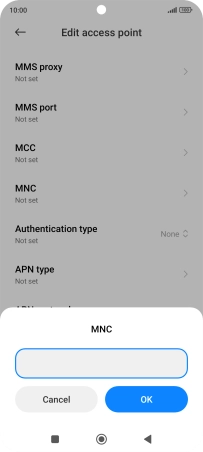
8 Enter network code
Press MNC.
![](http://wmstatic.global.ssl.fastly.net/ml/7151223-f-f0ea41bc-6c2d-439d-9cb9-22cfee9cd8f0.png?width=204&height=452)
Key in 15 and press OK.
![](http://wmstatic.global.ssl.fastly.net/ml/7151223-f-f14ccdb4-04ab-47ee-bfca-ae370c65f63c.png?width=204&height=452)
15
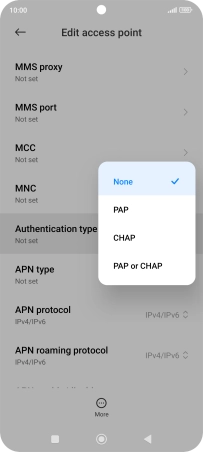
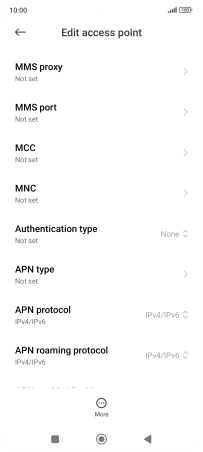
9 Select authentication type
Press Authentication type.
![](http://wmstatic.global.ssl.fastly.net/ml/7151223-f-f0ea41bc-6c2d-439d-9cb9-22cfee9cd8f0.png?width=204&height=452)
Press None.
![](http://wmstatic.global.ssl.fastly.net/ml/7151223-f-47013b83-d8b5-41ac-912f-781881b4f958.png?width=204&height=452)
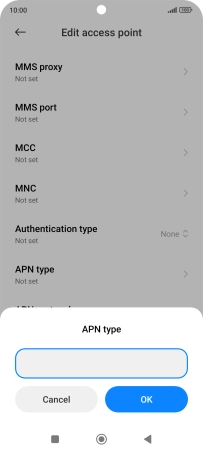
10 Enter APN type
Press APN type.
![](http://wmstatic.global.ssl.fastly.net/ml/7151223-f-f0ea41bc-6c2d-439d-9cb9-22cfee9cd8f0.png?width=204&height=452)
Key in default and press OK.
![](http://wmstatic.global.ssl.fastly.net/ml/7151223-f-35b13684-7013-412f-80cc-57f022f1493f.png?width=204&height=452)
default
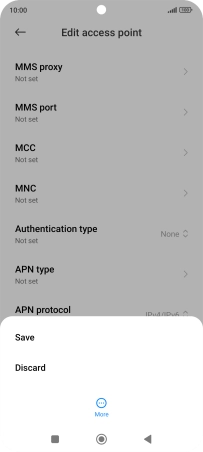
11 Save data connection
Press More.
![](http://wmstatic.global.ssl.fastly.net/ml/7151223-f-f0ea41bc-6c2d-439d-9cb9-22cfee9cd8f0.png?width=204&height=452)
Press Save.
![](http://wmstatic.global.ssl.fastly.net/ml/7151223-f-191ab22f-00cd-4baf-a690-99415e065bfa.png?width=204&height=452)
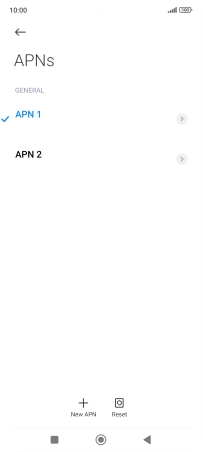
Press the required data connection to activate it.
![](http://wmstatic.global.ssl.fastly.net/ml/7151223-f-1089d6b7-1e4b-4f19-83f7-bb3156d482ca.png?width=204&height=452)
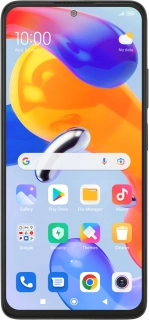
12 Return to the home screen
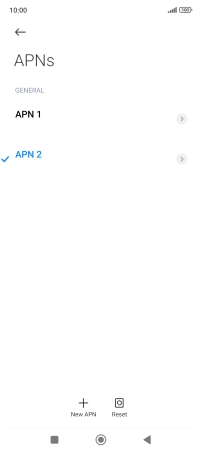
Press the Home key to return to the home screen.
![](http://wmstatic.global.ssl.fastly.net/ml/7151223-f-94a3190d-0303-4d6d-96ac-3337cb1f21cd.png?width=204&height=452)