![Xiaomi Redmi Note 9T](http://wmstatic.global.ssl.fastly.net/ml/7151223-f-342a1545-f3b3-4459-8ed4-2793831e7e47.png?width=150&height=320)
Xiaomi Redmi Note 9T
Android 10.0
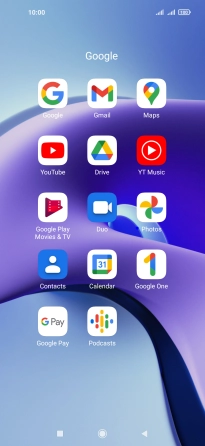
1. Find "Contacts"
Press Google.
![](http://wmstatic.global.ssl.fastly.net/ml/7151223-f-4cdc4481-37c4-4317-a7fb-b95c1fc0251b.png?width=206&height=446)
Press Contacts.
![](http://wmstatic.global.ssl.fastly.net/ml/7151223-f-ce662feb-0fa5-40b8-a81f-1d1dc4080934.png?width=206&height=446)
2. Create contact
Press the new contact icon.
![](http://wmstatic.global.ssl.fastly.net/ml/7151223-f-5201788e-3f73-4936-a908-079ba95a57ce.png?width=206&height=446)
3. Select address book
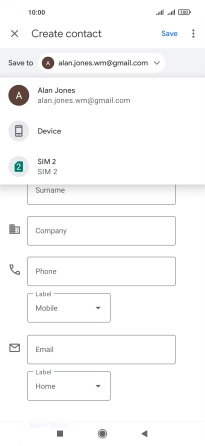
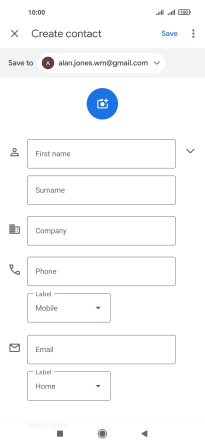
Press the drop down list next to "Save to".
![](http://wmstatic.global.ssl.fastly.net/ml/7151223-f-52490272-8dee-408d-85b9-f7eae8b51c54.png?width=206&height=446)
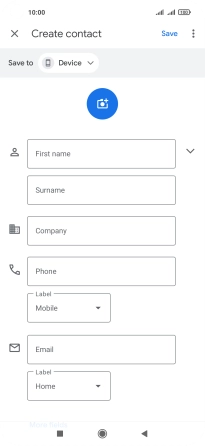
Press Device.
![](http://wmstatic.global.ssl.fastly.net/ml/7151223-f-a875cc1e-f265-4959-aeb6-87f798b8f07f.png?width=206&height=446)
4. Enter name
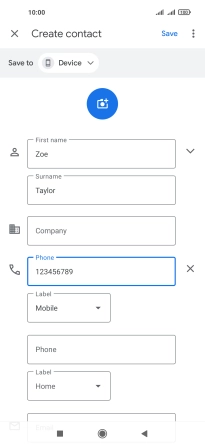
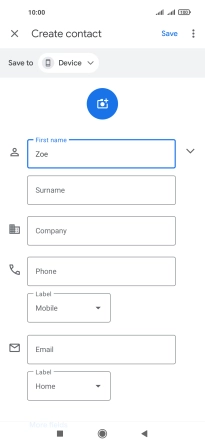
Press First name and key in the required first name.
![](http://wmstatic.global.ssl.fastly.net/ml/7151223-f-702bec81-c733-4805-b40b-0739ca3784b1.png?width=206&height=446)
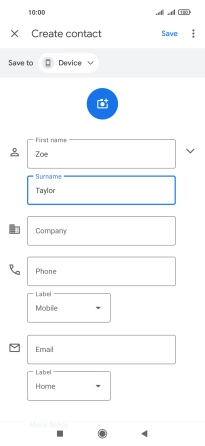
Press Surname and key in the required last name.
![](http://wmstatic.global.ssl.fastly.net/ml/7151223-f-b6916ac7-e1e5-46eb-a8de-c589658412a2.png?width=206&height=446)
5. Enter phone number
Press Phone and key in the required phone number.
Follow the instructions on the screen to add more information such as an email address and a personal ring tone.
![](http://wmstatic.global.ssl.fastly.net/ml/7151223-f-3324b954-fd9c-4832-8c34-b337037068f8.png?width=206&height=446)
6. Save contact
Press Save.
![](http://wmstatic.global.ssl.fastly.net/ml/7151223-f-cf442a7b-1d2b-497a-b3ef-dcf59d7bc506.png?width=206&height=446)
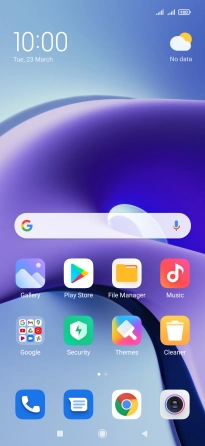
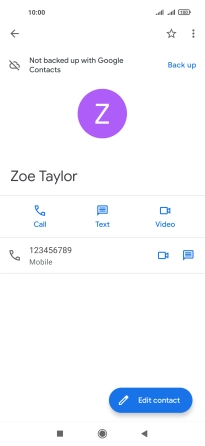
7. Return to the home screen
Press the Home key to return to the home screen.
![](http://wmstatic.global.ssl.fastly.net/ml/7151223-f-b54df291-9ef3-4687-b719-af8f16289a2a.png?width=206&height=446)