![Huawei P40 lite 5G](http://wmstatic.global.ssl.fastly.net/ml/7151223-f-8800411b-83e1-41af-9a72-af833fe287a1.png?width=150&height=320)
Huawei P40 lite 5G
Android 10.0
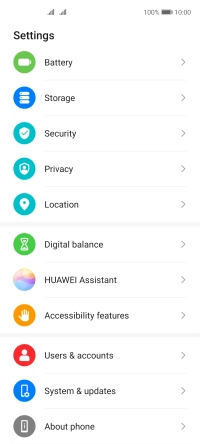
1 Find "Users & accounts"
Press Settings.
![](http://wmstatic.global.ssl.fastly.net/ml/7151223-f-d078d7ca-4d29-4210-b731-86988731af96.png?width=200&height=448)
Press Users & accounts.
![](http://wmstatic.global.ssl.fastly.net/ml/7151223-f-e9ee1d93-43c9-433a-809e-3c63d595bb56.png?width=200&height=448)
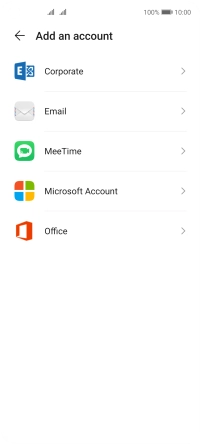
2 Create new email account
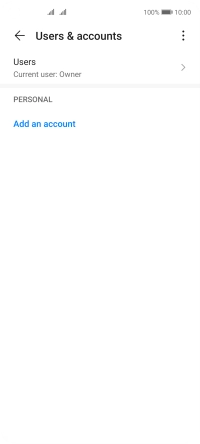
Press Add an account.
![](http://wmstatic.global.ssl.fastly.net/ml/7151223-f-d7e2ef7a-7247-4a91-89b9-f53667d80e47.png?width=200&height=448)
Press Corporate.
![](http://wmstatic.global.ssl.fastly.net/ml/7151223-f-82a85c9a-d954-440d-b25a-788b95ce46a1.png?width=200&height=448)
3 Enter email address
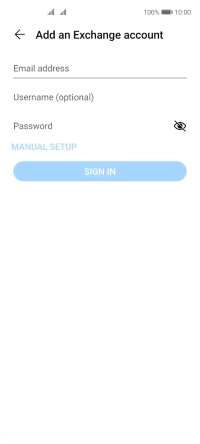
Press Email address and key in your email address.
![](http://wmstatic.global.ssl.fastly.net/ml/7151223-f-ef65c9f8-288e-43bf-87cf-8a7288ce5db9.png?width=200&height=448)
4 Enter username
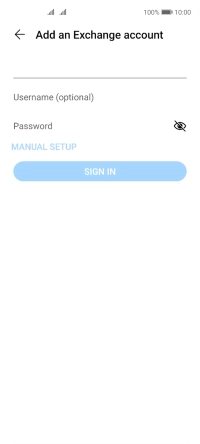
Press Username (optional) and key in the username for your email account.
![](http://wmstatic.global.ssl.fastly.net/ml/7151223-f-ac54c48a-aef9-42cb-beab-1c07849f5773.png?width=200&height=448)
5 Enter password
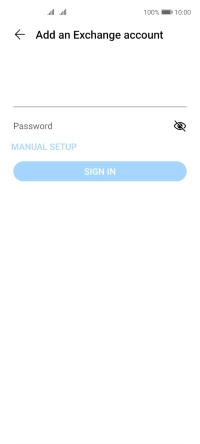
Press Password and key in the password for your email account.
![](http://wmstatic.global.ssl.fastly.net/ml/7151223-f-9883cfd4-3d38-4034-8228-255264ce51e4.png?width=200&height=448)
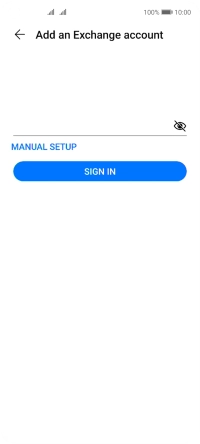
Press SIGN IN.
If the screen tells you that the email account has been set up, follow the instructions on the screen to select more settings and finish the setup.
![](http://wmstatic.global.ssl.fastly.net/ml/7151223-f-4a3b0fd4-b42d-4ecb-9fd6-6731f9ad016f.png?width=200&height=448)
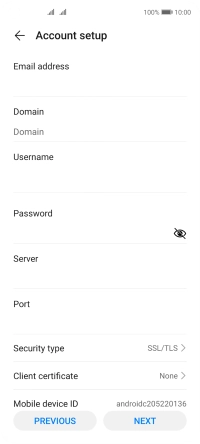
6 Enter domain name
Press Domain and key in the domain.
![](http://wmstatic.global.ssl.fastly.net/ml/7151223-f-e5751869-cc81-4224-b136-de944b352b77.png?width=200&height=448)
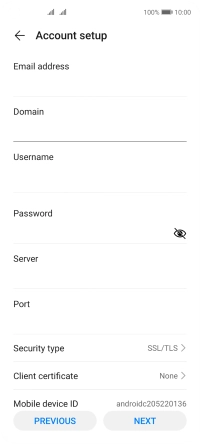
7 Enter server name
Press the field below "Server" and key in the server address.
![](http://wmstatic.global.ssl.fastly.net/ml/7151223-f-8c3897b6-bbf6-4255-beba-6eef07208ed4.png?width=200&height=448)
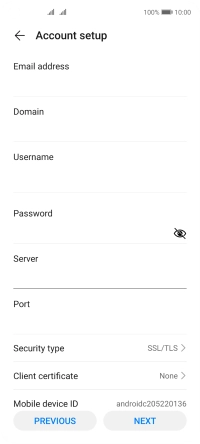
8 Enter incoming port
Press the field below "Port" and key in the required port number.
![](http://wmstatic.global.ssl.fastly.net/ml/7151223-f-8bf7753a-3fed-4af4-a061-22f6320fde49.png?width=200&height=448)
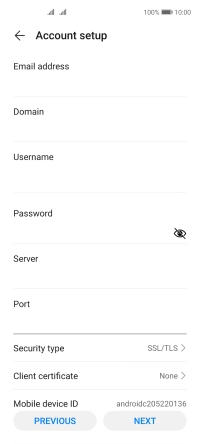
9 Turn SSL encryption on or off
Press Security type.
![](http://wmstatic.global.ssl.fastly.net/ml/7151223-f-7cc4f18d-b2d6-4e04-b3c9-bad6bbdbf308.png?width=200&height=448)
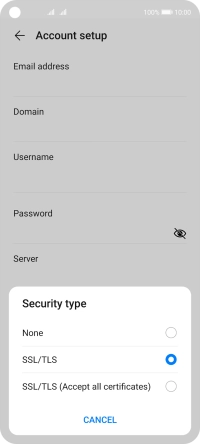
Press None to turn the function on or off.
![](http://wmstatic.global.ssl.fastly.net/ml/7151223-f-9be39151-044c-46fe-832c-e0871232f966.png?width=200&height=448)
If you turn on the function, press Client certificate and follow the instructions on the screen to install the required certificate.
![](http://wmstatic.global.ssl.fastly.net/ml/7151223-f-7cc4f18d-b2d6-4e04-b3c9-bad6bbdbf308.png?width=200&height=448)
Press NEXT.
![](http://wmstatic.global.ssl.fastly.net/ml/7151223-f-7cc4f18d-b2d6-4e04-b3c9-bad6bbdbf308.png?width=200&height=448)
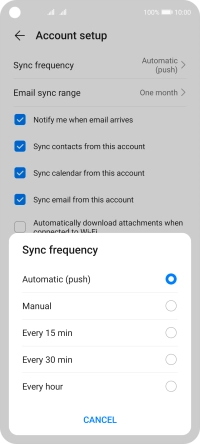
10 Select period for email message synchronisation
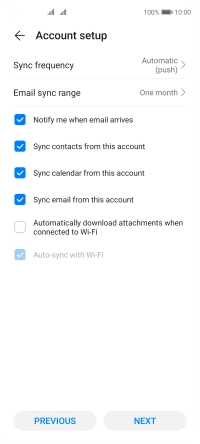
Press Sync frequency.
![](http://wmstatic.global.ssl.fastly.net/ml/7151223-f-1cecd946-f4e9-468c-8f9a-10f35cfc33af.png?width=200&height=448)
Press the required setting.
![](http://wmstatic.global.ssl.fastly.net/ml/7151223-f-91088bc4-5422-44db-af34-cf379004014a.png?width=200&height=448)
11 Turn email message notifications on or off
Press the field next to "Notify me when email arrives" to turn the function on or off.
![](http://wmstatic.global.ssl.fastly.net/ml/7151223-f-1cecd946-f4e9-468c-8f9a-10f35cfc33af.png?width=200&height=448)
12 Turn contact synchronisation on or off
Press the field next to "Sync contacts from this account" to turn the function on or off.
![](http://wmstatic.global.ssl.fastly.net/ml/7151223-f-1cecd946-f4e9-468c-8f9a-10f35cfc33af.png?width=200&height=448)
13 Turn calendar synchronisation on or off
Press the field next to "Sync calendar from this account" to turn the function on or off.
![](http://wmstatic.global.ssl.fastly.net/ml/7151223-f-1cecd946-f4e9-468c-8f9a-10f35cfc33af.png?width=200&height=448)
14 Turn on email message synchronisation
Press the field next to "Sync email from this account" to turn on the function.
![](http://wmstatic.global.ssl.fastly.net/ml/7151223-f-1cecd946-f4e9-468c-8f9a-10f35cfc33af.png?width=200&height=448)
Press NEXT.
![](http://wmstatic.global.ssl.fastly.net/ml/7151223-f-1cecd946-f4e9-468c-8f9a-10f35cfc33af.png?width=200&height=448)
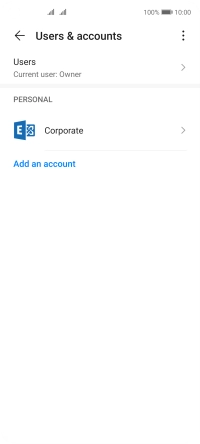
15 Return to the home screen
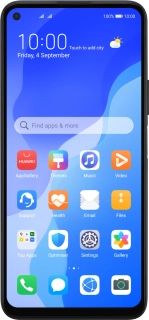
Slide your finger upwards starting from the bottom of the screen to return to the home screen.
![](http://wmstatic.global.ssl.fastly.net/ml/7151223-f-b4ca7683-858e-4be6-badb-ded4e4ac2e3c.png?width=200&height=448)
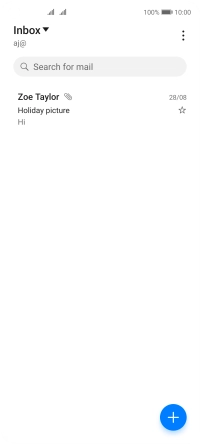
16 Find "Settings"
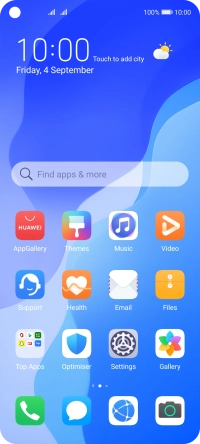
Press Email.
![](http://wmstatic.global.ssl.fastly.net/ml/7151223-f-d078d7ca-4d29-4210-b731-86988731af96.png?width=200&height=448)
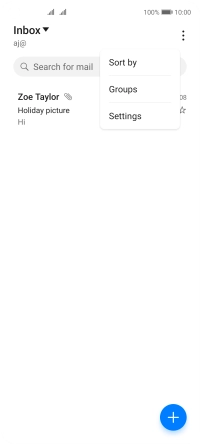
Press the menu icon.
![](http://wmstatic.global.ssl.fastly.net/ml/7151223-f-7e2394c3-bbe4-462c-9d3a-380907b0c022.png?width=200&height=448)
Press Settings.
![](http://wmstatic.global.ssl.fastly.net/ml/7151223-f-4140d89a-4af7-4164-b8a0-fa7d8908b0fe.png?width=200&height=448)
17 Enter email account name
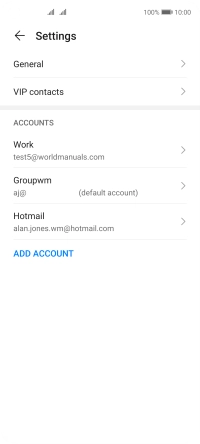
Press the required email account.
![](http://wmstatic.global.ssl.fastly.net/ml/7151223-f-e0f60443-15ef-4b1a-a1c8-b255245c7f6f.png?width=200&height=448)
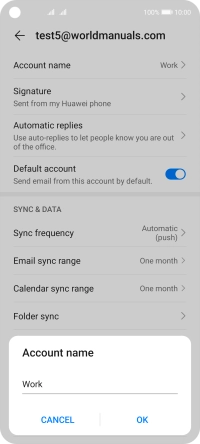
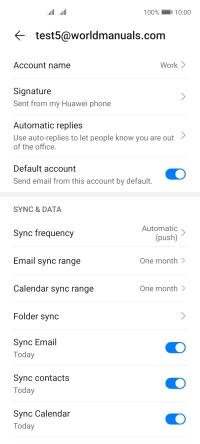
Press Account name and key in the required name.
![](http://wmstatic.global.ssl.fastly.net/ml/7151223-f-62dc131c-499b-4035-b94a-4630a42fa376.png?width=200&height=448)
Press OK.
![](http://wmstatic.global.ssl.fastly.net/ml/7151223-f-21ba61ee-82dd-4a76-b848-e33c84b69d7d.png?width=200&height=448)
18 Return to the home screen
Slide your finger upwards starting from the bottom of the screen to return to the home screen.
![](http://wmstatic.global.ssl.fastly.net/ml/7151223-f-62dc131c-499b-4035-b94a-4630a42fa376.png?width=200&height=448)