![Huawei P40 Pro](http://wmstatic.global.ssl.fastly.net/ml/7151223-f-52942875-5976-4dc3-8966-100d617745f4.png?width=150&height=320)
Huawei P40 Pro
Android 10.0
1 Find "Users & accounts"
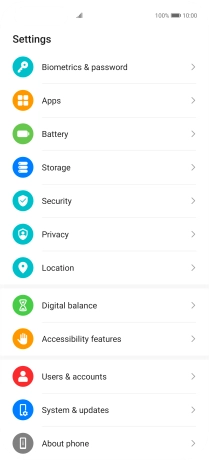
Press Settings.
![](http://wmstatic.global.ssl.fastly.net/ml/7151223-f-c64c5b1f-99aa-40b3-92d2-ef59c60bfa80.png?width=210&height=460)
Press Users & accounts.
![](http://wmstatic.global.ssl.fastly.net/ml/7151223-f-70c93b70-b0c8-44b7-a4f8-e0033eab689e.png?width=210&height=460)
2 Create new email account
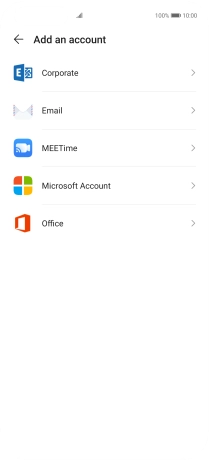
Press Add an account.
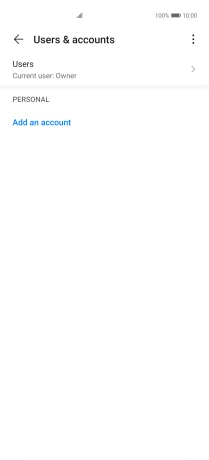
![](http://wmstatic.global.ssl.fastly.net/ml/7151223-f-499c1548-0f24-4aba-8052-83b6a9d93b01.png?width=210&height=460)
Press Corporate.
![](http://wmstatic.global.ssl.fastly.net/ml/7151223-f-fece3124-8900-482b-b8ce-961b43d56e1a.png?width=210&height=460)
3 Enter email address
Press Email address and key in your email address.
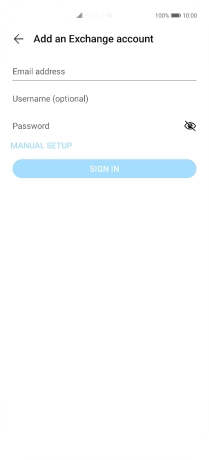
![](http://wmstatic.global.ssl.fastly.net/ml/7151223-f-678a8a6f-c4f2-456a-a432-5ec7516cba5f.png?width=210&height=460)
4 Enter username
Press Username (optional) and key in the username for your email account.
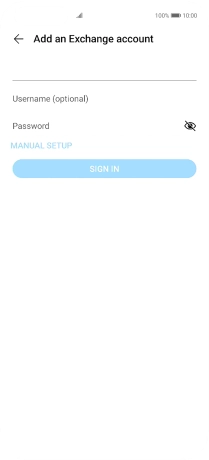
![](http://wmstatic.global.ssl.fastly.net/ml/7151223-f-f490de21-940c-4f64-9325-7317f0c04e01.png?width=210&height=460)
5 Enter password
Press Password and key in the password for your email account.
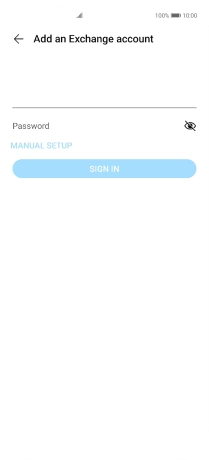
![](http://wmstatic.global.ssl.fastly.net/ml/7151223-f-13d27a18-c979-40c6-ae97-57b67e8fcab7.png?width=210&height=460)
Press SIGN IN.
If the screen tells you that the email account has been set up, follow the instructions on the screen to select more settings and finish the setup.
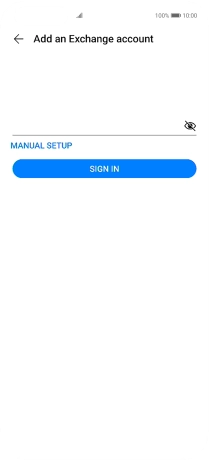
![](http://wmstatic.global.ssl.fastly.net/ml/7151223-f-f8b2a636-def5-4329-a0e9-4e7615ab0412.png?width=210&height=460)
6 Enter domain name
Press the field below "Domain" and key in the domain name.
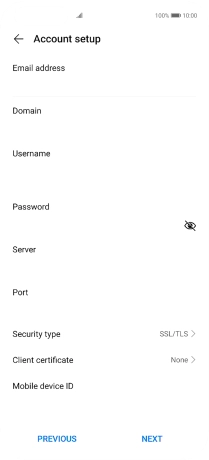
![](http://wmstatic.global.ssl.fastly.net/ml/7151223-f-77ad47b8-5301-4885-b900-19d615ed23a1.png?width=210&height=460)
7 Enter server name
Press the field below "Server" and key in the server address.
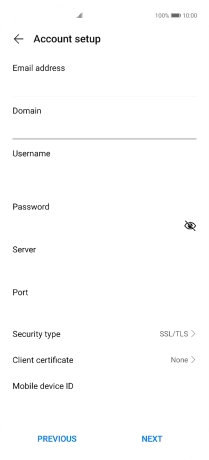
![](http://wmstatic.global.ssl.fastly.net/ml/7151223-f-1019429d-c8c9-48ac-8a8d-9f2702a590ee.png?width=210&height=460)
8 Enter incoming port
Press the field below "Port" and key in the required port number.
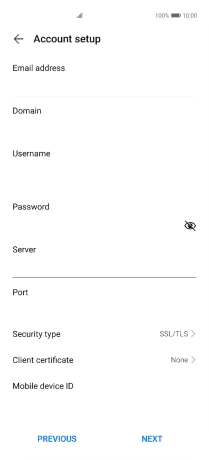
![](http://wmstatic.global.ssl.fastly.net/ml/7151223-f-13576e93-cf2b-4448-bbb1-209323725c18.png?width=210&height=460)
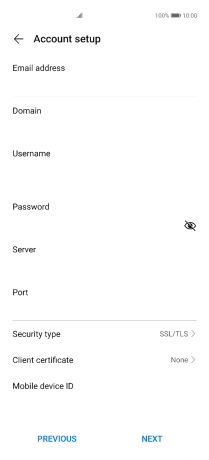
9 Turn SSL encryption on or off
Press Security type.
![](http://wmstatic.global.ssl.fastly.net/ml/7151223-f-149da967-7314-455d-8d0c-bc0587e47115.png?width=210&height=460)
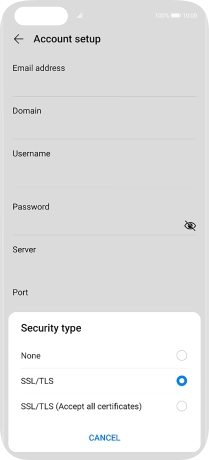
Press None to turn the function on or off.
![](http://wmstatic.global.ssl.fastly.net/ml/7151223-f-ab0abdc0-1f8c-43db-aad7-39ae7e2da726.png?width=210&height=460)
If you turn on the function, press Client certificate and follow the instructions on the screen to install the required certificate.
![](http://wmstatic.global.ssl.fastly.net/ml/7151223-f-149da967-7314-455d-8d0c-bc0587e47115.png?width=210&height=460)
Press NEXT.
![](http://wmstatic.global.ssl.fastly.net/ml/7151223-f-149da967-7314-455d-8d0c-bc0587e47115.png?width=210&height=460)
10 Select period for email message synchronisation
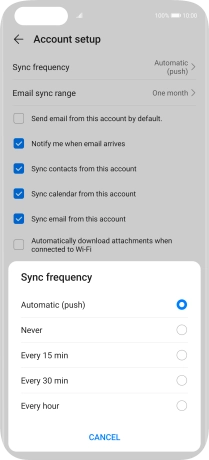
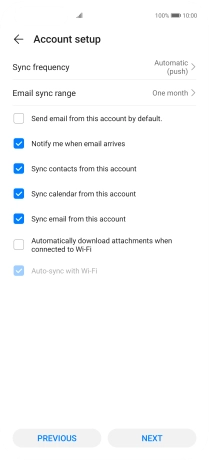
Press Sync frequency.
![](http://wmstatic.global.ssl.fastly.net/ml/7151223-f-c563a9e4-9d9f-4ddb-9292-2e6c0ca7b435.png?width=210&height=460)
Press the required setting.
![](http://wmstatic.global.ssl.fastly.net/ml/7151223-f-bae6f176-9b18-4d1d-9bf8-8e99be580d9a.png?width=210&height=460)
11 Turn email message notifications on or off
Press the field next to "Notify me when email arrives" to turn the function on or off.
![](http://wmstatic.global.ssl.fastly.net/ml/7151223-f-c563a9e4-9d9f-4ddb-9292-2e6c0ca7b435.png?width=210&height=460)
12 Turn contact synchronisation on or off
Press the field next to "Sync contacts from this account" to turn the function on or off.
![](http://wmstatic.global.ssl.fastly.net/ml/7151223-f-c563a9e4-9d9f-4ddb-9292-2e6c0ca7b435.png?width=210&height=460)
13 Turn calendar synchronisation on or off
Press the field next to "Sync calendar from this account" to turn the function on or off.
![](http://wmstatic.global.ssl.fastly.net/ml/7151223-f-c563a9e4-9d9f-4ddb-9292-2e6c0ca7b435.png?width=210&height=460)
14 Turn on email message synchronisation
Press the field next to "Sync email from this account" to turn on the function.
![](http://wmstatic.global.ssl.fastly.net/ml/7151223-f-c563a9e4-9d9f-4ddb-9292-2e6c0ca7b435.png?width=210&height=460)
Press NEXT.
![](http://wmstatic.global.ssl.fastly.net/ml/7151223-f-c563a9e4-9d9f-4ddb-9292-2e6c0ca7b435.png?width=210&height=460)
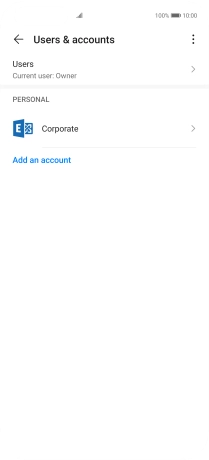
15 Return to the home screen
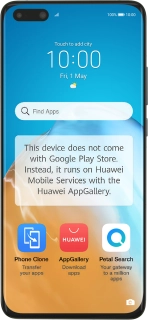
Slide your finger upwards starting from the bottom of the screen to return to the home screen.
![](http://wmstatic.global.ssl.fastly.net/ml/7151223-f-582cc5a8-6b87-49fa-929c-57485f258dfe.png?width=210&height=460)
16 Find "Settings"
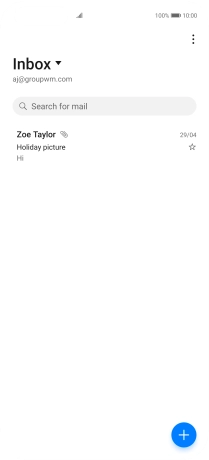
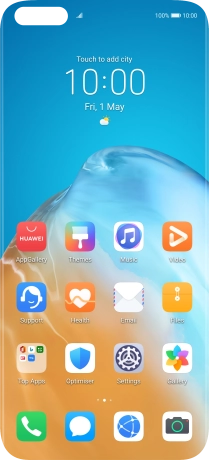
Press Email.
![](http://wmstatic.global.ssl.fastly.net/ml/7151223-f-c64c5b1f-99aa-40b3-92d2-ef59c60bfa80.png?width=210&height=460)
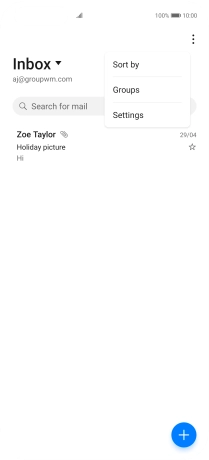
Press the menu icon.
![](http://wmstatic.global.ssl.fastly.net/ml/7151223-f-0c8f0527-02d1-477c-8948-83a240a59494.png?width=210&height=460)
Press Settings.
![](http://wmstatic.global.ssl.fastly.net/ml/7151223-f-349217fc-7930-4a96-bab5-15c0a906ffb6.png?width=210&height=460)
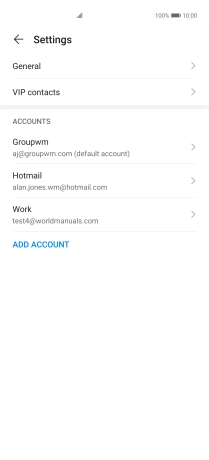
17 Enter email account name
Press the required email account.
![](http://wmstatic.global.ssl.fastly.net/ml/7151223-f-2bf5eff6-b130-49b7-8a15-f62890758923.png?width=210&height=460)
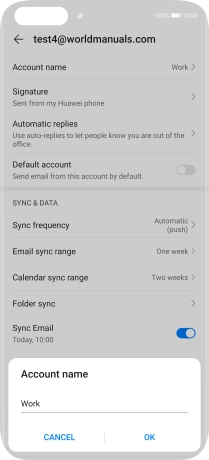
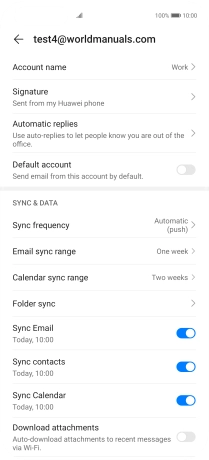
Press Account name and key in the required name.
![](http://wmstatic.global.ssl.fastly.net/ml/7151223-f-0d59ef7a-018b-495e-b026-2fcdc546d6a6.png?width=210&height=460)
Press OK.
![](http://wmstatic.global.ssl.fastly.net/ml/7151223-f-a4522c7a-4cde-4ebb-8877-92549e5097c6.png?width=210&height=460)
18 Return to the home screen
Slide your finger upwards starting from the bottom of the screen to return to the home screen.
![](http://wmstatic.global.ssl.fastly.net/ml/7151223-f-0d59ef7a-018b-495e-b026-2fcdc546d6a6.png?width=210&height=460)