![IMO Q2 Plus](http://wmstatic.global.ssl.fastly.net/ml/7070823-f-681d41ad-7361-449f-9370-e2a556575eeb.png?width=150&height=320)
IMO Q2 Plus
Android 8.1 (Go edition)
1. Find "Users & accounts"
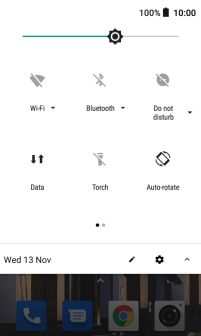
Slide two fingers downwards starting from the top of the screen.
![](http://wmstatic.global.ssl.fastly.net/ml/7070823-f-c19eaaed-01b6-470c-981a-b1837d4064e4.png?width=202&height=336)
Press the settings icon.
![](http://wmstatic.global.ssl.fastly.net/ml/7070823-f-dbfbb895-5acf-42a8-9304-340789a70b38.png?width=202&height=336)
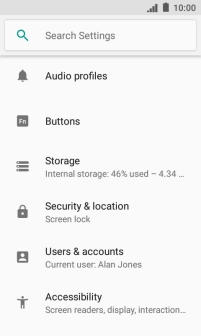
Press Users & accounts.
![](http://wmstatic.global.ssl.fastly.net/ml/7070823-f-ff8b94c8-436d-425a-81d4-474c3da29581.png?width=202&height=336)
2. Select social network or email account
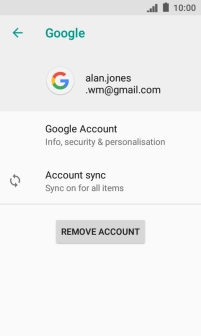
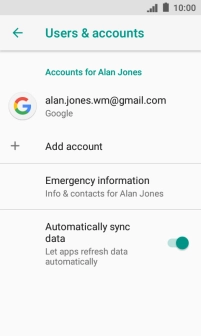
Press the required account.
![](http://wmstatic.global.ssl.fastly.net/ml/7070823-f-c583e022-59e3-4e14-b8a4-ecc0300116c7.png?width=202&height=336)
3. Copy contacts
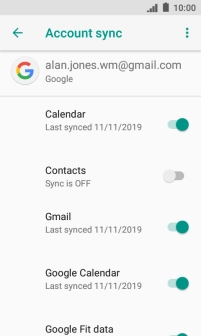
Press Account sync.
![](http://wmstatic.global.ssl.fastly.net/ml/7070823-f-bedbc7f6-7e88-40fa-a5ec-32a31e309f8c.png?width=202&height=336)
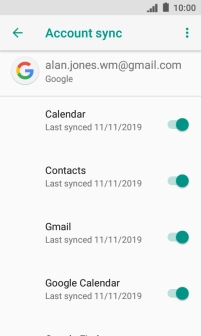
Press the indicator next to "Contacts" to turn on the function.
![](http://wmstatic.global.ssl.fastly.net/ml/7070823-f-cb7c40e4-9bae-4b3e-a7f3-5f1209db4791.png?width=202&height=336)
4. Return to the home screen
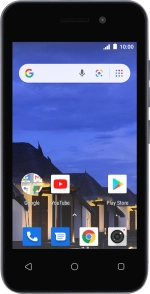
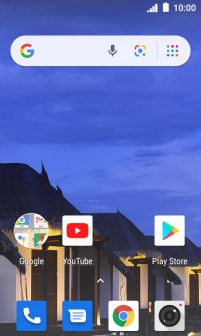
Press the Home key to return to the home screen.
![](http://wmstatic.global.ssl.fastly.net/ml/7070823-f-beee8d1e-11f5-4094-96a4-832ce7dabaf8.png?width=202&height=336)