
Motorola Moto G8 POWER


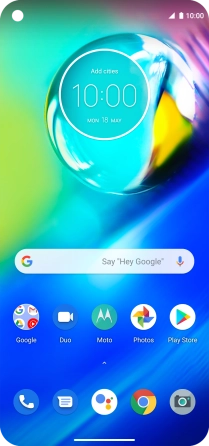
1. Find "Accounts"
Slide two fingers downwards starting from the top of the screen.


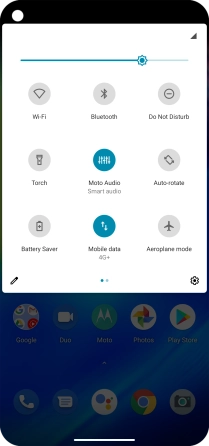
1. Find "Accounts"
Press the settings icon.


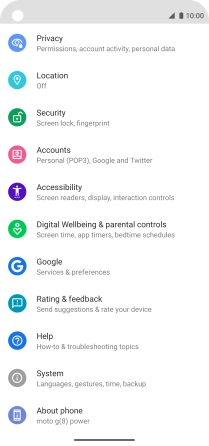
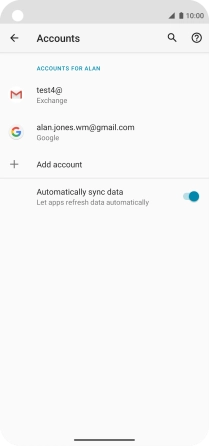
1. Find "Accounts"
Press Accounts.


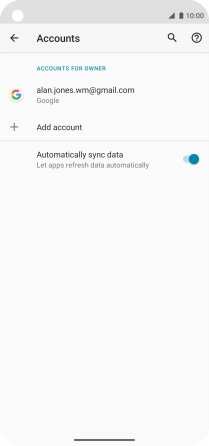
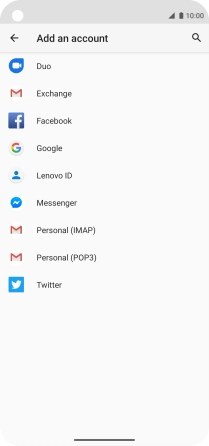
2. Create new email account
Press Add account.


3. Select server type
Press Exchange.


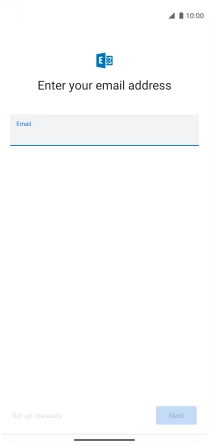
4. Enter email address
Press the field below "Email" and key in your email address.


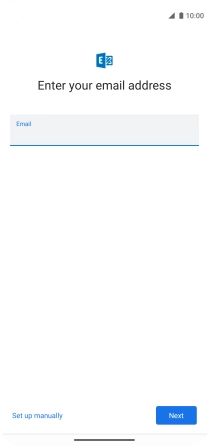
4. Enter email address
Press Next.


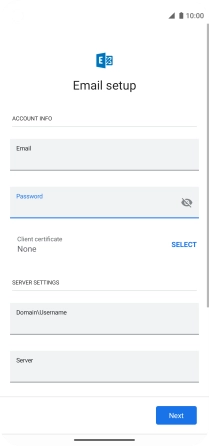
5. Enter password
Press Password and key in the password for your email account.


6. Select client certificate
To turn on the function, press SELECT and follow the instructions on the screen to install the required certificate.
7. Enter domain and username
Press the field below "Domain\Username" and key in the domain and username separated by a "\".


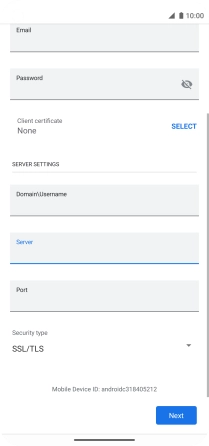
8. Select server address
Press the field below "Server" and key in the server address.


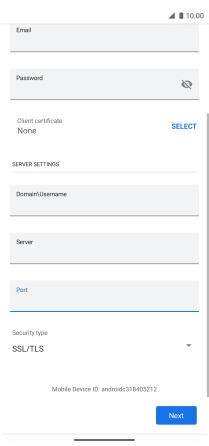
9. Enter port number
Press the field below "Port" and key in the required port number.


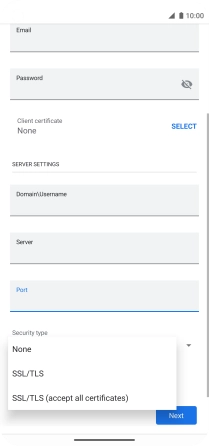
10. Turn SSL encryption on or off
Press the drop down list below "Security type".


10. Turn SSL encryption on or off
Press the required setting.
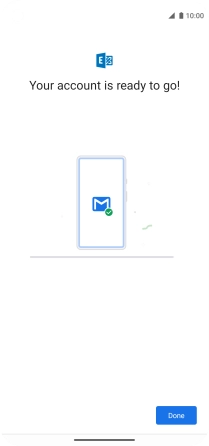
10. Turn SSL encryption on or off
Press Next and follow the instructions on the screen to finish setting up your phone.


10. Turn SSL encryption on or off
Press Done.


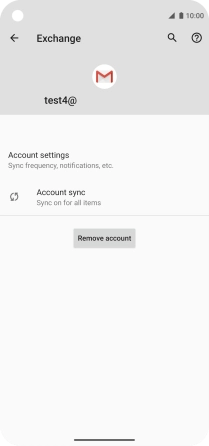
11. Select email account settings
Press the required account.


11. Select email account settings
Press Account settings.


11. Select email account settings
Press the required email account.


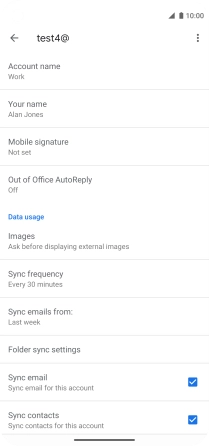
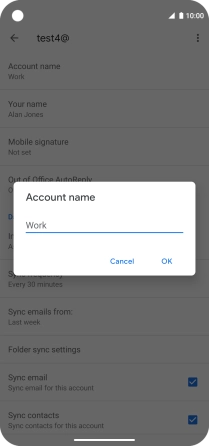
12. Enter account name
Press Account name.


12. Enter account name
Key in the required account name and press OK.
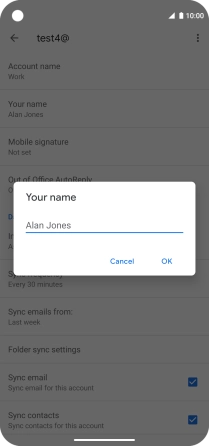
13. Enter sender name
Press Your name.


13. Enter sender name
Key in the required sender name and press OK.
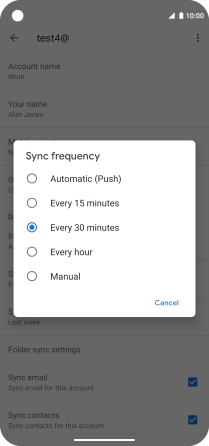
14. Select settings for retrieval of new email messages
Press Sync frequency.


14. Select settings for retrieval of new email messages
Press the required setting.


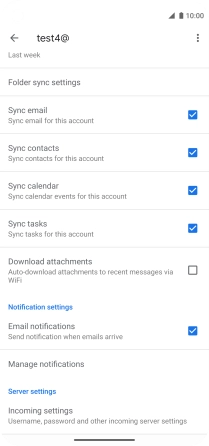
15. Turn on email message synchronisation
Press the field next to "Sync email" to turn on the function.
16. Turn contact synchronisation on or off
Press the field next to "Sync contacts" to turn the function on or off.
17. Turn calendar synchronisation on or off
Press the field next to "Sync calendar" to turn the function on or off.
18. Turn email message notifications on or off
Press the field next to "Email notifications" to turn the function on or off.
19. Return to the home screen
Slide your finger upwards starting from the bottom of the screen to return to the home screen.
1. Find "Accounts"
2. Create new email account
3. Select server type
4. Enter email address
5. Enter password

6. Select client certificate
7. Enter domain and username
8. Select server address

9. Enter port number
10. Turn SSL encryption on or off
11. Select email account settings
12. Enter account name
13. Enter sender name
14. Select settings for retrieval of new email messages
15. Turn on email message synchronisation
16. Turn contact synchronisation on or off
17. Turn calendar synchronisation on or off
18. Turn email message notifications on or off
19. Return to the home screen