
Sony Xperia 5
Android 9.0
1. Find "Accounts"
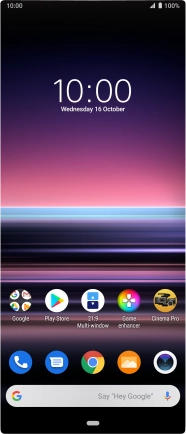
Slide two fingers downwards starting from the top of the screen.
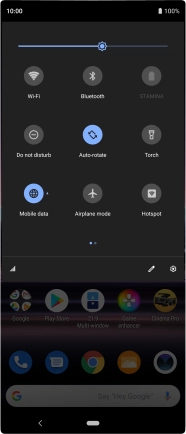
Press the settings icon.
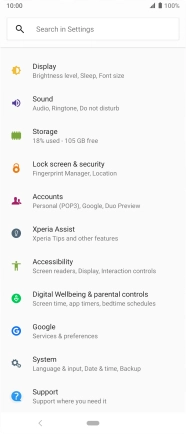
Press Accounts.
2. Create new email account
Press Add account.

Press Exchange.

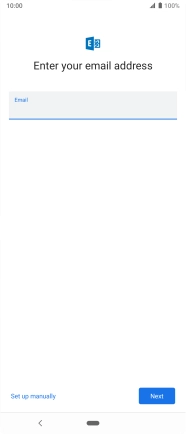
3. Enter email address
Press the field below "Email" and key in your email address.
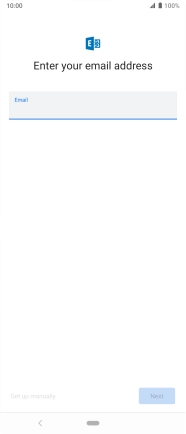
Press Next.
4. Enter password
Press Enter your password and key in the password for your email account.
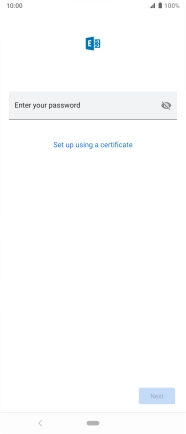
Press Next.
If the screen tells you that the email account has been set up, follow the instructions on the screen to select more settings and finish the setup.
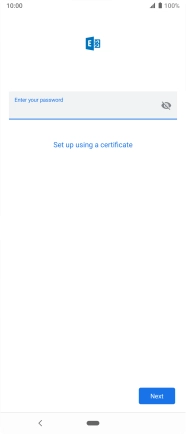
5. Install security certificate
Press SELECT and follow the instructions on the screen to install the required certificate.
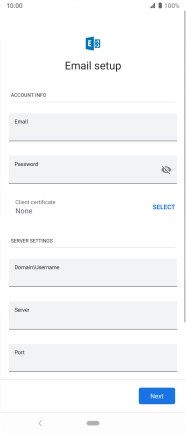
6. Enter domain and username
Press the field below "Domain\Username" and key in the domain and username separated by a "\".

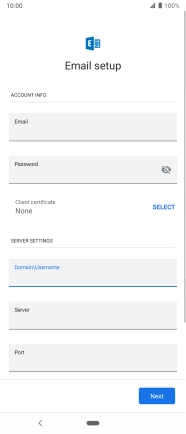
7. Enter server name
Press the field below "Server" and key in the server address.
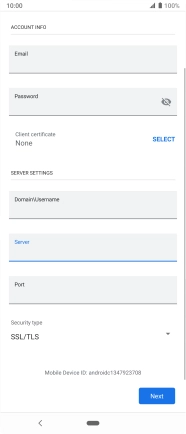
8. Enter port number
Press the field below "Port" and key in the required port number.
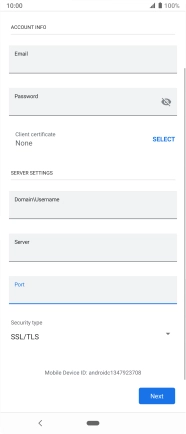
9. Turn SSL encryption on or off
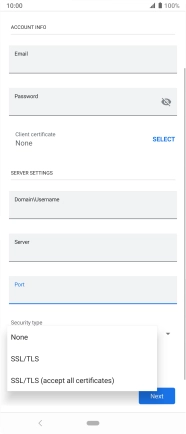
Press the drop down list below "Security type".
Press the required setting to turn the function on or off.
Press Next and follow the instructions on the screen to turn server synchronisation on or off.

Press Done.

10. Select setting for retrieval of new email messages
Press the required email account.

Press Account settings.
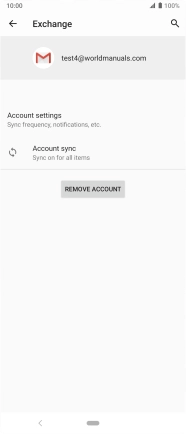
Press the required email account.

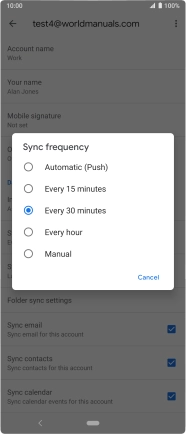
Press Sync frequency.
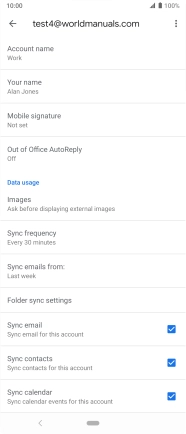
Press the required setting.
11. Turn on email message synchronisation
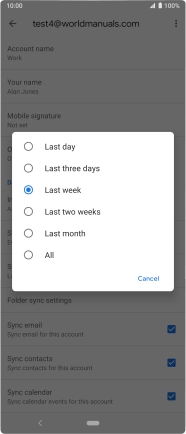
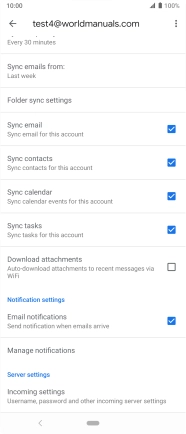
Press Sync emails from: to turn on the function.

Press the required setting.
12. Turn contact synchronisation on or off
Press the field next to "Sync contacts" to turn the function on or off.
13. Turn calendar synchronisation on or off
Press the field next to "Sync calendar" to turn the function on or off.

14. Turn email message notifications on or off
Press the field next to "Email notifications" to turn the function on or off.

15. Enter email account name
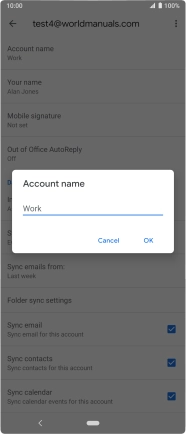
Press Account name and key in the required name.

Press OK.
16. Enter sender name
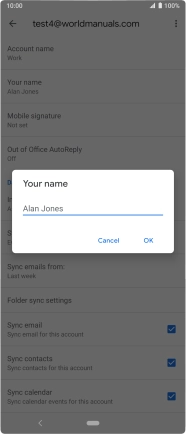
Press Your name and key in the required sender name.

Press OK.
17. Return to the home screen
Press the Home key to return to the home screen.


