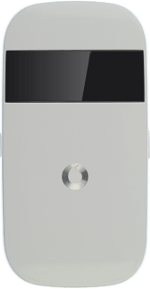
Vodafone R203-Z / Windows Vista

Vodafone R203-Z

Windows Vista

Set the message centre number - Vodafone R203-Z / Windows Vista

Read help info

Usually, your router automatically uses the necessary settings to send and receive text messages. If this isn't the case, it may help to save the message centre number. Follow these instructions to save the message centre number.

Step 1 of 16

Turn on your router

Press and hold On/Off.

Step 2 of 16

Connect to your Wi-Fi hotspot

Do the following in Windows:
Click the Windows icon.

You can see the Wi-Fi hotspot name and password by pressing On/Off twice in quick succession.
Step 3 of 16

Connect to your Wi-Fi hotspot

Click Connect To.

You can see the Wi-Fi hotspot name and password by pressing On/Off twice in quick succession.
Step 4 of 16

Connect to your Wi-Fi hotspot

If required, click the refresh icon.

You can see the Wi-Fi hotspot name and password by pressing On/Off twice in quick succession.
Step 5 of 16

Connect to your Wi-Fi hotspot

Highlight the name of your Wi-Fi hotspot and click Connect.

You can see the Wi-Fi hotspot name and password by pressing On/Off twice in quick succession.
Step 6 of 16

Connect to your Wi-Fi hotspot

Key in the password for your Wi-Fi hotspot and click Connect.

You can see the Wi-Fi hotspot name and password by pressing On/Off twice in quick succession.
Step 7 of 16

Connect to your Wi-Fi hotspot

Click Close.
A connection to your Wi-Fi hotspot is established.

You can see the Wi-Fi hotspot name and password by pressing On/Off twice in quick succession.
Step 8 of 16

Connect to the router configuration page

Open a browser window.
Key in 192.168.0.1 in the address bar and press Enter.
Highlight the field next to Password and key in admin

Step 9 of 16

Connect to the router configuration page

Click Login.

Step 10 of 16

Key in your PIN

If you're asked to key in your PIN:
Highlight the field below Enter current PIN code and key in your PIN.

Step 11 of 16

Key in your PIN

Click Submit.

Step 12 of 16

Find "Settings"

Click SMS.

Step 13 of 16

Find "Settings"

Click Settings.

Step 14 of 16

Save the message centre number

Highlight the field next to Message centre number and key in +447785016005

Step 15 of 16

Save and exit

Click Save.

Step 16 of 16

Save and exit

Click Logout.

Turn on your router

Press and hold On/Off.

Connect to your Wi-Fi hotspot

Do the following in Windows:
Click the Windows icon.
You can see the Wi-Fi hotspot name and password by pressing On/Off twice in quick succession.
Click Connect To.
You can see the Wi-Fi hotspot name and password by pressing On/Off twice in quick succession.
If required, click the refresh icon.
You can see the Wi-Fi hotspot name and password by pressing On/Off twice in quick succession.
Highlight the name of your Wi-Fi hotspot and click Connect.
You can see the Wi-Fi hotspot name and password by pressing On/Off twice in quick succession.
Key in the password for your Wi-Fi hotspot and click Connect.
You can see the Wi-Fi hotspot name and password by pressing On/Off twice in quick succession.
Click Close.
A connection to your Wi-Fi hotspot is established.
You can see the Wi-Fi hotspot name and password by pressing On/Off twice in quick succession.

Connect to the router configuration page

Open a browser window.
Key in 192.168.0.1 in the address bar and press Enter.
Highlight the field next to Password and key in admin
Click Login.

Key in your PIN

If you're asked to key in your PIN:
Highlight the field below Enter current PIN code and key in your PIN.
Click Submit.

Find "Settings"

Click SMS.
Click Settings.

Save the message centre number

Highlight the field next to Message centre number and key in +447785016005

Save and exit

Click Save.
Click Logout.

Get information on...

Or choose...

Another device