![FAIRPHONE Fairphone 4](http://wmstatic.global.ssl.fastly.net/ml/7070823-f-842a8f4c-ca94-4223-afa4-252e50c59ad8.png?width=150&height=320)
FAIRPHONE Fairphone 4
Android 11.0
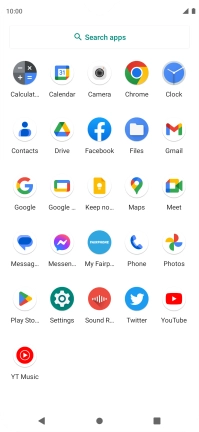
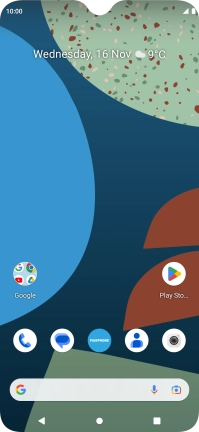
1. Find "Maps"
Slide your finger upwards on the screen.
![](http://wmstatic.global.ssl.fastly.net/ml/7070823-f-ccb093df-1600-4ad1-9227-97bed8815943.png?width=200&height=432)
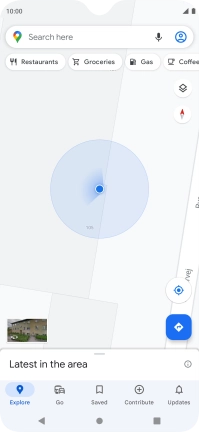
Press Maps.
![](http://wmstatic.global.ssl.fastly.net/ml/7070823-f-5aad88ce-013f-440b-99df-35ebc7befcfe.png?width=200&height=432)
2. Find destination
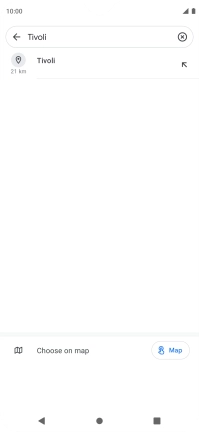
Press the search field and key in the required destination.
![](http://wmstatic.global.ssl.fastly.net/ml/7070823-f-8fc5fa5b-c347-45b0-9e16-9b6adfe1a544.png?width=200&height=432)
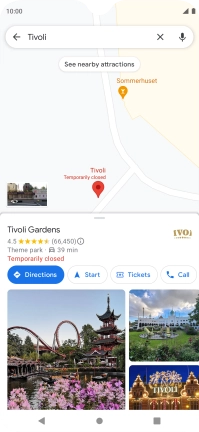
Press the required destination.
Drag two fingers together or apart to zoom in or out.
![](http://wmstatic.global.ssl.fastly.net/ml/7070823-f-bb80604f-79a2-44e0-92f2-96d03a497cc4.png?width=200&height=432)
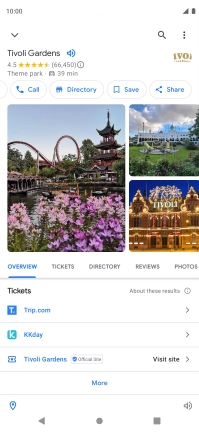
3. Save favourite destination
Press the destination.
![](http://wmstatic.global.ssl.fastly.net/ml/7070823-f-eff5afcf-5899-43b7-85dc-81138afa08ff.png?width=200&height=432)
Press Save.
![](http://wmstatic.global.ssl.fastly.net/ml/7070823-f-2286c965-efb7-474b-96e8-6d756691f9d3.png?width=200&height=432)
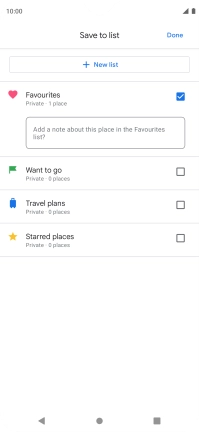
If you select New list, follow the instructions on the screen to create a new list.
![](http://wmstatic.global.ssl.fastly.net/ml/7070823-f-28bb79cc-d017-4441-8f02-b4a2a733561e.png?width=200&height=432)
Press the required setting.
![](http://wmstatic.global.ssl.fastly.net/ml/7070823-f-28bb79cc-d017-4441-8f02-b4a2a733561e.png?width=200&height=432)
Press Done.
![](http://wmstatic.global.ssl.fastly.net/ml/7070823-f-12726051-da6c-4ef0-9432-d0bd165ca73f.png?width=200&height=432)
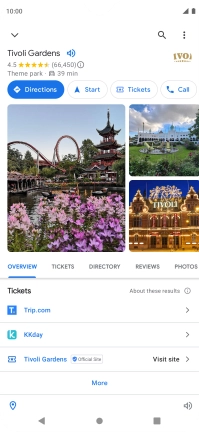
4. Plan route to destination
Press Directions.
![](http://wmstatic.global.ssl.fastly.net/ml/7070823-f-7f0cd894-bfbc-420f-b173-dd8829017429.png?width=200&height=432)
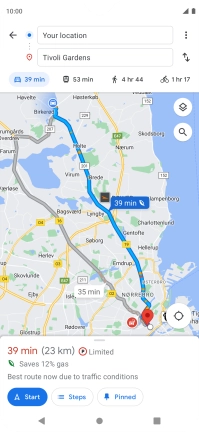
Press the required mode of transportation.
![](http://wmstatic.global.ssl.fastly.net/ml/7070823-f-8f16d942-f54b-4552-8e8e-7b6e773c0f5d.png?width=200&height=432)
Press the required route.
![](http://wmstatic.global.ssl.fastly.net/ml/7070823-f-8f16d942-f54b-4552-8e8e-7b6e773c0f5d.png?width=200&height=432)
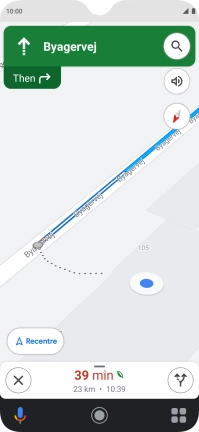
5. Start GPS navigation
Press Start.
![](http://wmstatic.global.ssl.fastly.net/ml/7070823-f-8f16d942-f54b-4552-8e8e-7b6e773c0f5d.png?width=200&height=432)
The travel information at the bottom of the screen shows your estimated time of arrival and distance to destination.
![](http://wmstatic.global.ssl.fastly.net/ml/7070823-f-79843d7d-86de-409d-9c10-004594284b34.png?width=200&height=432)
6. End GPS navigation
Press the end icon to end navigation.
![](http://wmstatic.global.ssl.fastly.net/ml/7070823-f-79843d7d-86de-409d-9c10-004594284b34.png?width=200&height=432)
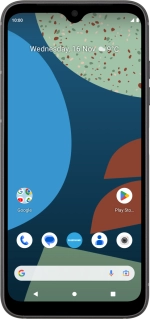
7. Return to the home screen
Press the Home key to return to the home screen.
![](http://wmstatic.global.ssl.fastly.net/ml/7070823-f-8fc5fa5b-c347-45b0-9e16-9b6adfe1a544.png?width=200&height=432)