![Google Pixel 6 Pro](http://wmstatic.global.ssl.fastly.net/ml/7220224-f-e56a51c4-b735-4cc1-9976-9b0a29c9df0d.png?width=150&height=320)
Google Pixel 6 Pro
Android 12.0
1. Find "Passwords & accounts"
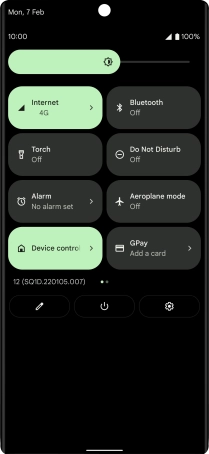
Slide two fingers downwards starting from the top of the screen.
![](http://wmstatic.global.ssl.fastly.net/ml/7220224-f-b529fc7a-8977-490b-88bd-db36b15a1d88.png?width=210&height=454)
Press the settings icon.
![](http://wmstatic.global.ssl.fastly.net/ml/7220224-f-0f4e9561-0afc-466c-9e7a-ff33922cf025.png?width=210&height=454)
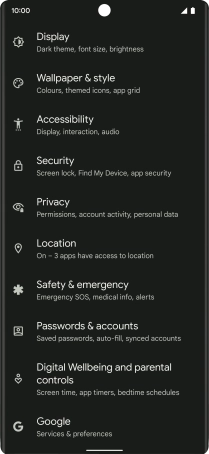
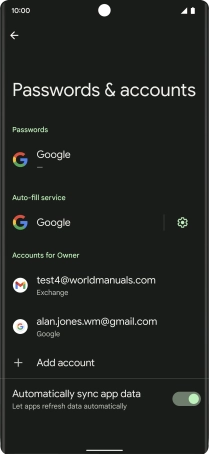
Press Passwords & accounts.
![](http://wmstatic.global.ssl.fastly.net/ml/7220224-f-95796c27-04b5-4e04-b569-2d7fdfde59d5.png?width=210&height=454)
2. Create new email account
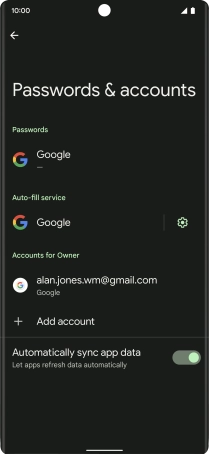
Press Add account.
![](http://wmstatic.global.ssl.fastly.net/ml/7220224-f-fa5863bc-8a6a-4327-856f-3a8e58b9b21a.png?width=210&height=454)
3. Select server type
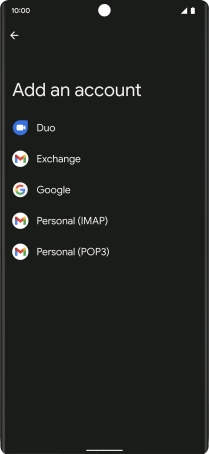
Press Exchange.
![](http://wmstatic.global.ssl.fastly.net/ml/7220224-f-d68787b3-7909-4013-978d-ca853a1715b6.png?width=210&height=454)
4. Enter email address
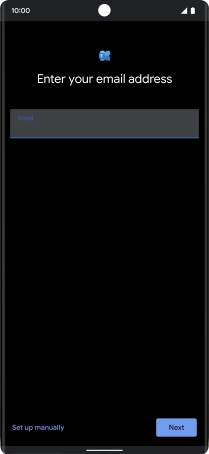
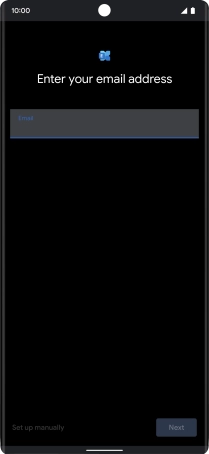
Press the field below "Email" and key in your email address.
![](http://wmstatic.global.ssl.fastly.net/ml/7220224-f-0ddeacfd-86f9-45e4-98cc-a1cf132e67b3.png?width=210&height=454)
Press Next.
![](http://wmstatic.global.ssl.fastly.net/ml/7220224-f-94d040f5-62b5-461d-aca7-6cb7417e021e.png?width=210&height=454)
5. Enter password
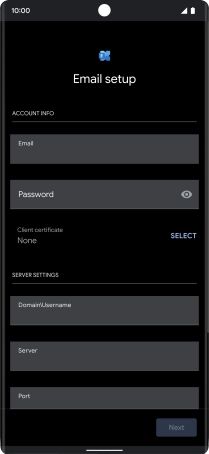
Press Password and key in the password for your email account.
![](http://wmstatic.global.ssl.fastly.net/ml/7220224-f-62c8f9f3-701f-4fcb-b323-0c055da6a6ec.png?width=210&height=454)
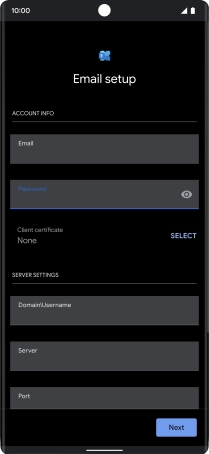
6. Select client certificate
To turn on the function, press SELECT and follow the instructions on the screen to install the required certificate.
![](http://wmstatic.global.ssl.fastly.net/ml/7220224-f-65c0041e-58ff-4533-b758-b4def1a26e7b.png?width=210&height=454)
7. Enter domain and username
Press the field below "Domain\Username" and key in the domain and username separated by a "\".
![](http://wmstatic.global.ssl.fastly.net/ml/7220224-f-65c0041e-58ff-4533-b758-b4def1a26e7b.png?width=210&height=454)
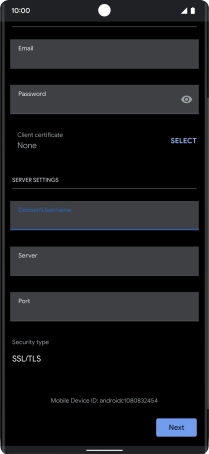
8. Enter server name
Press the field below "Server" and key in the server address.
![](http://wmstatic.global.ssl.fastly.net/ml/7220224-f-1f6901d7-01ec-43b1-8a32-0a5ccf08df07.png?width=210&height=454)
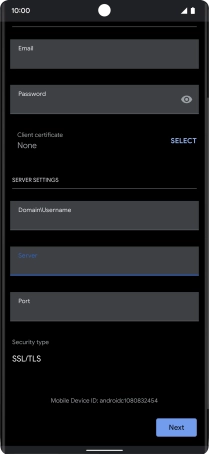
9. Enter incoming port
Press the field below "Port" and key in the required port number.
![](http://wmstatic.global.ssl.fastly.net/ml/7220224-f-3c042560-3757-4bfd-8394-be07e7cc17ac.png?width=210&height=454)
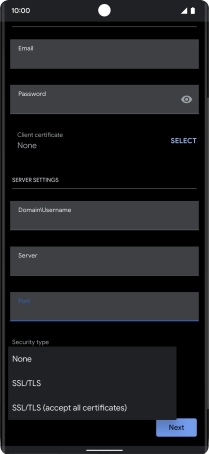
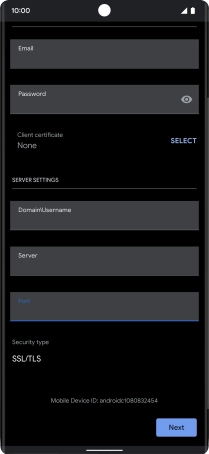
10. Turn SSL encryption on or off
Press the drop down list below "Security type".
![](http://wmstatic.global.ssl.fastly.net/ml/7220224-f-f2656382-a42c-4dd0-a214-56a642c73c48.png?width=210&height=454)
Press the required setting.
![](http://wmstatic.global.ssl.fastly.net/ml/7220224-f-effc970e-6a0d-4095-ba88-4ef0d2f072dc.png?width=210&height=454)
Press Next.
![](http://wmstatic.global.ssl.fastly.net/ml/7220224-f-f2656382-a42c-4dd0-a214-56a642c73c48.png?width=210&height=454)
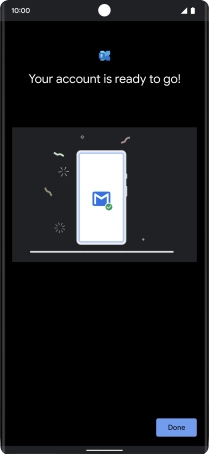
Press Done.
![](http://wmstatic.global.ssl.fastly.net/ml/7220224-f-5cff2313-7ad5-4951-b9c6-35846ff4e964.png?width=210&height=454)
Press the required email account.
![](http://wmstatic.global.ssl.fastly.net/ml/7220224-f-94e814c2-d2d3-4604-9087-5d3202a1084a.png?width=210&height=454)
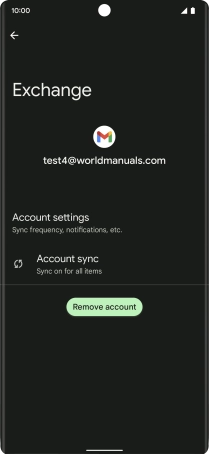
Press Account settings.
![](http://wmstatic.global.ssl.fastly.net/ml/7220224-f-4de3a69c-4e1f-428e-bf66-4b5e0b7c4038.png?width=210&height=454)
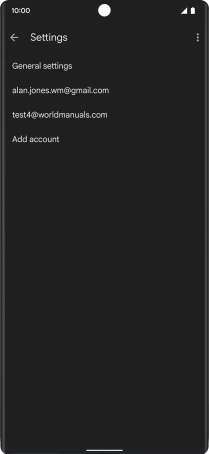
Press the required email account.
![](http://wmstatic.global.ssl.fastly.net/ml/7220224-f-1724bba6-b954-4ecf-9313-112d23e66eae.png?width=210&height=454)
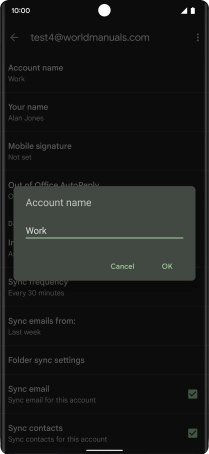
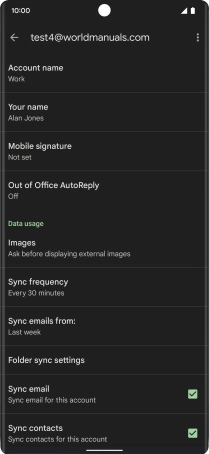
11. Enter email account name
Press Account name and key in the required name.
![](http://wmstatic.global.ssl.fastly.net/ml/7220224-f-41c08767-1a91-4d9c-8312-e906fb1aad6a.png?width=210&height=454)
Press OK.
![](http://wmstatic.global.ssl.fastly.net/ml/7220224-f-cc88e4c0-753d-4229-a05b-c169a07fdde1.png?width=210&height=454)
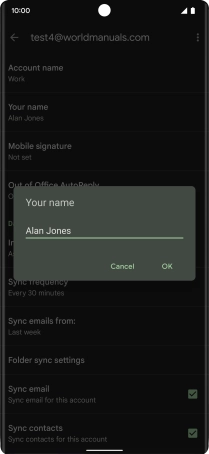
12. Enter sender name
Press Your name.
![](http://wmstatic.global.ssl.fastly.net/ml/7220224-f-41c08767-1a91-4d9c-8312-e906fb1aad6a.png?width=210&height=454)
Key in the required sender name and press OK.
![](http://wmstatic.global.ssl.fastly.net/ml/7220224-f-830cba38-aaca-44f1-b0ca-af9206588b25.png?width=210&height=454)
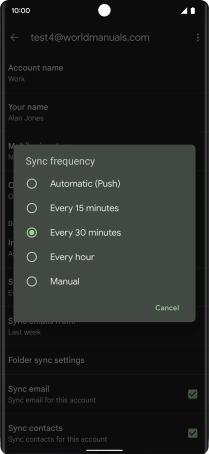
13. Select settings for retrieval of new email messages
Press Sync frequency.
![](http://wmstatic.global.ssl.fastly.net/ml/7220224-f-41c08767-1a91-4d9c-8312-e906fb1aad6a.png?width=210&height=454)
Press the required setting.
![](http://wmstatic.global.ssl.fastly.net/ml/7220224-f-2bcbce13-9571-4503-a3be-d6d8f20527a5.png?width=210&height=454)
14. Turn on email message synchronisation
Press the field next to "Sync email" to turn on the function.
![](http://wmstatic.global.ssl.fastly.net/ml/7220224-f-41c08767-1a91-4d9c-8312-e906fb1aad6a.png?width=210&height=454)
15. Turn contact synchronisation on or off
Press the field next to "Sync contacts" to turn the function on or off.
![](http://wmstatic.global.ssl.fastly.net/ml/7220224-f-41c08767-1a91-4d9c-8312-e906fb1aad6a.png?width=210&height=454)
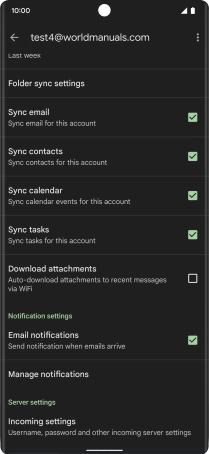
16. Turn calendar synchronisation on or off
Press the field next to "Sync calendar" to turn the function on or off.
![](http://wmstatic.global.ssl.fastly.net/ml/7220224-f-928c19e1-78be-40c8-b2bd-154a721cc5cb.png?width=210&height=454)
17. Turn email message notifications on or off
Press the field next to "Email notifications" to turn the function on or off.
![](http://wmstatic.global.ssl.fastly.net/ml/7220224-f-928c19e1-78be-40c8-b2bd-154a721cc5cb.png?width=210&height=454)
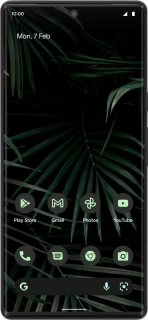
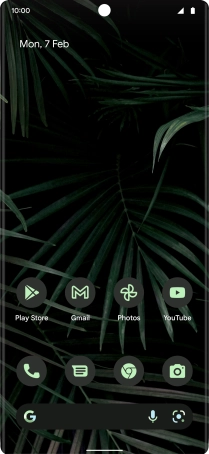
18. Return to the home screen
Slide your finger upwards starting from the bottom of the screen to return to the home screen.
![](http://wmstatic.global.ssl.fastly.net/ml/7220224-f-928c19e1-78be-40c8-b2bd-154a721cc5cb.png?width=210&height=454)