![IMO Q2 Plus](http://wmstatic.global.ssl.fastly.net/ml/7070823-f-681d41ad-7361-449f-9370-e2a556575eeb.png?width=150&height=320)
IMO Q2 Plus
Android 8.1 (Go edition)
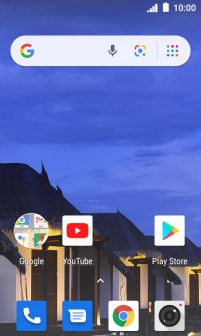
1. Find "Start chat"
Press the message icon.
![](http://wmstatic.global.ssl.fastly.net/ml/7070823-f-c19eaaed-01b6-470c-981a-b1837d4064e4.png?width=202&height=336)
Press Start chat.
![](http://wmstatic.global.ssl.fastly.net/ml/7070823-f-372c37ab-64db-4176-a68e-06a059fddfe4.png?width=202&height=336)
2. Select recipient
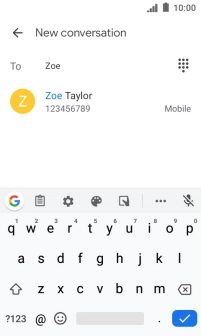
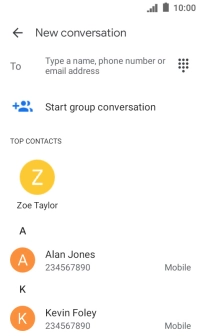
Press the field next to "To" and key in the first letters of the recipient's name.
![](http://wmstatic.global.ssl.fastly.net/ml/7070823-f-32f8bcf7-01e4-40ba-a97e-4feb9dc79945.png?width=202&height=336)
Press the required contact.
![](http://wmstatic.global.ssl.fastly.net/ml/7070823-f-2307b687-dc9a-41c9-82dc-7b28c498ad4a.png?width=202&height=336)
3. Write text
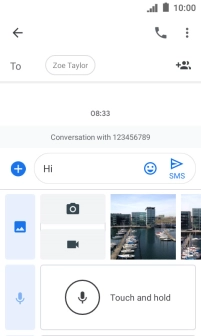
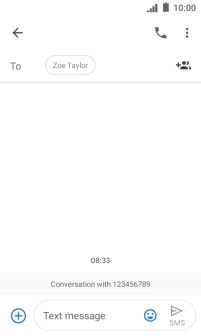
Press the text input field and write the text for your picture message.
![](http://wmstatic.global.ssl.fastly.net/ml/7070823-f-4fb87399-1522-444c-9aa4-f540c7c1e7f3.png?width=202&height=336)
4. Insert picture
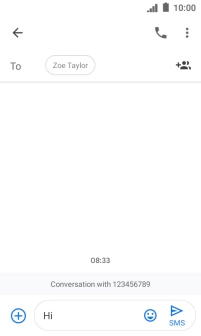
Press the add icon.
![](http://wmstatic.global.ssl.fastly.net/ml/7070823-f-7ceeb261-b118-490d-b75b-13ede55cc1af.png?width=202&height=336)
Press the picture icon.
![](http://wmstatic.global.ssl.fastly.net/ml/7070823-f-0c13dff4-90d4-4c01-86d2-480ccbedfc53.png?width=202&height=336)
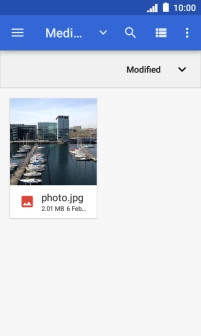
Press Folders and go to the required folder.
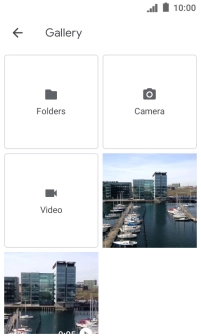
![](http://wmstatic.global.ssl.fastly.net/ml/7070823-f-f0bffb43-bbe8-4525-8a6c-c053febf4c79.png?width=202&height=336)
Press the required picture.
![](http://wmstatic.global.ssl.fastly.net/ml/7070823-f-aaedd79e-2d65-4a5b-ab42-612c49b03e55.png?width=202&height=336)
5. Send picture message
Press the send icon when you've finished your picture message.
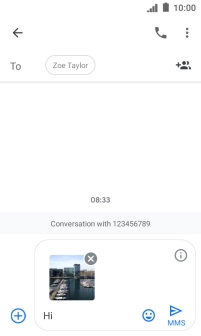
![](http://wmstatic.global.ssl.fastly.net/ml/7070823-f-2f1bfa23-5d37-432b-87ae-88eb16d4cebd.png?width=202&height=336)
6. Return to the home screen
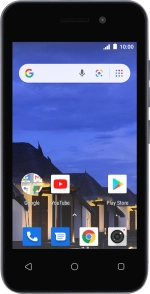
Press the Home key to return to the home screen.
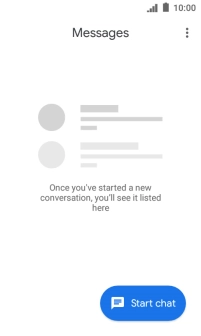
![](http://wmstatic.global.ssl.fastly.net/ml/7070823-f-372c37ab-64db-4176-a68e-06a059fddfe4.png?width=202&height=336)