![Samsung Galaxy A51 5G](http://wmstatic.global.ssl.fastly.net/ml/7151223-f-4184e4e6-af71-4107-ab7d-9714a2562cbc.png?width=150&height=320)
Samsung Galaxy A51 5G
Android 10.0
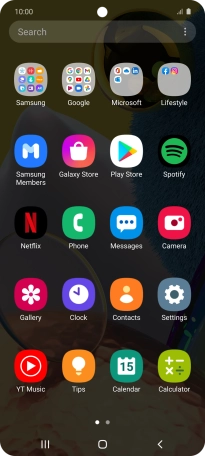
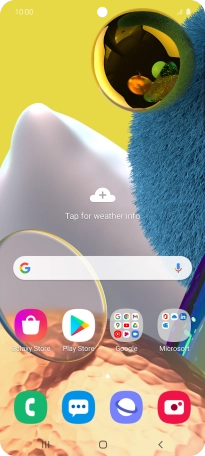
1. Find "Contacts"
Slide your finger upwards on the screen.
![](http://wmstatic.global.ssl.fastly.net/ml/7151223-f-b5b61328-b695-4dd6-98d1-52b8beca5fab.png?width=206&height=456)
Press Contacts.
![](http://wmstatic.global.ssl.fastly.net/ml/7151223-f-ed50c491-b604-48e4-9a90-06d0a724b549.png?width=206&height=456)
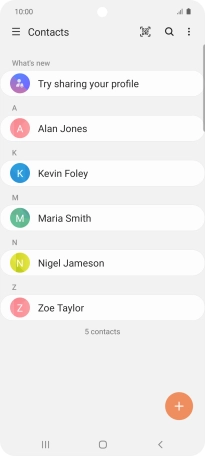
2. Create contact
Press the new contact icon.
![](http://wmstatic.global.ssl.fastly.net/ml/7151223-f-1ae8c320-2cd8-40c9-b487-512a1a965de3.png?width=206&height=456)
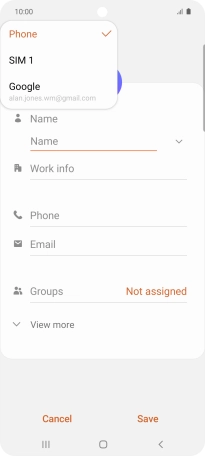
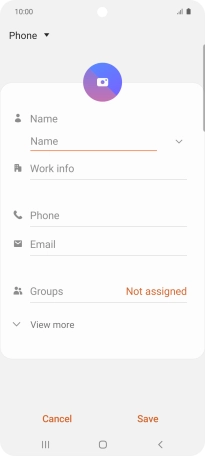
3. Select address book
Press the address book drop down list.
![](http://wmstatic.global.ssl.fastly.net/ml/7151223-f-a5d459c6-598f-4bcc-a10d-7eaafa160147.png?width=206&height=456)
Press Phone.
![](http://wmstatic.global.ssl.fastly.net/ml/7151223-f-aff7cd65-b04e-48f1-9c43-ccdc7ae63292.png?width=206&height=456)
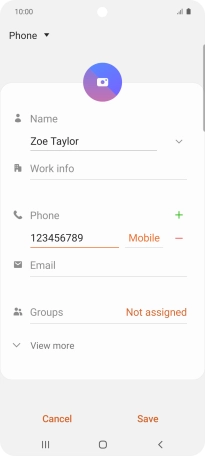
4. Enter name
Press the field below "Name" and key in the required name.
![](http://wmstatic.global.ssl.fastly.net/ml/7151223-f-a5d459c6-598f-4bcc-a10d-7eaafa160147.png?width=206&height=456)
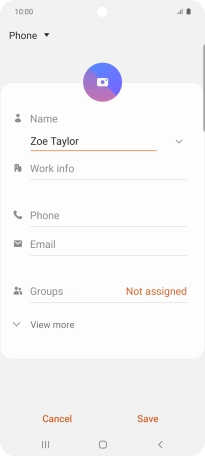
5. Enter phone number
Press Phone and key in the required phone number.
Follow the instructions on the screen to add more information such as an email address and a personal ring tone.
![](http://wmstatic.global.ssl.fastly.net/ml/7151223-f-33808650-f0aa-4594-9e5c-32897bf58e3b.png?width=206&height=456)
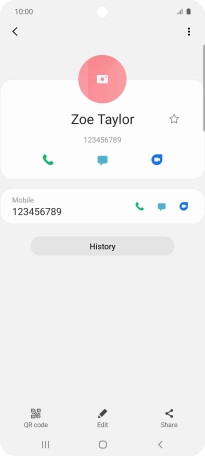
6. Save contact
Press Save.
![](http://wmstatic.global.ssl.fastly.net/ml/7151223-f-0f935248-be15-4c0c-aac3-ce3eff398c05.png?width=206&height=456)
7. Return to the home screen
Press the Home key to return to the home screen.
![](http://wmstatic.global.ssl.fastly.net/ml/7151223-f-44ca7159-1aab-4d9a-9665-b50893ba328d.png?width=206&height=456)