![Samsung Galaxy Tab S9 FE 5G](http://wmstatic.global.ssl.fastly.net/ml/7120724-f-2109ece9-5908-4301-bd5e-c21b65276ae2.png?width=150&height=320)
Samsung Galaxy Tab S9 FE 5G
Android 13
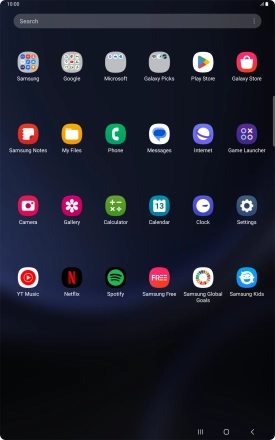
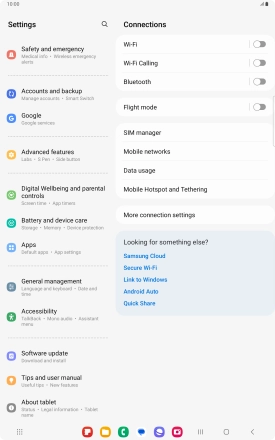
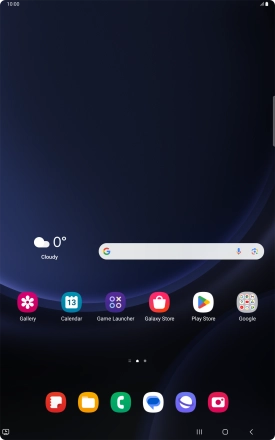
1. Find "Settings"
Slide your finger upwards on the screen.
![](http://wmstatic.global.ssl.fastly.net/ml/7120724-f-028af442-d6e3-4c46-8513-4cb19af5d359.png?width=276&height=440)
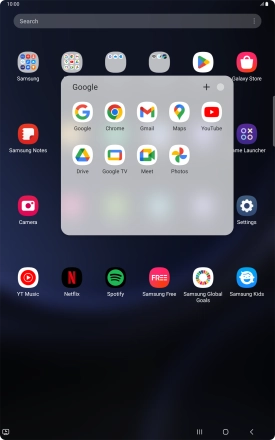
Press Google.
![](http://wmstatic.global.ssl.fastly.net/ml/7120724-f-53819bf6-115a-441a-ba14-65b9b19c9995.png?width=276&height=440)
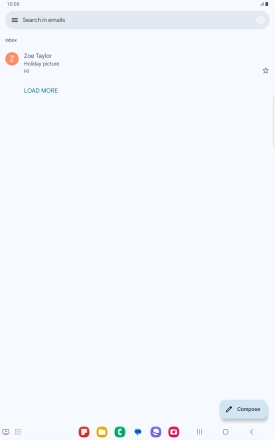
Press Gmail.
![](http://wmstatic.global.ssl.fastly.net/ml/7120724-f-e32eaa6f-183d-40b5-bb65-01fc1667fd53.png?width=276&height=440)
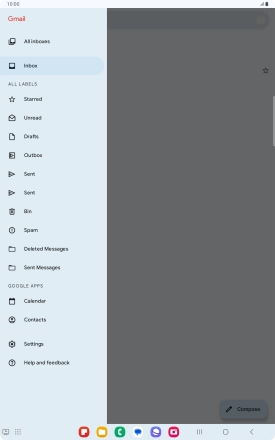
Press the menu icon.
![](http://wmstatic.global.ssl.fastly.net/ml/7120724-f-aa07e718-fa1f-4bf3-9da6-2a51bf6c215f.png?width=276&height=440)
Press Settings.
![](http://wmstatic.global.ssl.fastly.net/ml/7120724-f-c12d951b-d67b-4889-befa-a1a408bdcb2e.png?width=276&height=440)
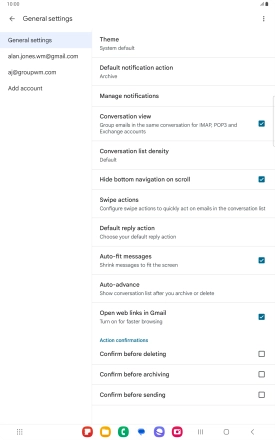
2. Create new email account
Press Add account.
![](http://wmstatic.global.ssl.fastly.net/ml/7120724-f-40c30ff9-3922-4202-a3a7-b10ad4b423ae.png?width=276&height=440)
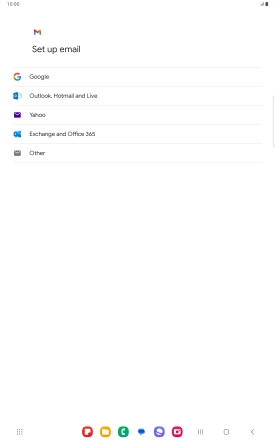
3. Select server type
Press Exchange and Office 365.
![](http://wmstatic.global.ssl.fastly.net/ml/7120724-f-b73182da-7679-4d59-a64e-276d8e0a8844.png?width=276&height=440)
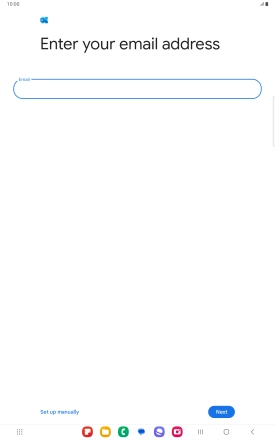
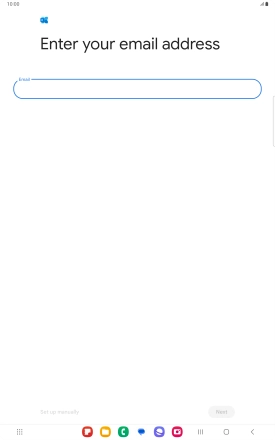
4. Enter email address
Press the field below "Email" and key in your email address.
![](http://wmstatic.global.ssl.fastly.net/ml/7120724-f-428f3651-d8ef-4359-9892-04b7eb47fcbc.png?width=276&height=440)
Press Next.
![](http://wmstatic.global.ssl.fastly.net/ml/7120724-f-bf164016-03ad-477c-b6d3-81bd146b910d.png?width=276&height=440)
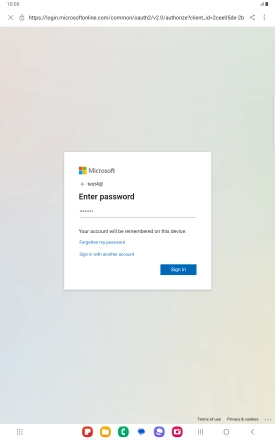
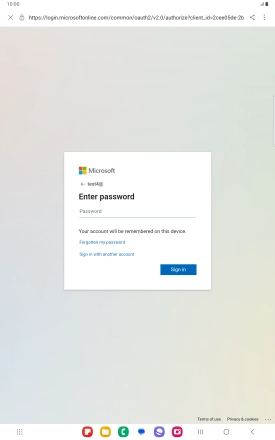
5. Enter password
Press Password and key in the password for your email account.
![](http://wmstatic.global.ssl.fastly.net/ml/7120724-f-3d095973-f283-40b9-83df-f41a9e8b3b57.png?width=276&height=440)
Press Sign in.
![](http://wmstatic.global.ssl.fastly.net/ml/7120724-f-9c436cc6-d969-4639-b195-e570ac6f20e5.png?width=276&height=440)
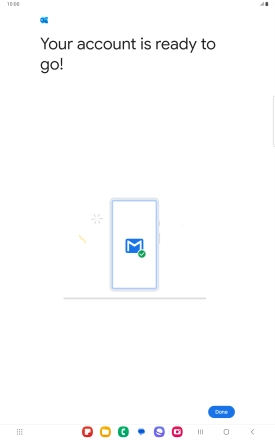
Press Done.
![](http://wmstatic.global.ssl.fastly.net/ml/7120724-f-c66d24dc-2cae-479c-bc17-60768b004325.png?width=276&height=440)
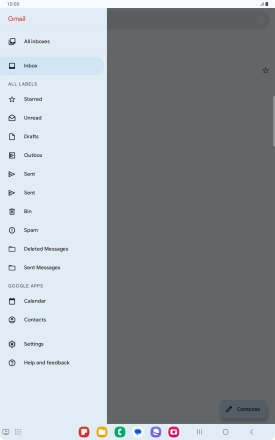
6. Return to the home screen
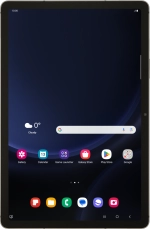
Press the Home key to return to the home screen.
![](http://wmstatic.global.ssl.fastly.net/ml/7120724-f-3cad5ec8-88d1-417b-a2f3-977d7da32d7c.png?width=276&height=440)
7. Find "Account settings"
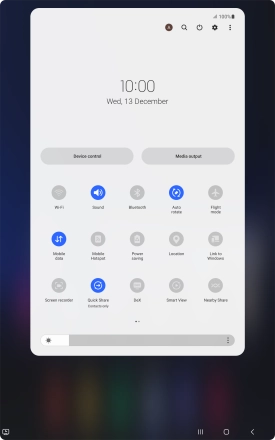
Slide two fingers downwards starting from the top of the screen.
![](http://wmstatic.global.ssl.fastly.net/ml/7120724-f-028af442-d6e3-4c46-8513-4cb19af5d359.png?width=276&height=440)
Press the settings icon.
![](http://wmstatic.global.ssl.fastly.net/ml/7120724-f-3f05eb7d-cf1c-44f0-8983-1ca0ae11e8d1.png?width=276&height=440)
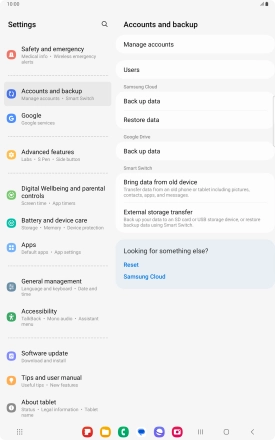
Press Accounts and backup.
![](http://wmstatic.global.ssl.fastly.net/ml/7120724-f-37e8378a-7da5-4068-9b8f-dbe43495cb3f.png?width=276&height=440)
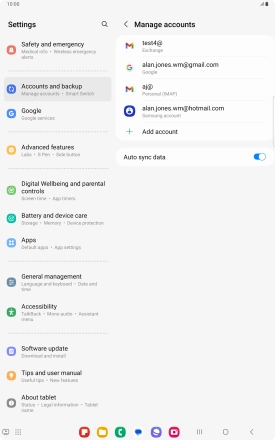
Press Manage accounts.
![](http://wmstatic.global.ssl.fastly.net/ml/7120724-f-22fe2c4f-55e9-40d3-820a-e121625c9e3a.png?width=276&height=440)
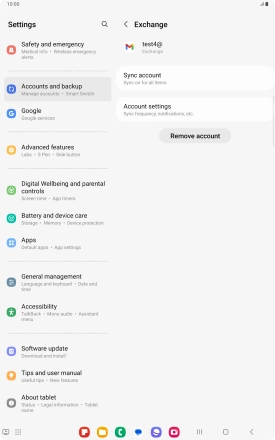
Press the required email account.
![](http://wmstatic.global.ssl.fastly.net/ml/7120724-f-4076380a-cb08-4ed0-90ae-7a3e385237d2.png?width=276&height=440)
Press Account settings.
![](http://wmstatic.global.ssl.fastly.net/ml/7120724-f-2e6bd807-bb09-41fc-a08b-7bd7458761e8.png?width=276&height=440)
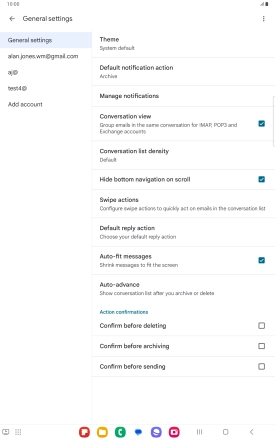
8. Enter email account name
Press the required email account.
![](http://wmstatic.global.ssl.fastly.net/ml/7120724-f-68434c3b-232e-4a95-b9c3-c337ec144fa8.png?width=276&height=440)
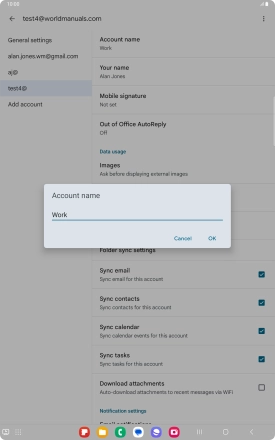
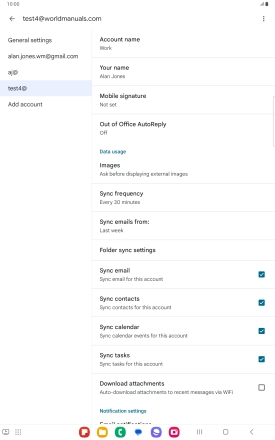
Press Account name and key in the required name.
![](http://wmstatic.global.ssl.fastly.net/ml/7120724-f-0660f28c-8e51-43cb-a2f1-e8a89ca809ba.png?width=276&height=440)
Press OK.
![](http://wmstatic.global.ssl.fastly.net/ml/7120724-f-90a4166a-74df-4fd3-97af-5a700dfacd5e.png?width=276&height=440)
9. Enter sender name
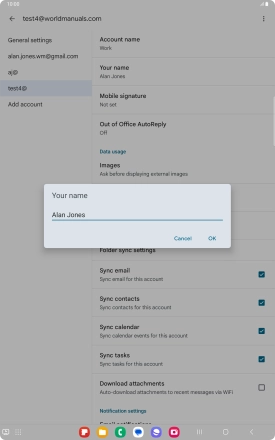
Press Your name and key in the required sender name.
![](http://wmstatic.global.ssl.fastly.net/ml/7120724-f-0660f28c-8e51-43cb-a2f1-e8a89ca809ba.png?width=276&height=440)
Press OK.
![](http://wmstatic.global.ssl.fastly.net/ml/7120724-f-95f90e70-b73e-4cd2-9990-58394e683ab2.png?width=276&height=440)
10. Select setting for retrieval of new email messages
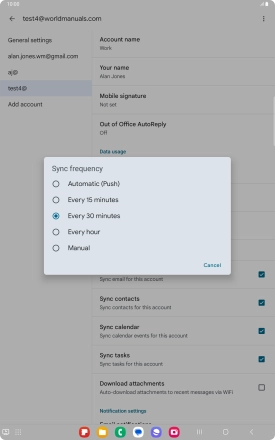
Press Sync frequency.
![](http://wmstatic.global.ssl.fastly.net/ml/7120724-f-0660f28c-8e51-43cb-a2f1-e8a89ca809ba.png?width=276&height=440)
Press the required setting.
![](http://wmstatic.global.ssl.fastly.net/ml/7120724-f-0c1022bb-67d0-450e-ae90-80f48f9803a7.png?width=276&height=440)
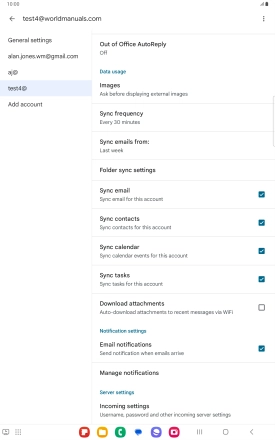
11. Turn on email message synchronisation
Press the field next to "Sync email" to turn on the function.
![](http://wmstatic.global.ssl.fastly.net/ml/7120724-f-698583bf-e19d-4519-8634-493c987f73b9.png?width=276&height=440)
12. Select data types for synchronisation
Press the fields next to the required data types to turn synchronisation on or off.
![](http://wmstatic.global.ssl.fastly.net/ml/7120724-f-698583bf-e19d-4519-8634-493c987f73b9.png?width=276&height=440)
13. Turn email message notifications on or off
Press the field next to "Email notifications" to turn the function on or off.
![](http://wmstatic.global.ssl.fastly.net/ml/7120724-f-698583bf-e19d-4519-8634-493c987f73b9.png?width=276&height=440)
14. Return to the home screen
Press the Home key to return to the home screen.
![](http://wmstatic.global.ssl.fastly.net/ml/7120724-f-698583bf-e19d-4519-8634-493c987f73b9.png?width=276&height=440)