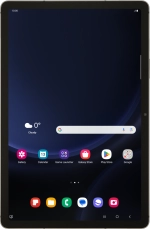
![Samsung Galaxy Tab S9 FE 5G](http://wmstatic.global.ssl.fastly.net/ml/7120724-f-2109ece9-5908-4301-bd5e-c21b65276ae2.png?width=150&height=320)
Samsung Galaxy Tab S9 FE 5G
Android 13
1 Find "Manage accounts"
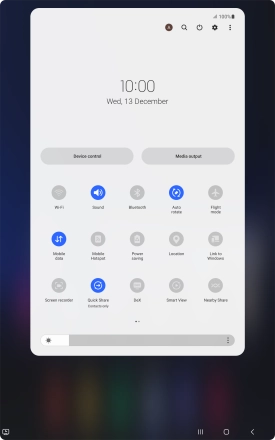
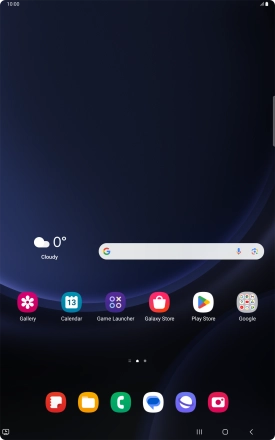
Slide two fingers downwards starting from the top of the screen.
![](http://wmstatic.global.ssl.fastly.net/ml/7120724-f-028af442-d6e3-4c46-8513-4cb19af5d359.png?width=276&height=440)
Press the settings icon.
![](http://wmstatic.global.ssl.fastly.net/ml/7120724-f-3f05eb7d-cf1c-44f0-8983-1ca0ae11e8d1.png?width=276&height=440)
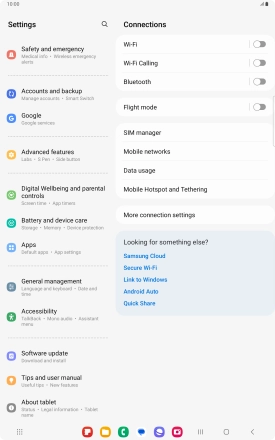
Press Accounts and backup.
![](http://wmstatic.global.ssl.fastly.net/ml/7120724-f-37e8378a-7da5-4068-9b8f-dbe43495cb3f.png?width=276&height=440)
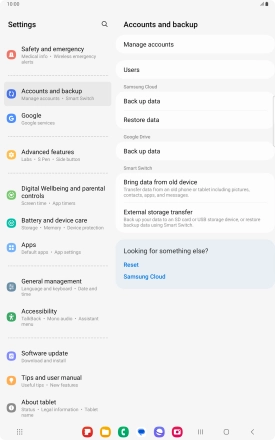
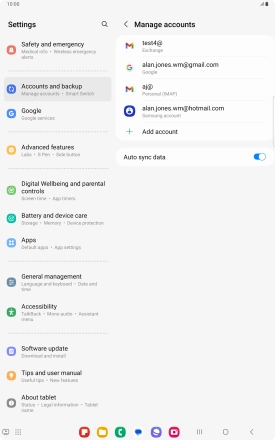
Press Manage accounts.
![](http://wmstatic.global.ssl.fastly.net/ml/7120724-f-22fe2c4f-55e9-40d3-820a-e121625c9e3a.png?width=276&height=440)
2 Turn automatic synchronisation of content on or off
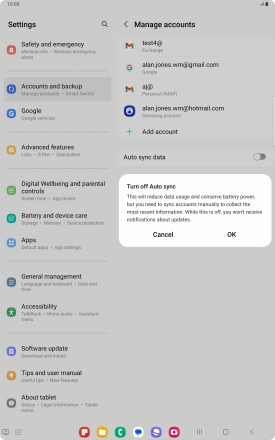
Press the indicator next to "Auto sync data" to turn the function on or off.
![](http://wmstatic.global.ssl.fastly.net/ml/7120724-f-4076380a-cb08-4ed0-90ae-7a3e385237d2.png?width=276&height=440)
Press OK.
![](http://wmstatic.global.ssl.fastly.net/ml/7120724-f-9c1a1177-88a8-4b10-ab2b-7f2894de0bd1.png?width=276&height=440)
3 Return to the home screen
Press the Home key to return to the home screen.
![](http://wmstatic.global.ssl.fastly.net/ml/7120724-f-4076380a-cb08-4ed0-90ae-7a3e385237d2.png?width=276&height=440)