Xiaomi Mi 10T Lite


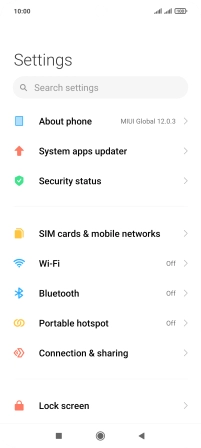
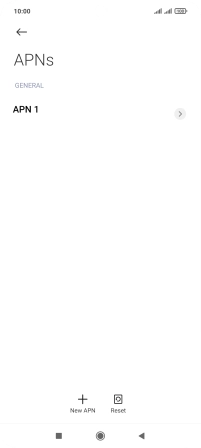
Find "Access point names"
Press Settings.


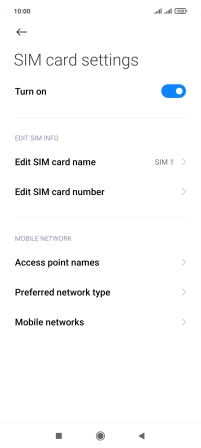
Find "Access point names"
Press SIM cards & mobile networks.


Find "Access point names"
Press the required SIM.


Find "Access point names"
Press Access point names.


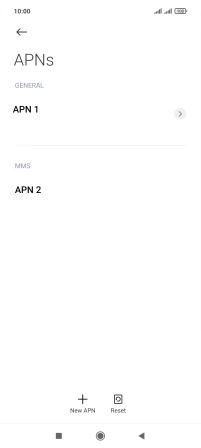
Create new data connection
Press New APN.


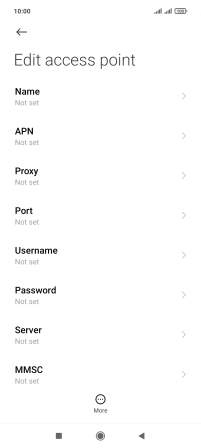
Enter a name for the connection
Press Name.


Enter a name for the connection
Key in Vodafone MMS and press OK.
Enter APN
Press APN.


Enter APN
Key in wap.vodafone.co.uk and press OK.
Enter username
Press Username.


Enter username
Key in wap and press OK.
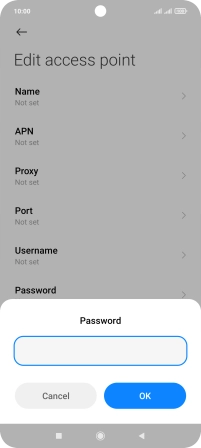
Enter password
Press Password.


Enter password
Key in wap and press OK.
Enter picture messaging server
Press MMSC.


Enter picture messaging server
Key in http://mms.vodafone.co.uk/servlets/mms and press OK.


Enter IP address
Press MMS proxy.


Enter IP address
Key in 212.183.137.012 and press OK.
Enter port number
Press MMS port.


Enter port number
Key in 8799 and press OK.
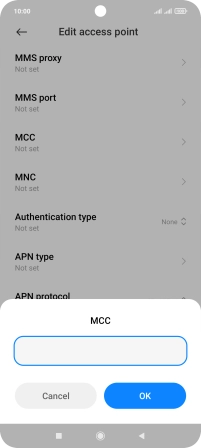
Enter country code
Press MCC.


Enter country code
Key in 234 and press OK.
Enter network code
Press MNC.


Enter network code
Key in 15 and press OK.
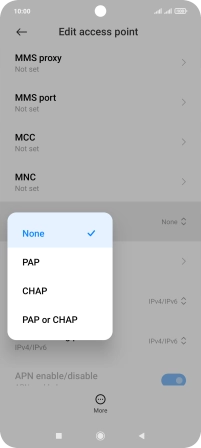
Select authentication type
Press Authentication type.


Select authentication type
Press None.
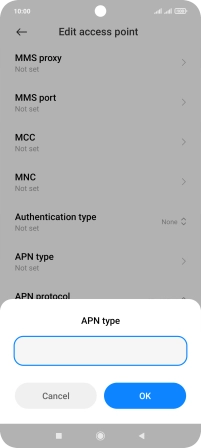
Enter APN type
Press APN type.


Enter APN type
Key in mms and press OK.
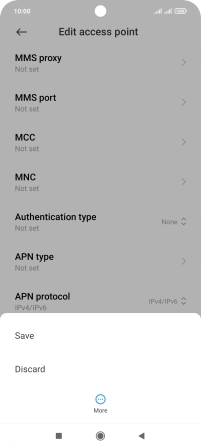
Save data connection
Press More.


Save data connection
Press Save.


Return to the home screen
Press the Home key to return to the home screen.
1 Find "Access point names"

2 Create new data connection
3 Enter a name for the connection

4 Enter APN

5 Enter username

6 Enter password
7 Enter picture messaging server

8 Enter IP address

9 Enter port number

10 Enter country code
11 Enter network code

12 Select authentication type
13 Enter APN type
14 Save data connection
15 Return to the home screen