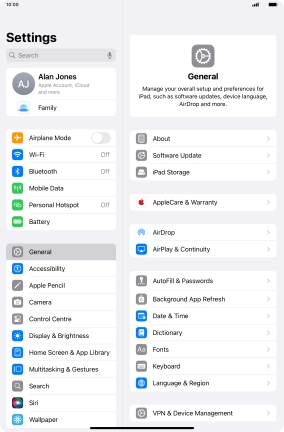
1. Find "Use QR Code"
Press Settings.
![](http://wmstatic.global.ssl.fastly.net/ml/7070225-f-4722e7ae-b85b-4c73-9deb-54d0b6ce906f.png?width=284&height=434)
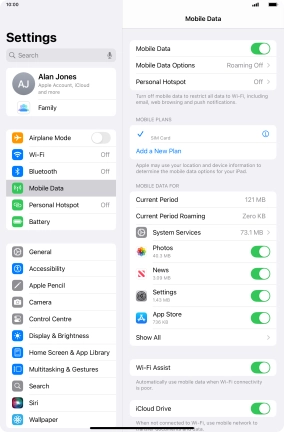
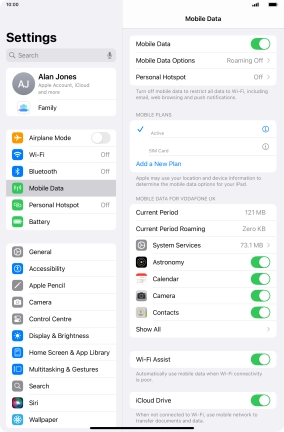
Press Mobile Data.
![](http://wmstatic.global.ssl.fastly.net/ml/7070225-f-203f93c0-864c-4a79-b18e-c7bc18c11041.png?width=284&height=434)
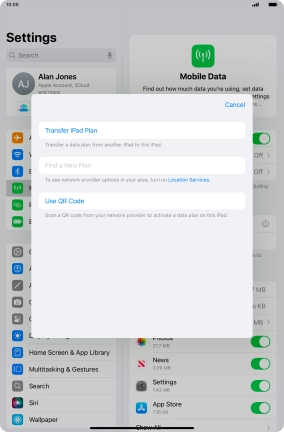
Press Add a New Plan.
![](http://wmstatic.global.ssl.fastly.net/ml/7070225-f-7c0c4877-6334-43f1-a980-c8643fabcb23.png?width=284&height=434)
Press Use QR Code.
![](http://wmstatic.global.ssl.fastly.net/ml/7070225-f-e5cb203f-f2a4-45b7-914b-f1944db0d87d.png?width=284&height=434)
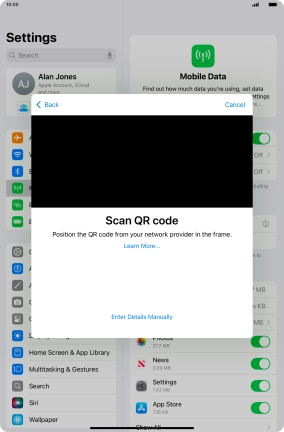
2. Scan QR code
Place the QR code you've received inside the tablet camera frame to scan the code. If you’ve deleted your eSIM, you can re-add it using your existing QR code. If you’re having problems, see our FAQ.
![](http://wmstatic.global.ssl.fastly.net/ml/7070225-f-12bfeb68-6d6c-479b-9ea4-c6a7b78ffcb1.png?width=284&height=434)
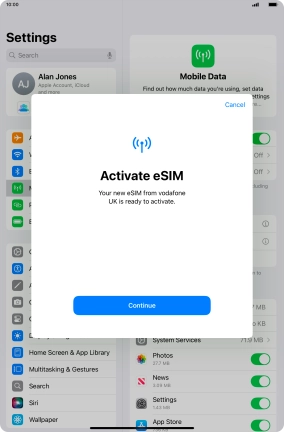
3. Activate eSIM
Press Continue.
![](http://wmstatic.global.ssl.fastly.net/ml/7070225-f-cd7e146d-957b-4afc-a7b1-7dcad5e83ff6.png?width=284&height=434)
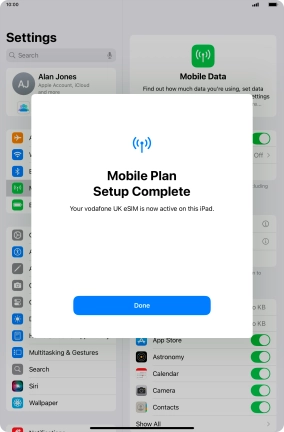
Press Done.
![](http://wmstatic.global.ssl.fastly.net/ml/7070225-f-2b2ca804-2b3e-4c86-9ff2-15709c16edec.png?width=284&height=434)
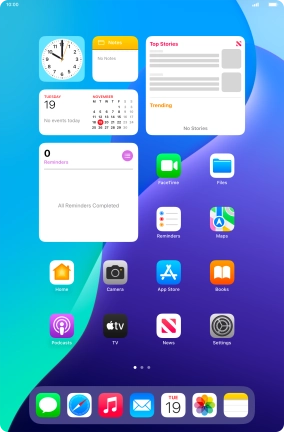
4. Return to the home screen
Slide your finger upwards starting from the bottom of the screen to return to the home screen.
![](http://wmstatic.global.ssl.fastly.net/ml/7070225-f-9cb64189-eb7b-4a93-81b1-6cefed17ffbb.png?width=284&height=434)