![Apple iPhone 16 Plus](http://wmstatic.global.ssl.fastly.net/ml/7270924-f-3ef29b42-6a40-4864-ab36-cf0a490a6874.png?width=150&height=320)
Apple iPhone 16 Plus
iOS 18
1. Create contact
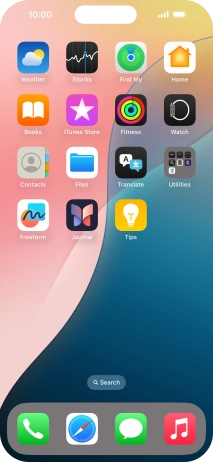
Press Contacts.
![](http://wmstatic.global.ssl.fastly.net/ml/7270924-f-e62f75f8-5f0d-4e49-bdfe-c6ed8606a79b.png?width=214&height=462)
Press the new contact icon.
![](http://wmstatic.global.ssl.fastly.net/ml/7270924-f-8aab1bba-0828-4795-9873-859925308d10.png?width=214&height=462)
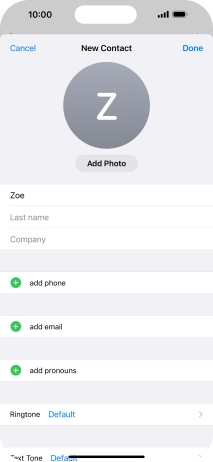
2. Enter name
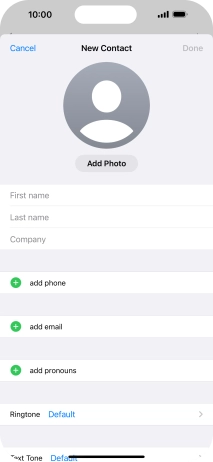
Press First name and key in the first name.
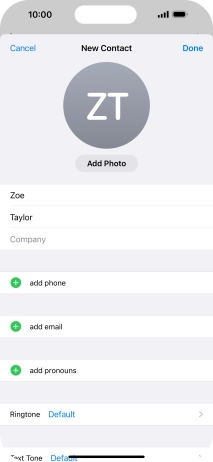
![](http://wmstatic.global.ssl.fastly.net/ml/7270924-f-49ad3568-ac08-4415-bc92-4fba780f088e.png?width=214&height=462)
Press Last name and key in the last name.
![](http://wmstatic.global.ssl.fastly.net/ml/7270924-f-bfd744db-67d4-446c-844b-d2be9bb09c3b.png?width=214&height=462)
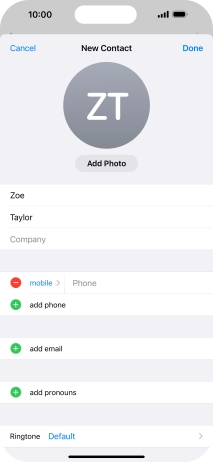
3. Enter phone number
Press add phone.
![](http://wmstatic.global.ssl.fastly.net/ml/7270924-f-a8fce2b9-6469-4011-b3fc-30aa70fc553d.png?width=214&height=462)
Press Phone and key in the required phone number.
Follow the instructions on the screen to add more information such as an email address and a personal ring tone.
![](http://wmstatic.global.ssl.fastly.net/ml/7270924-f-132ee287-1775-4bb4-b69f-ce7f5aed0dfd.png?width=214&height=462)
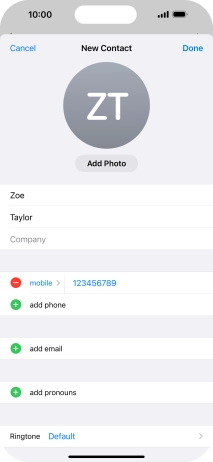
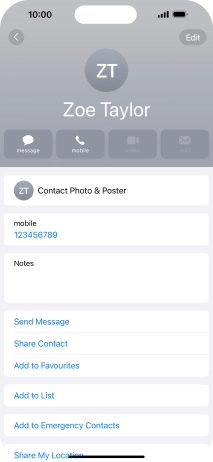
4. Save contact
Press Done.
![](http://wmstatic.global.ssl.fastly.net/ml/7270924-f-f7206f86-817c-4f04-a896-37edfe79c5a5.png?width=214&height=462)
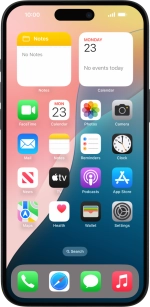
5. Return to the home screen
Slide your finger upwards starting from the bottom of the screen to return to the home screen.
![](http://wmstatic.global.ssl.fastly.net/ml/7270924-f-97cf5b74-1d8c-43ab-9fa9-bf15e261b803.png?width=214&height=462)