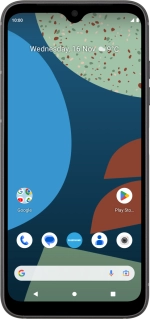
![FAIRPHONE Fairphone 4](http://wmstatic.global.ssl.fastly.net/ml/7070823-f-842a8f4c-ca94-4223-afa4-252e50c59ad8.png?width=150&height=320)
FAIRPHONE Fairphone 4
Android 11.0
1 Find "Start chat"
Press the message icon.
![](http://wmstatic.global.ssl.fastly.net/ml/7070823-f-ccb093df-1600-4ad1-9227-97bed8815943.png?width=200&height=432)
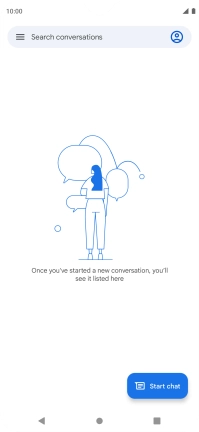
Press Start chat.
![](http://wmstatic.global.ssl.fastly.net/ml/7070823-f-28f912a7-bb63-47ab-97e3-39a622355135.png?width=200&height=432)
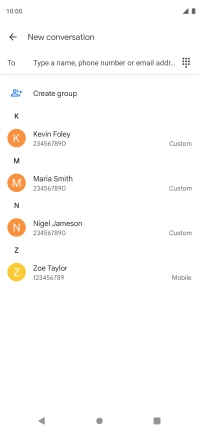
2 Select recipient
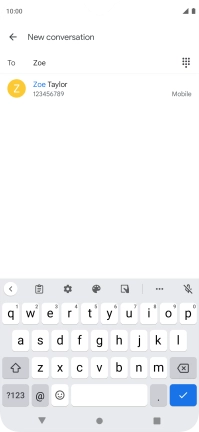
Press the field next to "To" and key in the first letters of the recipient's name.
![](http://wmstatic.global.ssl.fastly.net/ml/7070823-f-afbe4774-ca8e-4169-8dfd-1256e70c5e29.png?width=200&height=432)
Press the required contact.
![](http://wmstatic.global.ssl.fastly.net/ml/7070823-f-1d19229c-2f0f-437f-959b-8013e4c12f0f.png?width=200&height=432)
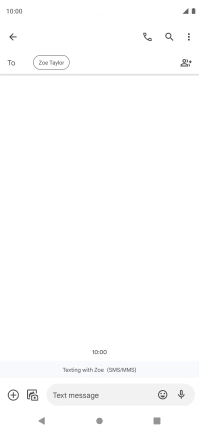
3 Write text
Press the text input field and write the text for your picture message.
![](http://wmstatic.global.ssl.fastly.net/ml/7070823-f-4ba2699f-7b3b-405a-8cc9-cc65b429c6c1.png?width=200&height=432)
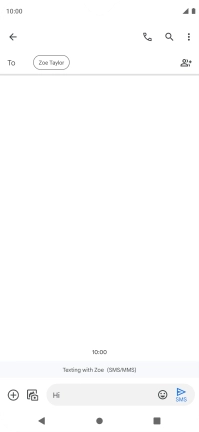
4 Insert picture
Press the attach picture icon.
![](http://wmstatic.global.ssl.fastly.net/ml/7070823-f-d13e80dd-5e95-4c37-bb1e-3a182ad23239.png?width=200&height=432)
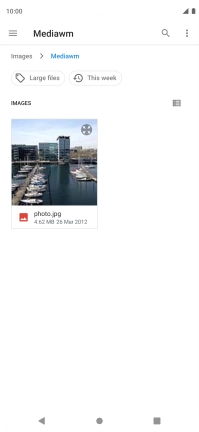
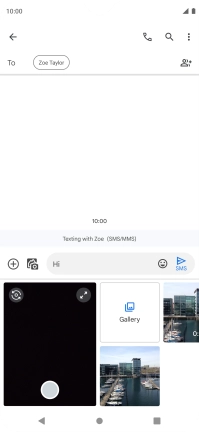
Press Gallery and go to the required folder.
![](http://wmstatic.global.ssl.fastly.net/ml/7070823-f-411facb6-081a-4442-902d-cdfd35e9780e.png?width=200&height=432)
Press the required picture.
![](http://wmstatic.global.ssl.fastly.net/ml/7070823-f-cb9ceb3a-32d2-404f-a3f0-930de89b9861.png?width=200&height=432)
5 Send picture message
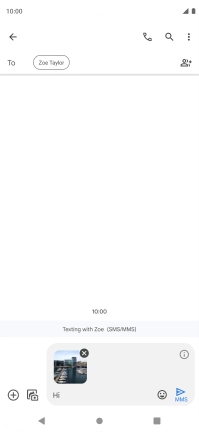
Press the send icon when you've finished your picture message.
![](http://wmstatic.global.ssl.fastly.net/ml/7070823-f-3f89a49d-1eb7-4601-ab5d-f34bdeb5f6ca.png?width=200&height=432)
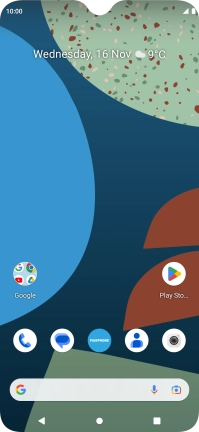
6 Return to the home screen
Press the Home key to return to the home screen.
![](http://wmstatic.global.ssl.fastly.net/ml/7070823-f-28f912a7-bb63-47ab-97e3-39a622355135.png?width=200&height=432)