
Lenovo Tab M10 Plus (3rd Gen)
Android 13
1. Find "Wi-Fi hotspot"
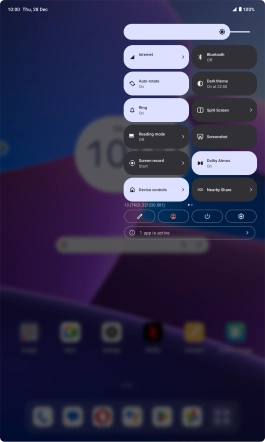
Slide your finger downwards starting from the top right side of the screen.

Press the settings icon.
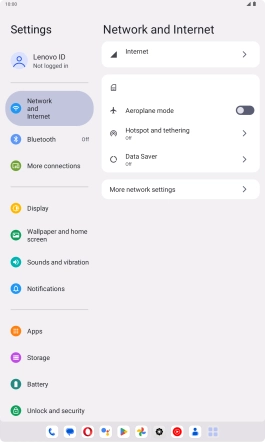
Press Network and Internet.
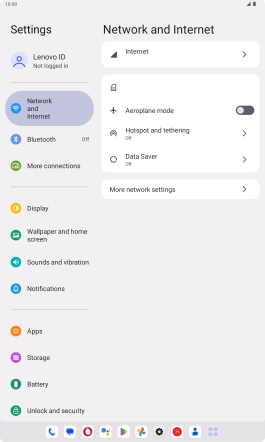
Press Hotspot and tethering.
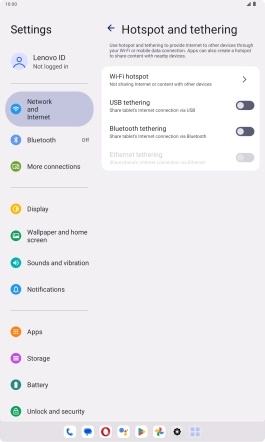
Press Wi-Fi hotspot.
2. Select Wi-Fi hotspot settings
Press Hotspot name and key in the required name for the Wi-Fi hotspot.
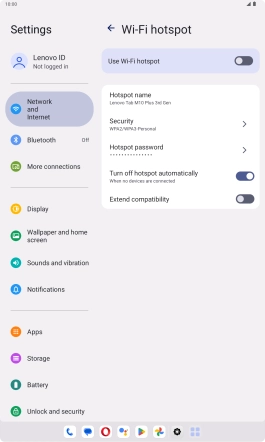
Press OK.
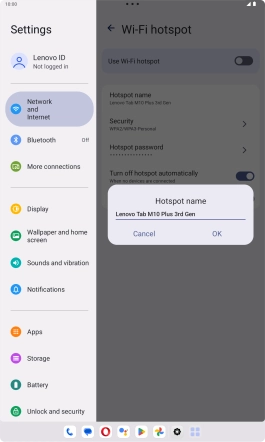
Press Security.

Press WPA3-Personal to password protect your Wi-Fi hotspot.
The password prevents others from accessing your Wi-Fi hotspot without your approval.
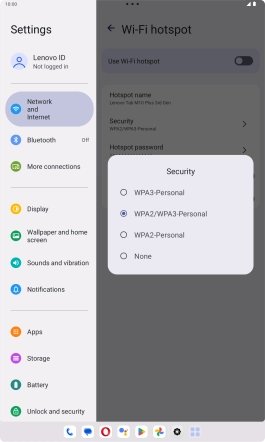
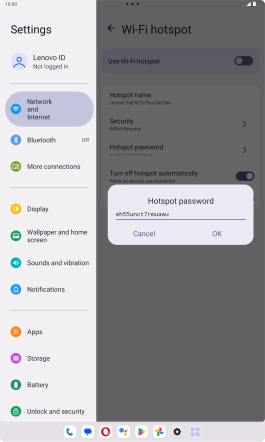
Press Hotspot password and key in the required password.
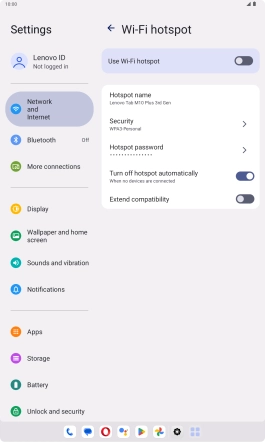
Press OK.
3. Turn on Wi-Fi hotspot
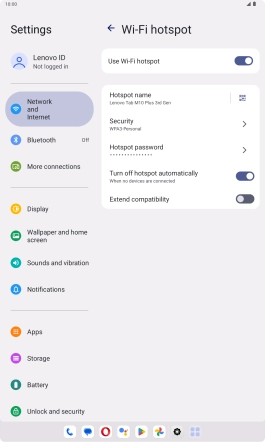
Press the indicator next to "Use Wi-Fi hotspot" to turn on the function.

4. Return to the home screen
Slide your finger upwards starting from the bottom of the screen to return to the home screen.
5. Establish connection to Wi-Fi hotspot from another device
Turn on Wi-Fi on the other device.
Find the list of available Wi-Fi networks and select your own Wi-Fi hotspot.
Key in the password for your Wi-Fi hotspot and establish the connection.
When the connection is established, you can access the internet from the other device.
Find the list of available Wi-Fi networks and select your own Wi-Fi hotspot.
Key in the password for your Wi-Fi hotspot and establish the connection.
When the connection is established, you can access the internet from the other device.


