![Motorola razr 40 ultra](http://wmstatic.global.ssl.fastly.net/ml/7151223-f-9a697841-dc19-48a8-bac8-d774a5b6e40a.png?width=150&height=320)
Motorola razr 40 ultra
Android 13
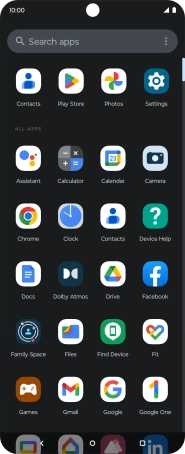
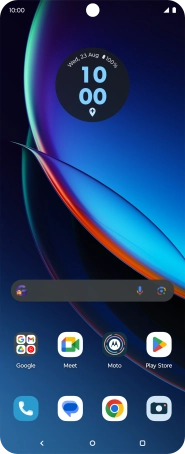
1. Find "Contacts"
Slide your finger upwards on the screen.
![](http://wmstatic.global.ssl.fastly.net/ml/7151223-f-5e300eec-2cb0-4282-b24b-3ee7549bb307.png?width=186&height=454)
Press Contacts.
![](http://wmstatic.global.ssl.fastly.net/ml/7151223-f-692c991b-c763-4e1f-8b73-6a3ec8f92d98.png?width=186&height=454)
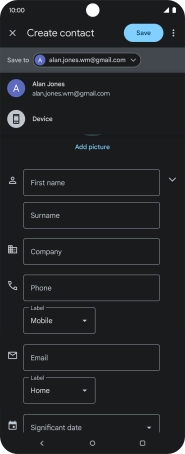
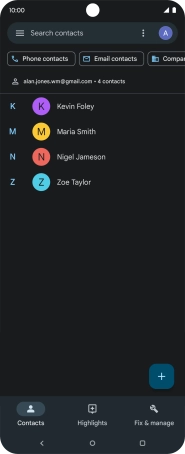
2. Create contact
Press the new contact icon.
![](http://wmstatic.global.ssl.fastly.net/ml/7151223-f-990c1152-0a7d-47e8-8f7c-92e33f485fc0.png?width=186&height=454)
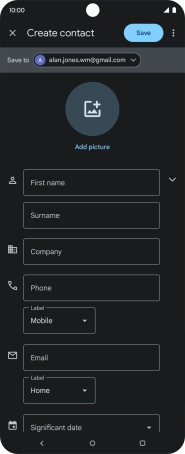
3. Select address book
Press the drop down list next to "Save to".
![](http://wmstatic.global.ssl.fastly.net/ml/7151223-f-5bee3bb6-aa9b-4bdb-98d5-e5e137c1bfc7.png?width=186&height=454)
Press the required Google account.
![](http://wmstatic.global.ssl.fastly.net/ml/7151223-f-e74e4681-9016-4339-ad75-a5c63e6d198c.png?width=186&height=454)
4. Enter first name
Press First name and key in the first name.
![](http://wmstatic.global.ssl.fastly.net/ml/7151223-f-5bee3bb6-aa9b-4bdb-98d5-e5e137c1bfc7.png?width=186&height=454)
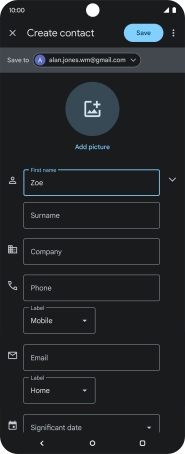
5. Enter last name
Press Surname and key in the last name.
![](http://wmstatic.global.ssl.fastly.net/ml/7151223-f-8991594b-737a-413d-b3c3-3fefe862a7cc.png?width=186&height=454)
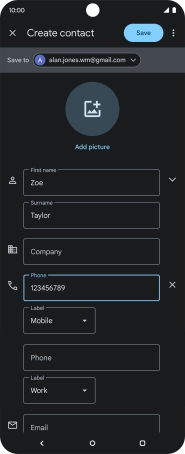
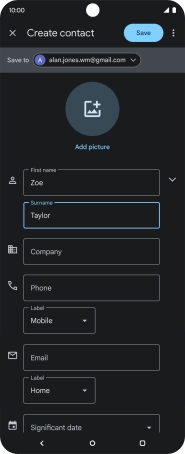
6. Enter phone number
Press Phone and key in the phone number.
Follow the instructions on the screen to add more information such as an email address and a personal ring tone.
![](http://wmstatic.global.ssl.fastly.net/ml/7151223-f-e32b40f2-9bda-4be4-a9c8-5852a8351487.png?width=186&height=454)
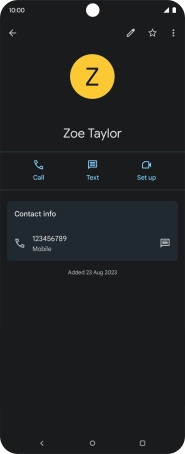
7. Save contact
Press Save.
![](http://wmstatic.global.ssl.fastly.net/ml/7151223-f-a492598e-b1c7-4779-bdf6-2075dfb74b63.png?width=186&height=454)
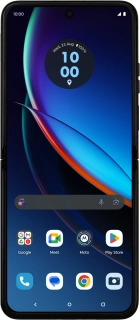
8. Return to the home screen
Press the Home key to return to the home screen.
![](http://wmstatic.global.ssl.fastly.net/ml/7151223-f-e06392dc-bb45-495b-a085-0b372b436551.png?width=186&height=454)