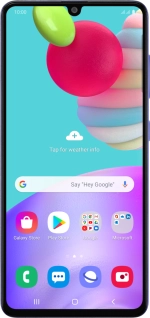
![Samsung Galaxy A41](http://wmstatic.global.ssl.fastly.net/ml/7220224-f-013296dd-db0f-4966-99e1-e2e31cf9a1eb.png?width=150&height=320)
Samsung Galaxy A41
Android 10.0
1. Find "Accounts"
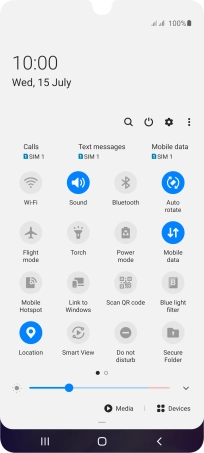
Slide two fingers downwards starting from the top of the screen.
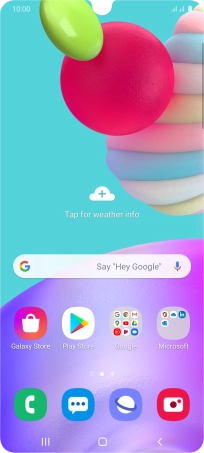
![](http://wmstatic.global.ssl.fastly.net/ml/7220224-f-4bffd78c-bfa5-48e7-ae81-d552da8b5a8a.png?width=204&height=456)
Press the settings icon.
![](http://wmstatic.global.ssl.fastly.net/ml/7220224-f-8c1660ec-ec6f-4dfe-b4ac-4862760abe3f.png?width=204&height=456)
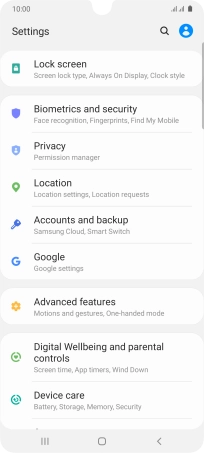
Press Accounts and backup.
![](http://wmstatic.global.ssl.fastly.net/ml/7220224-f-a69966ef-d578-4050-8941-6f380d55baa6.png?width=204&height=456)
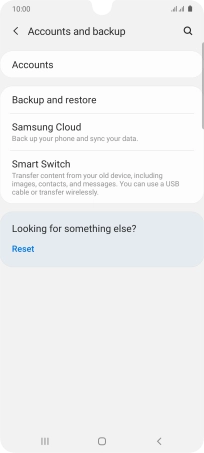
Press Accounts.
![](http://wmstatic.global.ssl.fastly.net/ml/7220224-f-bdb97a73-04a9-41d2-bd61-ad491e03ae91.png?width=204&height=456)
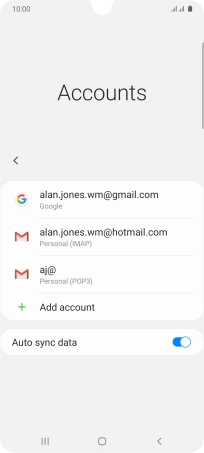
2. Turn automatic synchronisation of content on or off
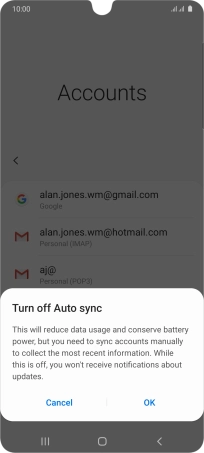
Press the indicator next to "Auto sync data" to turn the function on or off.
![](http://wmstatic.global.ssl.fastly.net/ml/7220224-f-82a72d3e-f4eb-448f-9b74-37ffb0728c3c.png?width=204&height=456)
Press OK.
![](http://wmstatic.global.ssl.fastly.net/ml/7220224-f-8aef04d4-1639-4a36-b14e-d65dfe3afb35.png?width=204&height=456)
3. Return to the home screen
Press the Home key to return to the home screen.
![](http://wmstatic.global.ssl.fastly.net/ml/7220224-f-82a72d3e-f4eb-448f-9b74-37ffb0728c3c.png?width=204&height=456)