![Samsung Galaxy A53 5G](http://wmstatic.global.ssl.fastly.net/ml/7151223-f-c22b8300-5a30-48e5-9be1-377232e210a2.png?width=150&height=320)
Samsung Galaxy A53 5G
Android 12.0
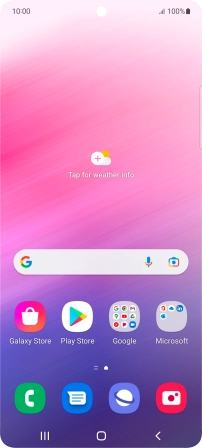
1 Find "Manage accounts"
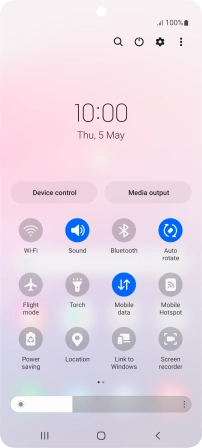
Slide two fingers downwards starting from the top of the screen.
![](http://wmstatic.global.ssl.fastly.net/ml/7151223-f-6ceee3b6-3165-44ad-8b5f-25133a2d59f0.png?width=202&height=452)
Press the settings icon.
![](http://wmstatic.global.ssl.fastly.net/ml/7151223-f-8d79b9d9-337c-4fc8-af1a-cc57dad8ff9f.png?width=202&height=452)
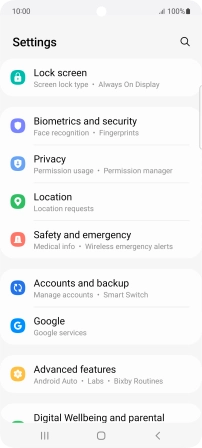
Press Accounts and backup.
![](http://wmstatic.global.ssl.fastly.net/ml/7151223-f-169bb816-c921-427b-8dcd-e9f233f2e56d.png?width=202&height=452)
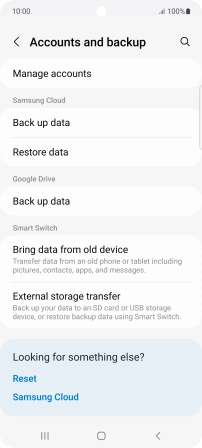
Press Manage accounts.
![](http://wmstatic.global.ssl.fastly.net/ml/7151223-f-00dcd983-042d-4e71-8393-ce10e35c8bb9.png?width=202&height=452)
2 Turn automatic synchronisation of content on or off
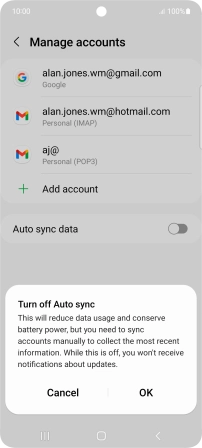
Press the indicator next to "Auto sync data" to turn the function on or off.
![](http://wmstatic.global.ssl.fastly.net/ml/7151223-f-52b4e456-30e6-4d95-a880-d0bc579e9b8b.png?width=202&height=452)
Press OK.
![](http://wmstatic.global.ssl.fastly.net/ml/7151223-f-9261f72f-d4b9-4c6e-bcf6-00fb5dba159e.png?width=202&height=452)
3 Return to the home screen
Press the Home key to return to the home screen.
![](http://wmstatic.global.ssl.fastly.net/ml/7151223-f-52b4e456-30e6-4d95-a880-d0bc579e9b8b.png?width=202&height=452)