![Samsung Galaxy Tab A9](http://wmstatic.global.ssl.fastly.net/ml/7190624-f-b5afd3c2-4456-4bd4-be1b-e98e39f6d391.png?width=150&height=320)
Samsung Galaxy Tab A9
Android 14
1. Find "Manage contacts"
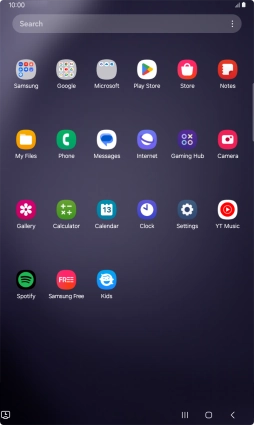
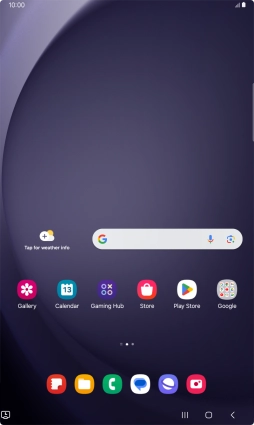
Slide your finger upwards on the screen.
![](http://wmstatic.global.ssl.fastly.net/ml/7190624-f-8ce9b2aa-a04d-45d3-b131-ee38b5221437.png?width=254&height=428)
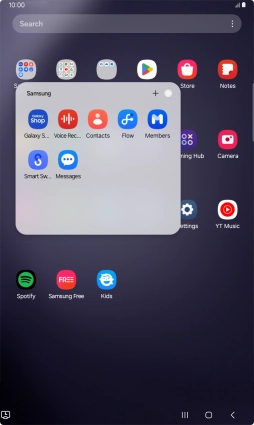
Press Samsung.
![](http://wmstatic.global.ssl.fastly.net/ml/7190624-f-40f97314-e1f8-4120-8542-e15e5a02616b.png?width=254&height=428)
Press Contacts.
![](http://wmstatic.global.ssl.fastly.net/ml/7190624-f-2f1646c5-e12c-4dfd-898d-abc26cafc45e.png?width=254&height=428)
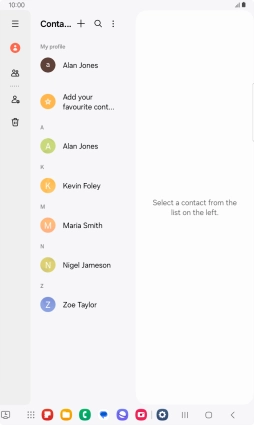
Press the menu icon.
![](http://wmstatic.global.ssl.fastly.net/ml/7190624-f-d8a4f72b-453c-49b8-87f1-4c14e2cbafe4.png?width=254&height=428)
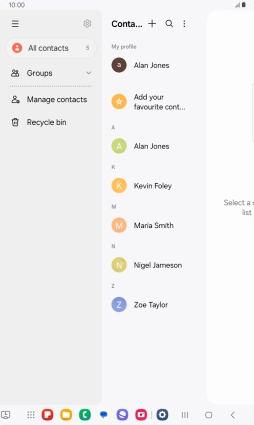
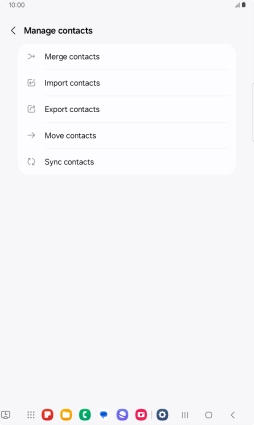
Press Manage contacts.
![](http://wmstatic.global.ssl.fastly.net/ml/7190624-f-2155c050-366c-43e1-8bd0-62ff43bed084.png?width=254&height=428)
2. Copy contacts from your SIM to your Google account
Press Import contacts.
![](http://wmstatic.global.ssl.fastly.net/ml/7190624-f-b29d3d66-6b25-4e74-a0a2-d793114542dd.png?width=254&height=428)
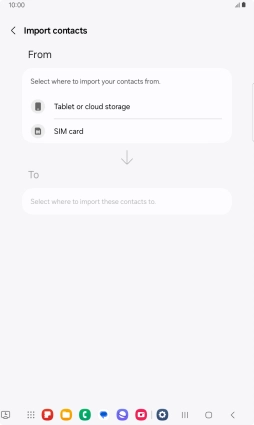
Press the name of the SIM.
![](http://wmstatic.global.ssl.fastly.net/ml/7190624-f-5153808f-1cef-430d-af5f-bfcd3278446e.png?width=254&height=428)
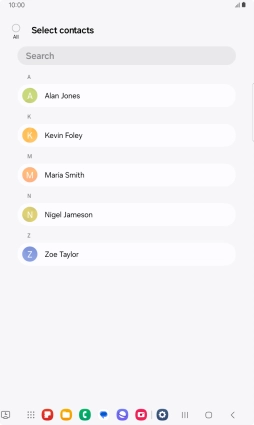
Press the field above "All".
![](http://wmstatic.global.ssl.fastly.net/ml/7190624-f-3e814b06-e23b-4e26-95f3-55ebc0a19470.png?width=254&height=428)
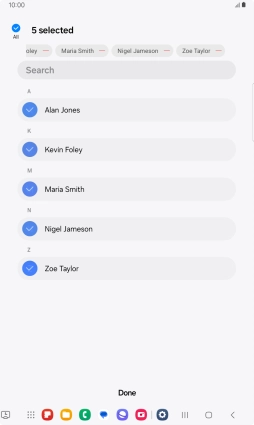
Press Done.
![](http://wmstatic.global.ssl.fastly.net/ml/7190624-f-9fa99c5b-6168-4bf2-920a-f511990349bd.png?width=254&height=428)
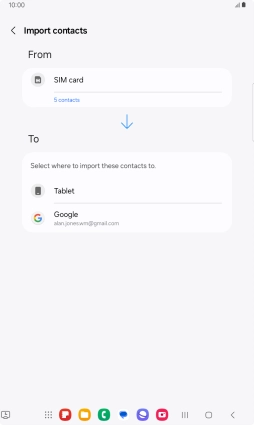
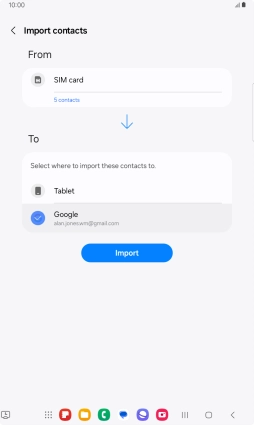
Press the required Google account.
![](http://wmstatic.global.ssl.fastly.net/ml/7190624-f-c80093fa-778a-499e-9556-35670a335a04.png?width=254&height=428)
Press Import.
![](http://wmstatic.global.ssl.fastly.net/ml/7190624-f-84ec882a-cf30-4643-8962-a4c63c2e8d8f.png?width=254&height=428)
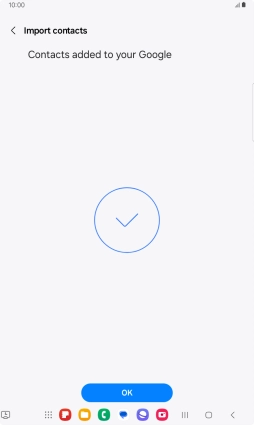
Press OK.
![](http://wmstatic.global.ssl.fastly.net/ml/7190624-f-ef04333a-459e-47fd-aa1e-363d1d95ec81.png?width=254&height=428)
3. Copy contacts from your Google account to your SIM
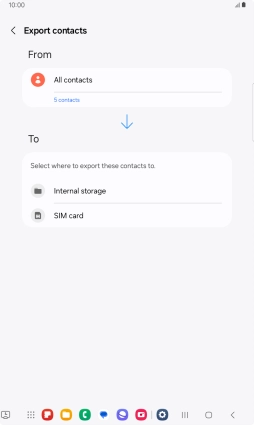
Press Export contacts.
![](http://wmstatic.global.ssl.fastly.net/ml/7190624-f-b29d3d66-6b25-4e74-a0a2-d793114542dd.png?width=254&height=428)
Press the name of the SIM.
![](http://wmstatic.global.ssl.fastly.net/ml/7190624-f-6dd05f66-8e0d-4645-9749-c3ba4571c863.png?width=254&height=428)
Press the field above "All".
![](http://wmstatic.global.ssl.fastly.net/ml/7190624-f-7eae6fdf-a72f-4c56-9221-6b0ad70e2248.png?width=254&height=428)
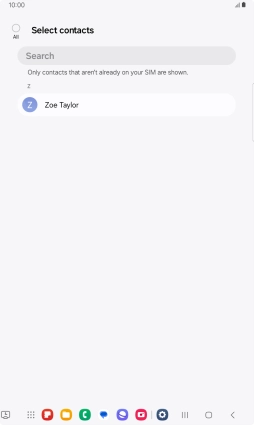
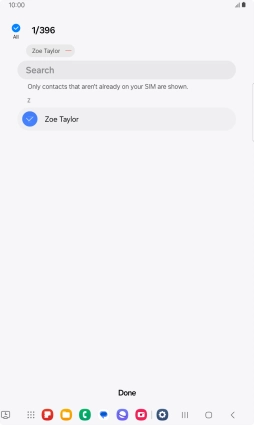
Press Done.
![](http://wmstatic.global.ssl.fastly.net/ml/7190624-f-c5ee1aa9-e4f5-4e3b-b550-65a742ca7d04.png?width=254&height=428)
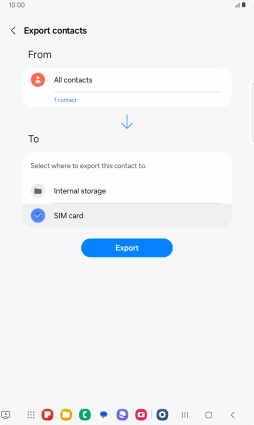
Press Export.
![](http://wmstatic.global.ssl.fastly.net/ml/7190624-f-e6d6bf0e-069e-4990-a8c1-5f2d633c898b.png?width=254&height=428)
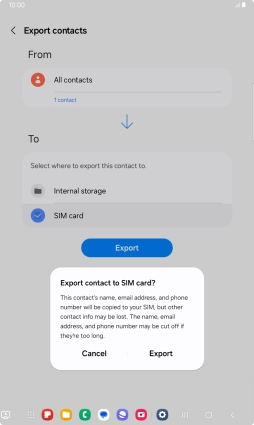
Press Export.
![](http://wmstatic.global.ssl.fastly.net/ml/7190624-f-2449907b-9cbb-4d48-a0c5-f1ceb8c91285.png?width=254&height=428)
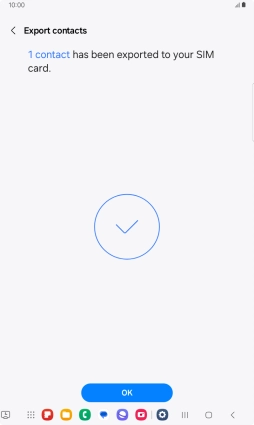
Press OK.
![](http://wmstatic.global.ssl.fastly.net/ml/7190624-f-e03a9fad-8f67-4461-86db-32bf97fb7117.png?width=254&height=428)
4. Return to the home screen
Press the Home key to return to the home screen.
![](http://wmstatic.global.ssl.fastly.net/ml/7190624-f-b29d3d66-6b25-4e74-a0a2-d793114542dd.png?width=254&height=428)