![Samsung Galaxy Tab A9](http://wmstatic.global.ssl.fastly.net/ml/7190624-f-b5afd3c2-4456-4bd4-be1b-e98e39f6d391.png?width=150&height=320)
Samsung Galaxy Tab A9
Android 14
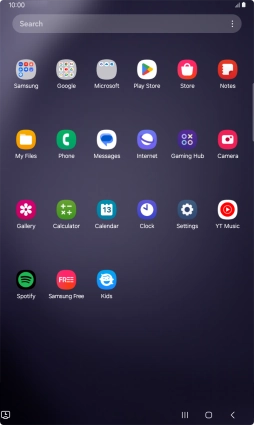
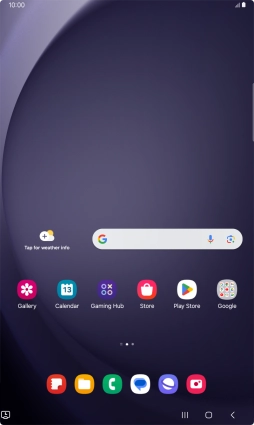
1 Find "Settings"
Slide your finger upwards on the screen.
![](http://wmstatic.global.ssl.fastly.net/ml/7190624-f-8ce9b2aa-a04d-45d3-b131-ee38b5221437.png?width=254&height=428)
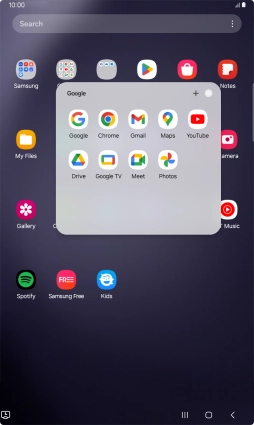
Press Google.
![](http://wmstatic.global.ssl.fastly.net/ml/7190624-f-40f97314-e1f8-4120-8542-e15e5a02616b.png?width=254&height=428)
Press Gmail.
![](http://wmstatic.global.ssl.fastly.net/ml/7190624-f-f6173992-2820-4476-9412-0fba1406c979.png?width=254&height=428)
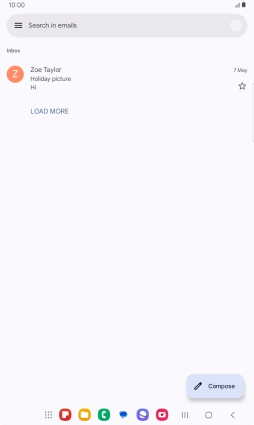
Press the menu icon.
![](http://wmstatic.global.ssl.fastly.net/ml/7190624-f-395e091a-211d-4059-8dc8-3152bae0d652.png?width=254&height=428)
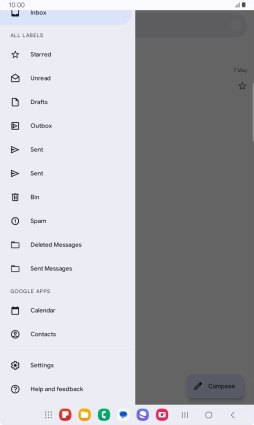
Press Settings.
![](http://wmstatic.global.ssl.fastly.net/ml/7190624-f-9745460c-aa9b-448b-a7b7-cef782003d69.png?width=254&height=428)
2 Create new email account
Press Add account.
![](http://wmstatic.global.ssl.fastly.net/ml/7190624-f-9b96aa6c-0b7f-4087-9bc4-e527184cf330.png?width=254&height=428)
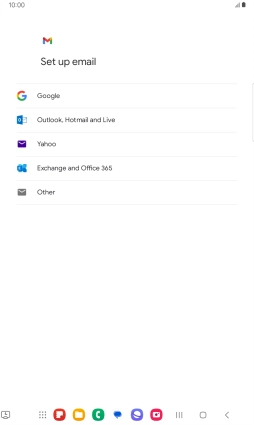
3 Select server type
Press Exchange and Office 365.
![](http://wmstatic.global.ssl.fastly.net/ml/7190624-f-ac681725-a479-4fb5-b19d-93714022174b.png?width=254&height=428)
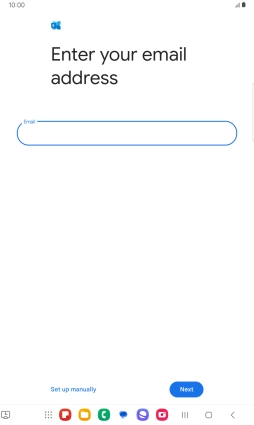
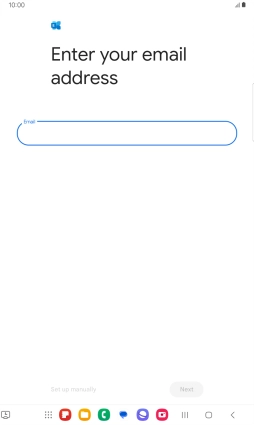
4 Enter email address
Press the field below "Email" and key in your email address.
![](http://wmstatic.global.ssl.fastly.net/ml/7190624-f-1d3c4347-7a8e-4d82-9585-2fc6f593d424.png?width=254&height=428)
Press Next.
![](http://wmstatic.global.ssl.fastly.net/ml/7190624-f-6d291288-1691-4d10-b43a-86ffe52d6e56.png?width=254&height=428)
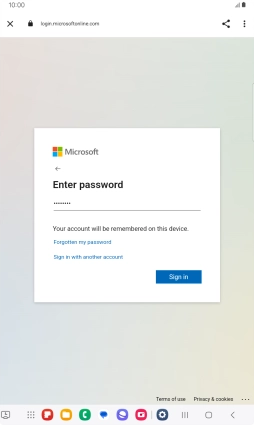
5 Enter password
Press Password and key in the password for your email account.
![](http://wmstatic.global.ssl.fastly.net/ml/7190624-f-6dcfb11d-d3f7-4f79-bc37-54a423f27733.png?width=254&height=428)
Press Sign in.
![](http://wmstatic.global.ssl.fastly.net/ml/7190624-f-2dbeff07-7bf6-48fe-a02b-c12d0ba82f2b.png?width=254&height=428)
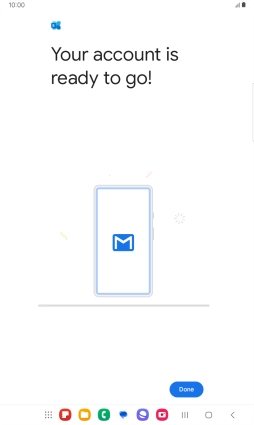
Press Done.
![](http://wmstatic.global.ssl.fastly.net/ml/7190624-f-4978f8e7-0999-4349-83ad-b53a6e1c852b.png?width=254&height=428)
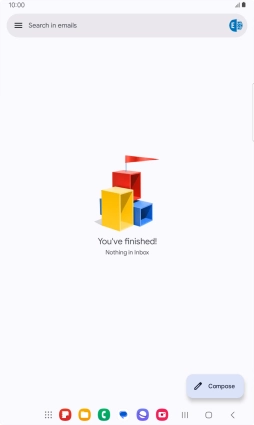
6 Return to the home screen
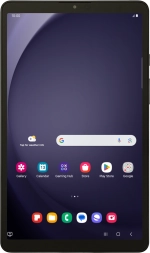
Press the Home key to return to the home screen.
![](http://wmstatic.global.ssl.fastly.net/ml/7190624-f-59a69270-6a0c-4de3-9573-05e2042894ef.png?width=254&height=428)
7 Find "Account settings"
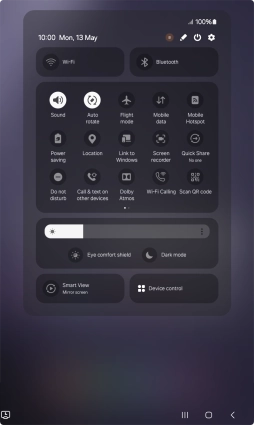
Slide two fingers downwards starting from the top of the screen.
![](http://wmstatic.global.ssl.fastly.net/ml/7190624-f-8ce9b2aa-a04d-45d3-b131-ee38b5221437.png?width=254&height=428)
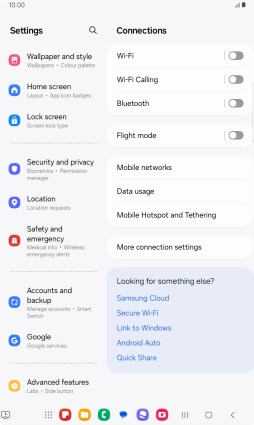
Press the settings icon.
![](http://wmstatic.global.ssl.fastly.net/ml/7190624-f-b91954e5-aa06-4848-b5dc-5be4d260cfa5.png?width=254&height=428)
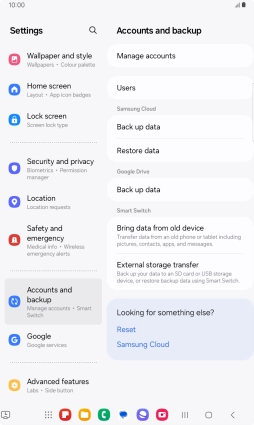
Press Accounts and backup.
![](http://wmstatic.global.ssl.fastly.net/ml/7190624-f-86142685-1a84-48c7-908b-c464ca1d0c86.png?width=254&height=428)
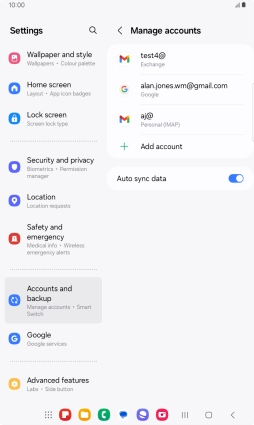
Press Manage accounts.
![](http://wmstatic.global.ssl.fastly.net/ml/7190624-f-5e2a354a-c64d-4a5e-b763-0405f48bdcc5.png?width=254&height=428)
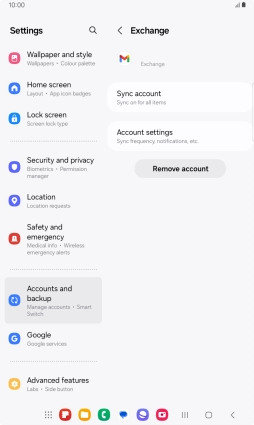
Press the required email account.
![](http://wmstatic.global.ssl.fastly.net/ml/7190624-f-86a259d7-a874-436c-bb4d-05da22e38ba4.png?width=254&height=428)
Press Account settings.
![](http://wmstatic.global.ssl.fastly.net/ml/7190624-f-58c93a65-1f0b-4899-b7e1-53dc2383a1ec.png?width=254&height=428)
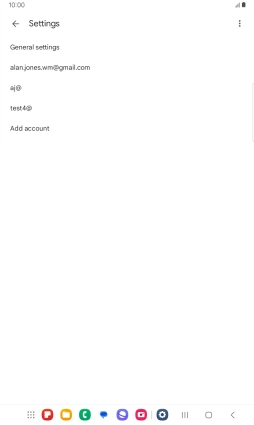
8 Enter email account name
Press the required email account.
![](http://wmstatic.global.ssl.fastly.net/ml/7190624-f-3e8d12ed-a4fb-4956-bb84-0fe8d3fe5eb8.png?width=254&height=428)
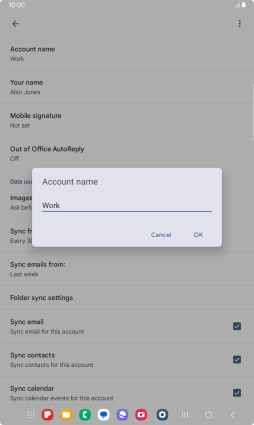
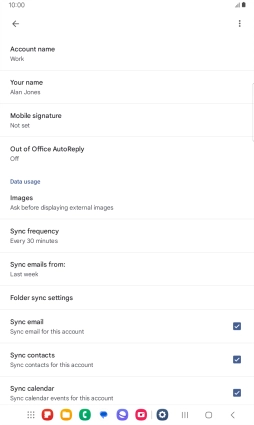
Press Account name and key in the required name.
![](http://wmstatic.global.ssl.fastly.net/ml/7190624-f-4d3fa813-761f-4121-8b4e-987e04c89225.png?width=254&height=428)
Press OK.
![](http://wmstatic.global.ssl.fastly.net/ml/7190624-f-465819db-6163-408b-8230-4f19536b73cf.png?width=254&height=428)
9 Enter sender name
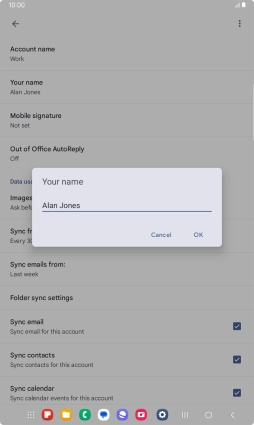
Press Your name and key in the required sender name.
![](http://wmstatic.global.ssl.fastly.net/ml/7190624-f-4d3fa813-761f-4121-8b4e-987e04c89225.png?width=254&height=428)
Press OK.
![](http://wmstatic.global.ssl.fastly.net/ml/7190624-f-4db07036-2521-44aa-9756-f44c793958de.png?width=254&height=428)
10 Select setting for retrieval of new email messages
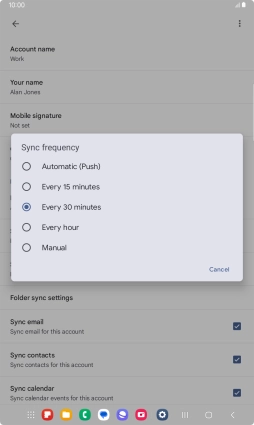
Press Sync frequency.
![](http://wmstatic.global.ssl.fastly.net/ml/7190624-f-4d3fa813-761f-4121-8b4e-987e04c89225.png?width=254&height=428)
Press the required setting.
![](http://wmstatic.global.ssl.fastly.net/ml/7190624-f-0f9e24ad-e8f0-45a0-b6ea-c38ddcd417e7.png?width=254&height=428)
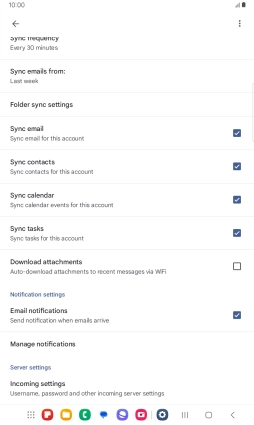
11 Turn on email message synchronisation
Press the field next to "Sync email" to turn on the function.
![](http://wmstatic.global.ssl.fastly.net/ml/7190624-f-737eed3c-0008-47ef-a7d1-11c1ccee0272.png?width=254&height=428)
12 Select data types for synchronisation
Press the fields next to the required data types to turn synchronisation on or off.
![](http://wmstatic.global.ssl.fastly.net/ml/7190624-f-737eed3c-0008-47ef-a7d1-11c1ccee0272.png?width=254&height=428)
13 Turn email message notifications on or off
Press the field next to "Email notifications" to turn the function on or off.
![](http://wmstatic.global.ssl.fastly.net/ml/7190624-f-737eed3c-0008-47ef-a7d1-11c1ccee0272.png?width=254&height=428)
14 Return to the home screen
Press the Home key to return to the home screen.
![](http://wmstatic.global.ssl.fastly.net/ml/7190624-f-737eed3c-0008-47ef-a7d1-11c1ccee0272.png?width=254&height=428)