![Samsung Galaxy Watch5](http://wmstatic.global.ssl.fastly.net/ml/7070624-f-0809ea71-44b9-422c-9a30-f56ccda99d0c.png?width=150&height=320)
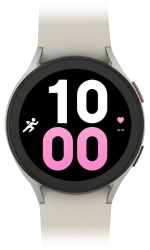
Samsung Galaxy Watch5
Android Wear OS
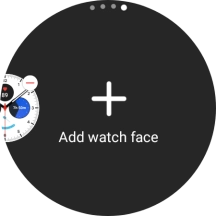
1. Add new watch face
Press and hold the middle of your watch.
![](http://wmstatic.global.ssl.fastly.net/ml/7070624-f-e0f61d6f-1226-4929-9123-343f1f6b2714.png?width=216&height=216)
Slide your finger left on the screen.
![](http://wmstatic.global.ssl.fastly.net/ml/7070624-f-f9b57884-10f6-4e86-af6b-c77b3301de13.png?width=216&height=216)
Press Add watch face.
![](http://wmstatic.global.ssl.fastly.net/ml/7070624-f-306826e0-abbb-448d-84ee-f5510ec57e9b.png?width=216&height=216)
Slide your finger left to see the available watch faces.
![](http://wmstatic.global.ssl.fastly.net/ml/7070624-f-b997db5c-02ea-4486-9a3d-d626b54dc661.png?width=216&height=216)
Press the required watch face to add it.
![](http://wmstatic.global.ssl.fastly.net/ml/7070624-f-b997db5c-02ea-4486-9a3d-d626b54dc661.png?width=216&height=216)
2. Select watch face
Press and hold the middle of your watch.
![](http://wmstatic.global.ssl.fastly.net/ml/7070624-f-e0f61d6f-1226-4929-9123-343f1f6b2714.png?width=216&height=216)
Slide your finger left to see the available watch faces.
![](http://wmstatic.global.ssl.fastly.net/ml/7070624-f-f9b57884-10f6-4e86-af6b-c77b3301de13.png?width=216&height=216)
Press the required watch face.
![](http://wmstatic.global.ssl.fastly.net/ml/7070624-f-b997db5c-02ea-4486-9a3d-d626b54dc661.png?width=216&height=216)
Press the Home key.
![](http://wmstatic.global.ssl.fastly.net/ml/7070624-f-02be018e-fd7c-46cd-bf93-c2d72748ee12.png?width=216&height=216)
3. Personalise watch design
Press and hold the middle of your watch.
![](http://wmstatic.global.ssl.fastly.net/ml/7070624-f-e0f61d6f-1226-4929-9123-343f1f6b2714.png?width=216&height=216)
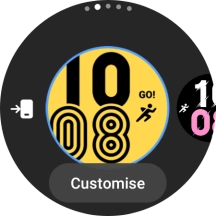
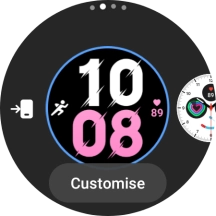
Press Customise.
![](http://wmstatic.global.ssl.fastly.net/ml/7070624-f-f9b57884-10f6-4e86-af6b-c77b3301de13.png?width=216&height=216)
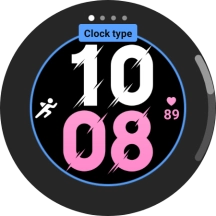
Slide your finger on the screen to change between the different designs.
![](http://wmstatic.global.ssl.fastly.net/ml/7070624-f-6d887b67-bda7-46b7-bbdb-a23679a8ed0e.png?width=216&height=216)
When you've selected the required design, press the Home key.
![](http://wmstatic.global.ssl.fastly.net/ml/7070624-f-6d887b67-bda7-46b7-bbdb-a23679a8ed0e.png?width=216&height=216)
4. Add widget
Slide your finger left on the screen.
![](http://wmstatic.global.ssl.fastly.net/ml/7070624-f-e0f61d6f-1226-4929-9123-343f1f6b2714.png?width=216&height=216)
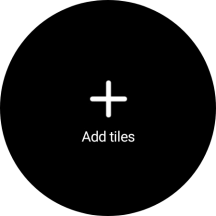
Press Add tiles.
![](http://wmstatic.global.ssl.fastly.net/ml/7070624-f-310378e5-bf52-4415-b8a7-48e75821804b.png?width=216&height=216)
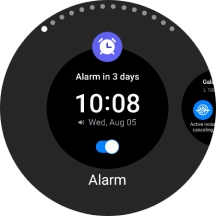
Press the required widget to add it.
![](http://wmstatic.global.ssl.fastly.net/ml/7070624-f-2a98c1fc-32a4-4c6d-8637-0b8b7b576fd7.png?width=216&height=216)
5. Remove widget
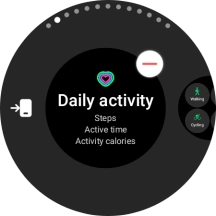
Press and hold the required widget.
![](http://wmstatic.global.ssl.fastly.net/ml/7070624-f-230378d7-bd5f-42d5-8363-f1333e9c9321.png?width=216&height=216)
Press the remove widget icon.
![](http://wmstatic.global.ssl.fastly.net/ml/7070624-f-9e4c9d18-e1fa-43ef-b281-c675a6e04418.png?width=216&height=216)
6. Return to the home screen
Press the Home key to return to the home screen.
![](http://wmstatic.global.ssl.fastly.net/ml/7070624-f-230378d7-bd5f-42d5-8363-f1333e9c9321.png?width=216&height=216)