![Samsung Galaxy Z Fold4](http://wmstatic.global.ssl.fastly.net/ml/7220224-f-e1d216ee-5079-47d4-a89c-0c6b88d6e821.png?width=150&height=320)
Samsung Galaxy Z Fold4
Android 12.0
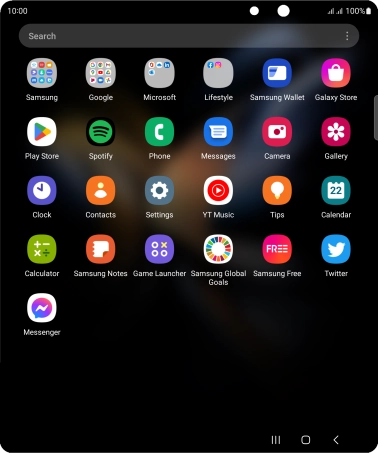
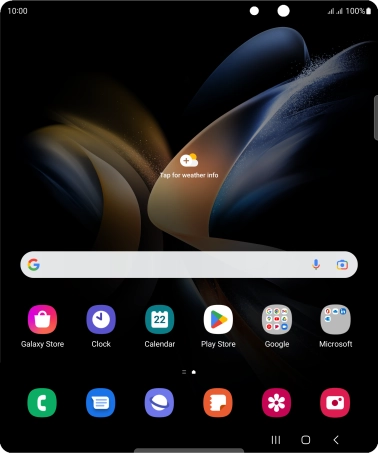
1. Find "Maps"
Slide your finger upwards on the screen.
![](http://wmstatic.global.ssl.fastly.net/ml/7220224-f-3c58a191-ef36-44df-ac40-5e762f4e7176.png?width=378&height=456)
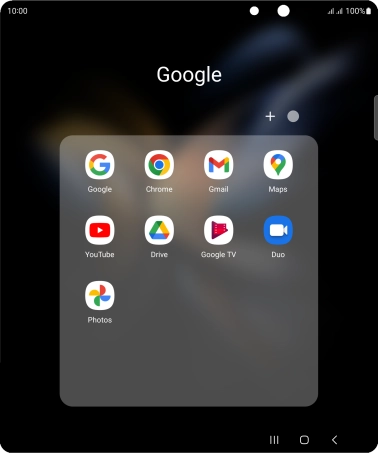
Press Google.
![](http://wmstatic.global.ssl.fastly.net/ml/7220224-f-ec65c7bd-30d3-4f63-8d6d-bdd4ed33a1ec.png?width=378&height=456)
Press Maps.
![](http://wmstatic.global.ssl.fastly.net/ml/7220224-f-e362a2e7-6ca3-4c0f-af21-9e808b1e5f33.png?width=378&height=456)
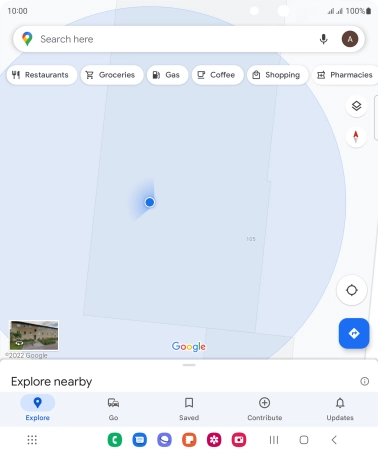
2. Find destination
Press the search field and key in the required destination.
![](http://wmstatic.global.ssl.fastly.net/ml/7220224-f-164d46c4-5978-417d-a9ee-9139f3412e91.png?width=378&height=456)
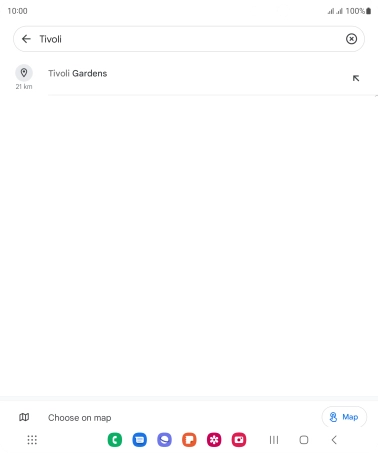
Press the required destination.
Drag two fingers together or apart to zoom in or out.
![](http://wmstatic.global.ssl.fastly.net/ml/7220224-f-4547087d-cd78-4f0a-bfeb-b351a49f737d.png?width=378&height=456)
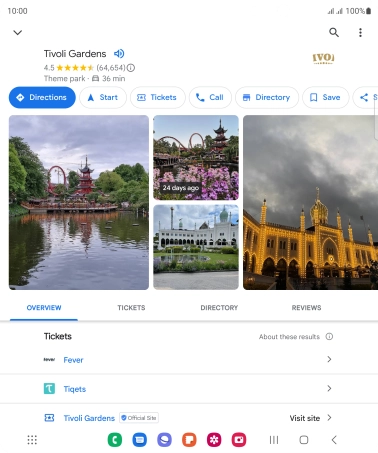
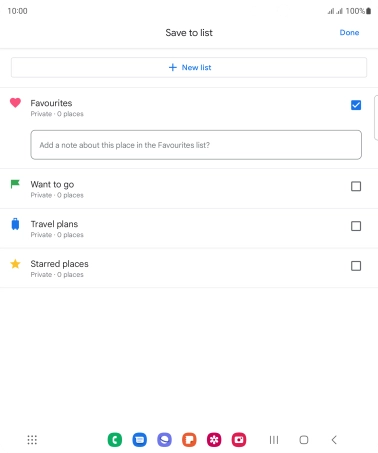
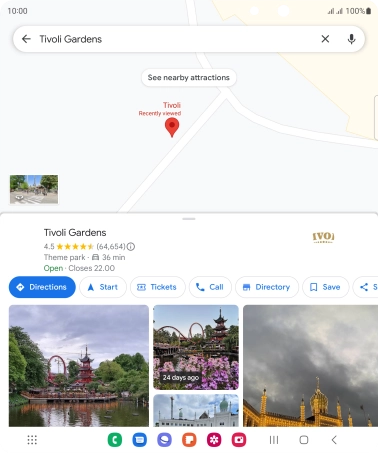
3. Save favourite destination
Press the destination at the bottom of the screen.
![](http://wmstatic.global.ssl.fastly.net/ml/7220224-f-c7e8e900-a538-4a79-a26e-4fcda5495dfb.png?width=378&height=456)
Press Save.
![](http://wmstatic.global.ssl.fastly.net/ml/7220224-f-8a540baa-d193-46da-81e7-874ae53783a9.png?width=378&height=456)
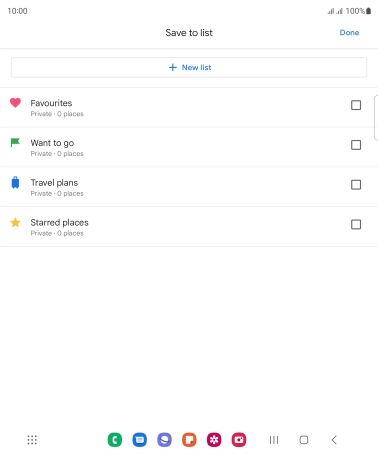
Press the required setting.
![](http://wmstatic.global.ssl.fastly.net/ml/7220224-f-9ee51fc7-1190-466e-88e1-ef55b544d0d7.png?width=378&height=456)
Press Done.
![](http://wmstatic.global.ssl.fastly.net/ml/7220224-f-835c7983-d642-4c20-af5c-94d393a27d0f.png?width=378&height=456)
If you select New list, follow the instructions on the screen to create a new list.
![](http://wmstatic.global.ssl.fastly.net/ml/7220224-f-9ee51fc7-1190-466e-88e1-ef55b544d0d7.png?width=378&height=456)
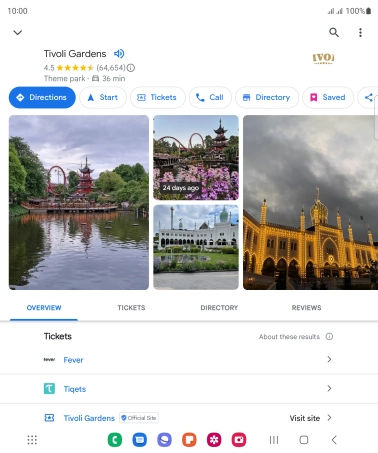
4. Plan route to destination
Press Directions.
![](http://wmstatic.global.ssl.fastly.net/ml/7220224-f-2b812c90-44fb-4839-b9ba-a5ac7c537b52.png?width=378&height=456)
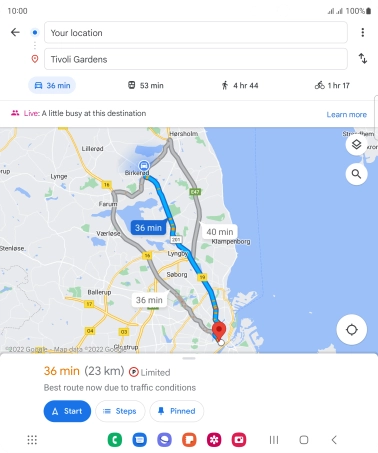
Press the required mode of transportation.
![](http://wmstatic.global.ssl.fastly.net/ml/7220224-f-fe352c7e-358e-465c-ba4b-9bf5a292a714.png?width=378&height=456)
Press the required route.
![](http://wmstatic.global.ssl.fastly.net/ml/7220224-f-fe352c7e-358e-465c-ba4b-9bf5a292a714.png?width=378&height=456)
5. Start GPS navigation
Press Start.
![](http://wmstatic.global.ssl.fastly.net/ml/7220224-f-fe352c7e-358e-465c-ba4b-9bf5a292a714.png?width=378&height=456)
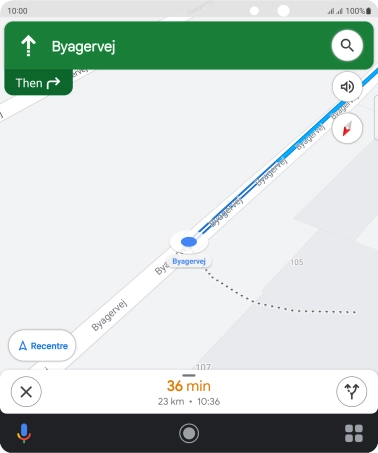
The travel information at the bottom of the screen shows your estimated time of arrival and distance to destination.
![](http://wmstatic.global.ssl.fastly.net/ml/7220224-f-33e5d05c-9c24-410c-8e6a-ec3ca137aaa7.png?width=378&height=456)
6. End GPS navigation
Press the end icon to end navigation.
![](http://wmstatic.global.ssl.fastly.net/ml/7220224-f-33e5d05c-9c24-410c-8e6a-ec3ca137aaa7.png?width=378&height=456)
7. Return to the home screen
Press the Home key to return to the home screen.
![](http://wmstatic.global.ssl.fastly.net/ml/7220224-f-fe352c7e-358e-465c-ba4b-9bf5a292a714.png?width=378&height=456)