![Motorola Moto G50](http://wmstatic.global.ssl.fastly.net/ml/7151223-f-8302073b-ec21-4d75-a3d4-31f23d72a19b.png?width=150&height=320)
Motorola Moto G50
Android 11.0
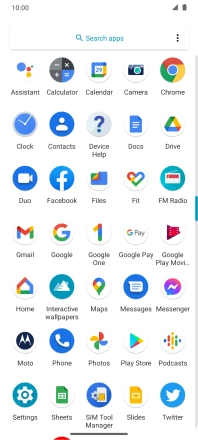
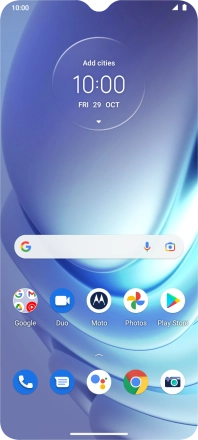
1. Find "Contacts"
Slide your finger upwards on the screen.
![](http://wmstatic.global.ssl.fastly.net/ml/7151223-f-89362757-6514-456c-8a0b-e99500036bfb.png?width=198&height=440)
Press Contacts.
![](http://wmstatic.global.ssl.fastly.net/ml/7151223-f-31389269-b7af-40fb-be02-ee049868a0ce.png?width=198&height=440)
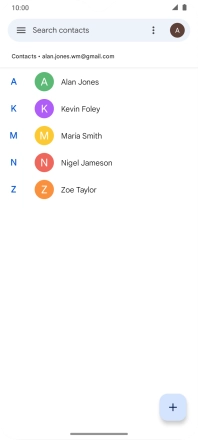
2. Create contact
Press the new contact icon.
![](http://wmstatic.global.ssl.fastly.net/ml/7151223-f-9b0582b5-5165-40d8-af3c-d4f4c61663db.png?width=198&height=440)
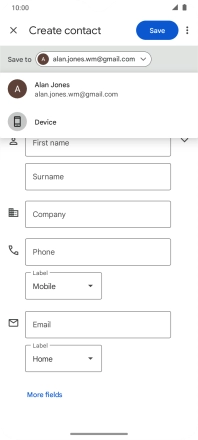
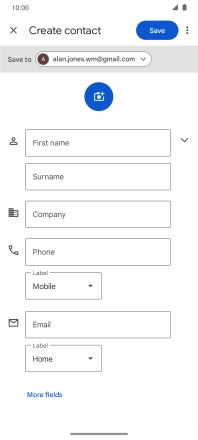
3. Select address book
Press the drop down list next to "Save to".
![](http://wmstatic.global.ssl.fastly.net/ml/7151223-f-8febbaed-cc08-420b-844f-ceebc7f631dc.png?width=198&height=440)
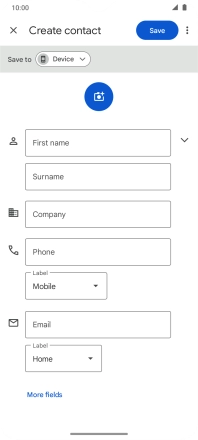
Press Device.
![](http://wmstatic.global.ssl.fastly.net/ml/7151223-f-37ee5258-6828-4940-8656-b5316fbc53b8.png?width=198&height=440)
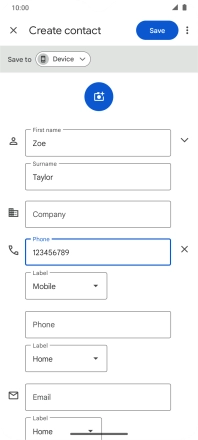
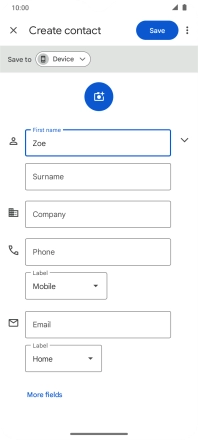
4. Enter first name
Press First name and key in the first name.
![](http://wmstatic.global.ssl.fastly.net/ml/7151223-f-a56da649-144c-408c-8c98-0eca59a282e7.png?width=198&height=440)
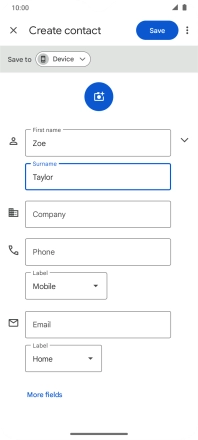
5. Enter last name
Press Surname and key in the last name.
![](http://wmstatic.global.ssl.fastly.net/ml/7151223-f-82998298-8a8e-4ee9-a275-bac916a88774.png?width=198&height=440)
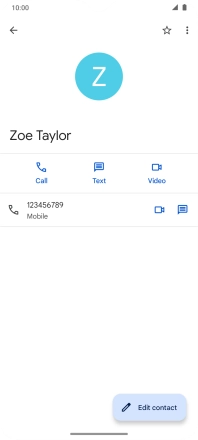
6. Enter phone number
Press Phone and key in the phone number.
Follow the instructions on the screen to add more information such as an email address and a personal ring tone.
![](http://wmstatic.global.ssl.fastly.net/ml/7151223-f-4f7217a7-70fe-41f1-a7ad-72c7b1108b0d.png?width=198&height=440)
7. Save contact
Press Save.
![](http://wmstatic.global.ssl.fastly.net/ml/7151223-f-334607fe-c1ca-44ba-b15a-4c701197452a.png?width=198&height=440)
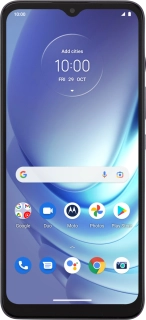
8. Return to the home screen
Slide your finger upwards starting from the bottom of the screen to return to the home screen.
![](http://wmstatic.global.ssl.fastly.net/ml/7151223-f-36092db5-2d2e-47cc-be25-0e92fd01834e.png?width=198&height=440)