![Samsung Galaxy Z Flip5](http://wmstatic.global.ssl.fastly.net/ml/7151223-f-315e48a4-80b8-411f-b0a4-e1b3ec75b24b.png?width=150&height=320)
Samsung Galaxy Z Flip5
Android 13
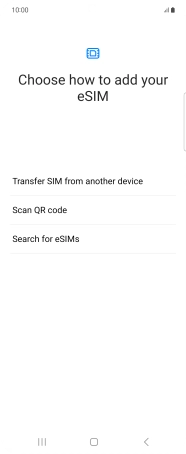
1. Find "Scan QR code"
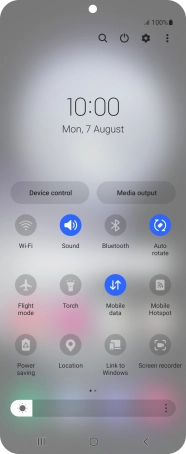
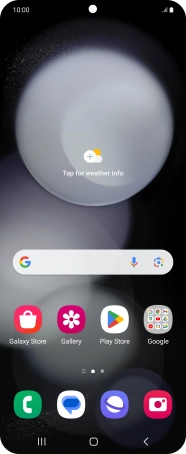
Slide two fingers downwards starting from the top of the screen.
![](http://wmstatic.global.ssl.fastly.net/ml/7151223-f-3464ea41-6a46-40fb-b5b9-0a17cf9092e0.png?width=186&height=458)
Press the settings icon.
![](http://wmstatic.global.ssl.fastly.net/ml/7151223-f-60f6b2a7-292f-4aed-b467-f0ec4744cd9d.png?width=186&height=458)
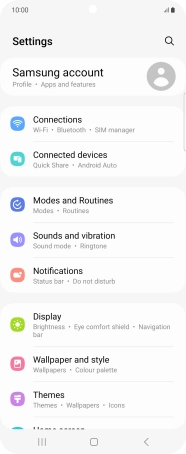
Press Connections.
![](http://wmstatic.global.ssl.fastly.net/ml/7151223-f-af8d8d3f-bbb1-4c2e-9943-bccc301e5cc4.png?width=186&height=458)
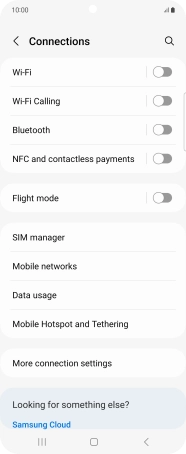
Press SIM manager.
![](http://wmstatic.global.ssl.fastly.net/ml/7151223-f-bae82afa-ee32-4bc5-b450-745c8c33e6d7.png?width=186&height=458)
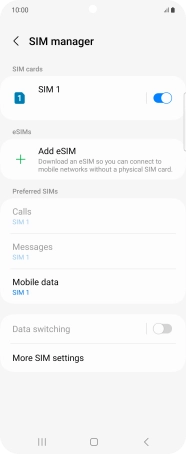
Press Add eSIM.
![](http://wmstatic.global.ssl.fastly.net/ml/7151223-f-98f34fa8-d9a9-4059-840c-c0ea7c898d42.png?width=186&height=458)
Press Scan QR code.
![](http://wmstatic.global.ssl.fastly.net/ml/7151223-f-b704a3d6-cd88-4c80-9328-6b6bdf89ac89.png?width=186&height=458)
2. Scan QR code
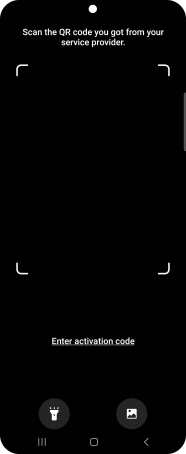
Place the QR code you've received inside the phone camera frame to scan the code. If you’ve deleted your eSIM, you can re-add it using your existing QR code. If you’re having problems, see our FAQ.
![](http://wmstatic.global.ssl.fastly.net/ml/7151223-f-6a85ea3f-1560-4ee0-99f7-2184ea3c532a.png?width=186&height=458)
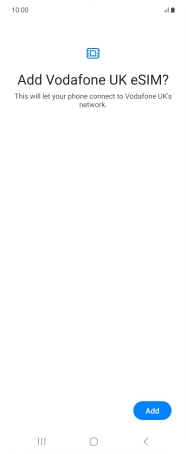
3. Activate eSIM
Press Add.
![](http://wmstatic.global.ssl.fastly.net/ml/7151223-f-7aff244f-98a1-4c5e-a4a8-9a4b7ef7caf3.png?width=186&height=458)
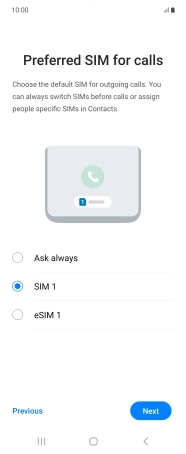
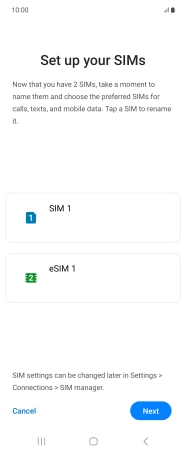
Follow the instructions on the screen and press Next.
![](http://wmstatic.global.ssl.fastly.net/ml/7151223-f-8cb4fab0-b3fd-4f71-9cd0-f68f31ab801c.png?width=186&height=458)
Press the required setting.
![](http://wmstatic.global.ssl.fastly.net/ml/7151223-f-8e48a33e-f76b-40b8-a8e6-0d123ad25cfd.png?width=186&height=458)
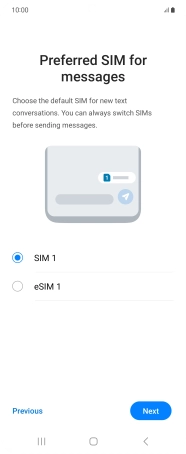
Press Next.
![](http://wmstatic.global.ssl.fastly.net/ml/7151223-f-8e48a33e-f76b-40b8-a8e6-0d123ad25cfd.png?width=186&height=458)
Press the required price plan.
![](http://wmstatic.global.ssl.fastly.net/ml/7151223-f-2ec1247d-181b-488a-9f2b-ac78aec7c19b.png?width=186&height=458)
Press Next.
![](http://wmstatic.global.ssl.fastly.net/ml/7151223-f-2ec1247d-181b-488a-9f2b-ac78aec7c19b.png?width=186&height=458)
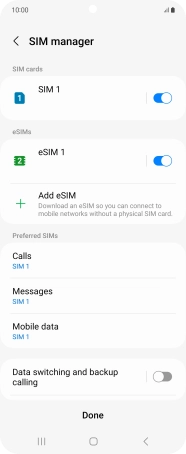
Press the required settings.
![](http://wmstatic.global.ssl.fastly.net/ml/7151223-f-87cec9f4-1b30-4596-aee1-55d4adc2d4f0.png?width=186&height=458)
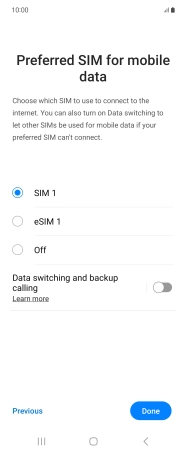
Press Done.
![](http://wmstatic.global.ssl.fastly.net/ml/7151223-f-87cec9f4-1b30-4596-aee1-55d4adc2d4f0.png?width=186&height=458)
4. Return to the home screen
Press the Home key to return to the home screen.
![](http://wmstatic.global.ssl.fastly.net/ml/7151223-f-42d4644e-4e83-432b-b97b-a4a5231c2daa.png?width=186&height=458)