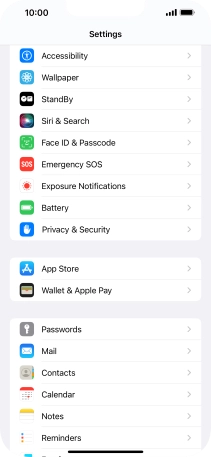
1. Find "Accounts"
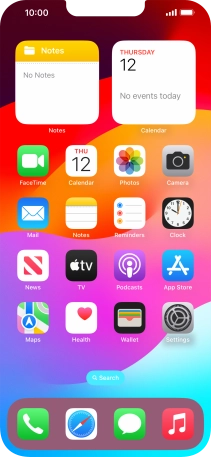
Press Settings.
![](http://wmstatic.global.ssl.fastly.net/ml/7151223-f-c0bcc280-abf2-4de8-b367-e5e4f9abe776.png?width=212&height=458)
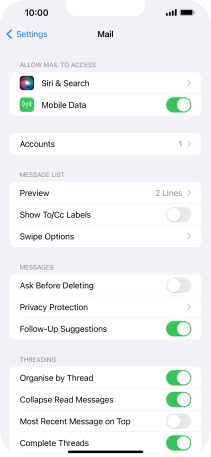
Press Mail.
![](http://wmstatic.global.ssl.fastly.net/ml/7151223-f-df30bf77-80b2-41e8-94ef-50cc05d4ed8b.png?width=212&height=458)
Press Accounts.
![](http://wmstatic.global.ssl.fastly.net/ml/7151223-f-a58ca8da-c69c-4c62-9f11-859a2660978b.png?width=212&height=458)
2. Create new email account
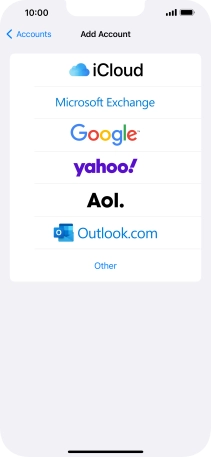
Press Add Account.
![](http://wmstatic.global.ssl.fastly.net/ml/7151223-f-0c7f535c-037e-484a-82b6-353e4c6a0237.png?width=212&height=458)
Press Microsoft Exchange.
![](http://wmstatic.global.ssl.fastly.net/ml/7151223-f-4eb6a743-689e-4a2d-9197-66482fb6c664.png?width=212&height=458)
3. Enter email address
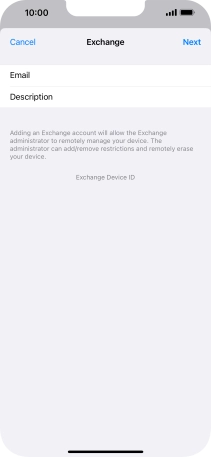
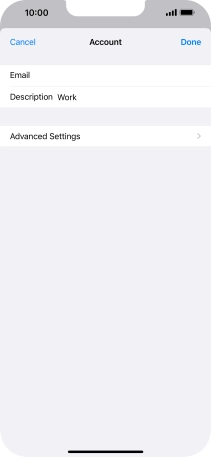
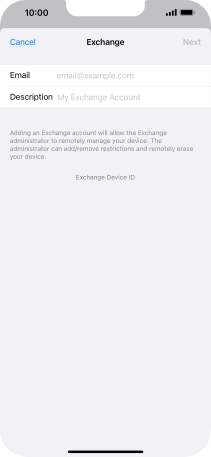
Press Email and key in your email address.
![](http://wmstatic.global.ssl.fastly.net/ml/7151223-f-d252e483-5fac-49a0-9bd8-e6a6bb280db3.png?width=212&height=458)
4. Enter email account name
Press Description and key in the required name.
![](http://wmstatic.global.ssl.fastly.net/ml/7151223-f-d252e483-5fac-49a0-9bd8-e6a6bb280db3.png?width=212&height=458)
Press Next.
![](http://wmstatic.global.ssl.fastly.net/ml/7151223-f-a52c1fba-ce29-4113-8b89-04307e6bcd94.png?width=212&height=458)
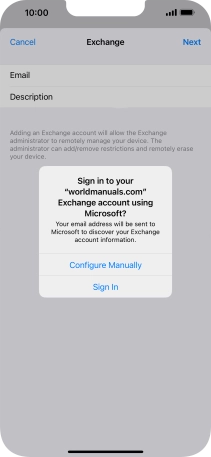
Press Sign In.
![](http://wmstatic.global.ssl.fastly.net/ml/7151223-f-9b438388-0441-48cd-ae43-d58bc6da7558.png?width=212&height=458)
5. Enter password
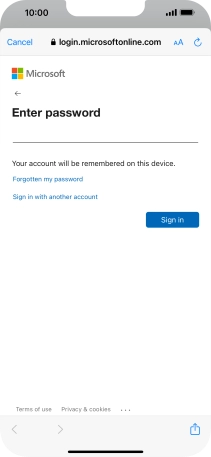
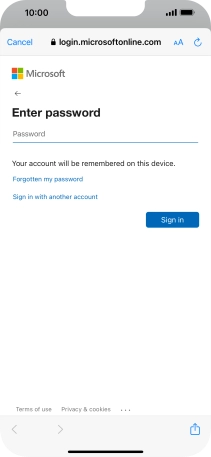
Press Password and key in the password for your email account.
![](http://wmstatic.global.ssl.fastly.net/ml/7151223-f-61ea6fb5-2b5c-4dde-8877-ad8b0c485d39.png?width=212&height=458)
Press Sign in.
![](http://wmstatic.global.ssl.fastly.net/ml/7151223-f-88609fbb-b137-4863-a941-c77559c23aef.png?width=212&height=458)
6. Select settings for synchronisation of data
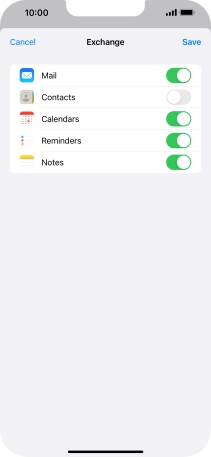
Press the indicators next to the required data types to turn synchronisation of each data type on or off.
![](http://wmstatic.global.ssl.fastly.net/ml/7151223-f-9078eed7-3d8d-465c-92ae-14e559bcd33a.png?width=212&height=458)
Press Save. Your email account has now been set up. To select more settings for e.g. SSL encryption and retrieval of new email messages, proceed with the following steps.
![](http://wmstatic.global.ssl.fastly.net/ml/7151223-f-9078eed7-3d8d-465c-92ae-14e559bcd33a.png?width=212&height=458)
7. Turn SSL encryption on or off
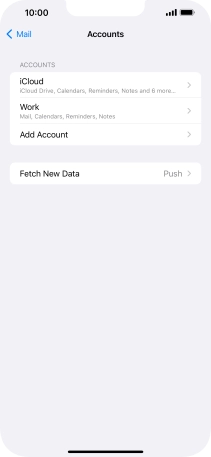
Press the name of the Exchange email account you've just set up.
![](http://wmstatic.global.ssl.fastly.net/ml/7151223-f-baf7c18d-8bcf-4013-9750-306b8894030b.png?width=212&height=458)
Press Account.
![](http://wmstatic.global.ssl.fastly.net/ml/7151223-f-9a41c517-a98d-4481-8fca-1943faa9079d.png?width=212&height=458)
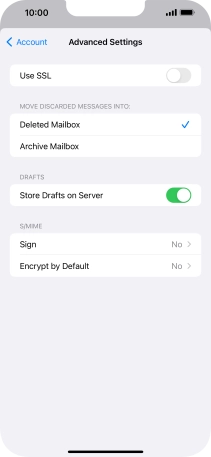
Press Advanced Settings.
![](http://wmstatic.global.ssl.fastly.net/ml/7151223-f-c4686055-7ea9-42e2-bacc-c1b46d8902c7.png?width=212&height=458)
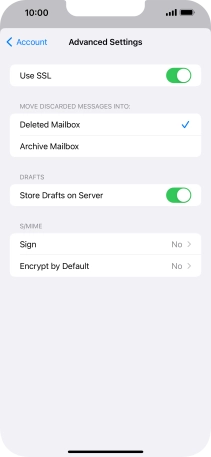
Press the indicator next to "Use SSL" to turn the function on or off.
![](http://wmstatic.global.ssl.fastly.net/ml/7151223-f-97b1503e-3f4a-4fff-9b07-0fd389634a27.png?width=212&height=458)
Press arrow left.
![](http://wmstatic.global.ssl.fastly.net/ml/7151223-f-8d937e8e-211b-486a-aefd-eb3ad7ced57a.png?width=212&height=458)
Press Done.
![](http://wmstatic.global.ssl.fastly.net/ml/7151223-f-c4686055-7ea9-42e2-bacc-c1b46d8902c7.png?width=212&height=458)
Press arrow left.
![](http://wmstatic.global.ssl.fastly.net/ml/7151223-f-9a41c517-a98d-4481-8fca-1943faa9079d.png?width=212&height=458)
8. Select setting for retrieval of new email messages
Press Fetch New Data.
![](http://wmstatic.global.ssl.fastly.net/ml/7151223-f-baf7c18d-8bcf-4013-9750-306b8894030b.png?width=212&height=458)
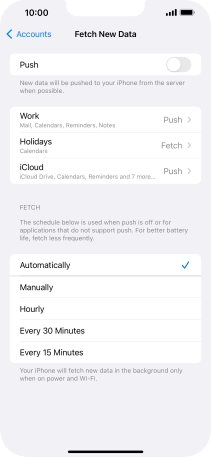
Press the indicator next to "Push" to turn the function on or off.
![](http://wmstatic.global.ssl.fastly.net/ml/7151223-f-2b77bd50-a549-4868-8725-8c052dbe1a69.png?width=212&height=458)
If you turn off the function, press the required setting.
![](http://wmstatic.global.ssl.fastly.net/ml/7151223-f-7b86d8dc-7447-4d27-accc-a965f594d3b8.png?width=212&height=458)
Press the required email account and follow the instructions on the screen to select settings for the specific account.
![](http://wmstatic.global.ssl.fastly.net/ml/7151223-f-7b86d8dc-7447-4d27-accc-a965f594d3b8.png?width=212&height=458)
9. Return to the home screen
Slide your finger upwards starting from the bottom of the screen to return to the home screen.
![](http://wmstatic.global.ssl.fastly.net/ml/7151223-f-7b86d8dc-7447-4d27-accc-a965f594d3b8.png?width=212&height=458)