![TCL 306](http://wmstatic.global.ssl.fastly.net/ml/7151223-f-ea2b6f96-4582-4dd6-9b00-74547509a6df.png?width=150&height=320)
TCL 306
Android 12.0
1. Find "Backup"
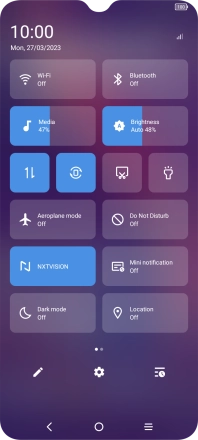
Slide two fingers downwards starting from the top of the screen.
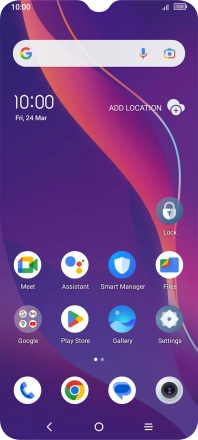
![](http://wmstatic.global.ssl.fastly.net/ml/7151223-f-1f21d219-7452-4c2f-b44c-43e33bce042b.png?width=198&height=440)
Press the settings icon.
![](http://wmstatic.global.ssl.fastly.net/ml/7151223-f-f31c501c-3eab-44a8-a48a-37e10f387c6a.png?width=198&height=440)
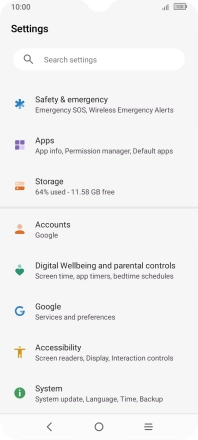
Press Google.
![](http://wmstatic.global.ssl.fastly.net/ml/7151223-f-e26a92fb-41f9-4fd7-9443-05382ab07801.png?width=198&height=440)
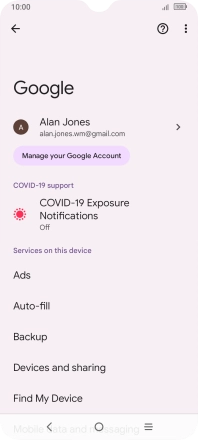
Press Backup.
![](http://wmstatic.global.ssl.fastly.net/ml/7151223-f-c01040a6-b5f7-4c82-b934-3904163216eb.png?width=198&height=440)
2. Turn on automatic Google One backup
Press Turn on.
The phone memory will be backed up automatically when your phone is charging, the screen lock is turned on and a Wi-Fi connection is established.
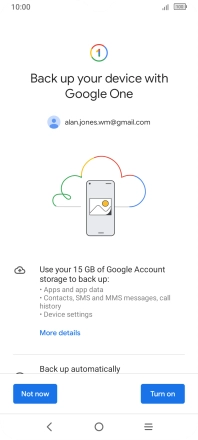
![](http://wmstatic.global.ssl.fastly.net/ml/7151223-f-2c81d49e-a4b6-4949-8c4f-ca8f1d349463.png?width=198&height=440)
3. Turn automatic back up using mobile network on or off
Press the indicator next to "Back up using mobile or metered Wi-Fi data" to turn the function on or off.
The phone memory will be backed up automatically using the mobile network when no Wi-Fi networks are within range.
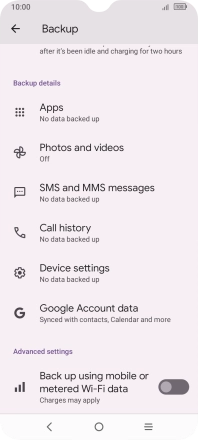
![](http://wmstatic.global.ssl.fastly.net/ml/7151223-f-3e0b53bc-68bf-4408-8053-debb27cd1004.png?width=198&height=440)
4. Back up phone memory to Google One
Press Back up now and wait while the phone memory is backed up.
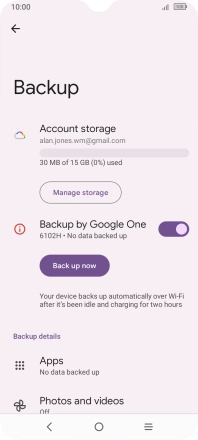
![](http://wmstatic.global.ssl.fastly.net/ml/7151223-f-c3e98d95-bc93-4a8f-8ad8-b2741131f564.png?width=198&height=440)
5. Return to the home screen
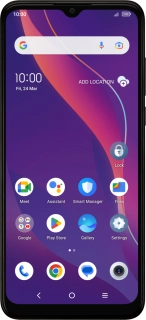
Press the Home key to return to the home screen.
![](http://wmstatic.global.ssl.fastly.net/ml/7151223-f-2c81d49e-a4b6-4949-8c4f-ca8f1d349463.png?width=198&height=440)