![TCL 403](http://wmstatic.global.ssl.fastly.net/ml/7060324-f-1f1388b5-356e-4f8a-af3a-e0ecb346ebef.png?width=150&height=320)
TCL 403
Android 12 (Go edition)
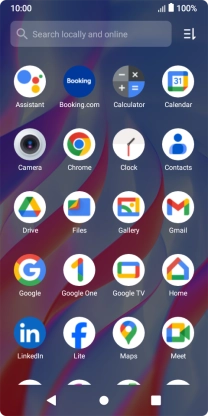
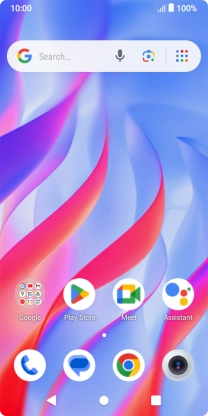
1. Find "Contacts"
Slide your finger upwards on the screen.
![](http://wmstatic.global.ssl.fastly.net/ml/7060324-f-2ae7371b-fe23-4b23-9f7c-ef6b3ab57beb.png?width=208&height=416)
Press Contacts.
![](http://wmstatic.global.ssl.fastly.net/ml/7060324-f-87be32cd-40dd-48d4-8f85-ff5c136068ba.png?width=208&height=416)
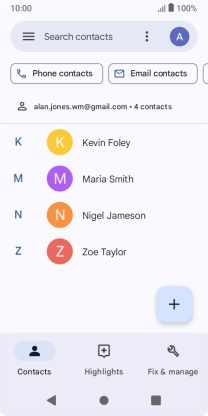
2. Create contact
Press the new contact icon.
![](http://wmstatic.global.ssl.fastly.net/ml/7060324-f-0640f38f-e7a8-4f2f-943d-7e60cd29576b.png?width=208&height=416)
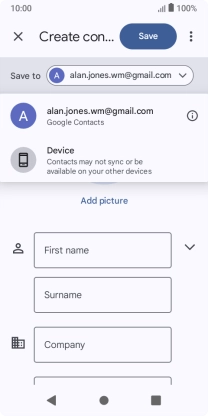
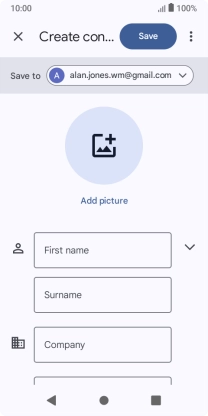
3. Select address book
Press the address book drop down list.
![](http://wmstatic.global.ssl.fastly.net/ml/7060324-f-56772c18-96c4-45ed-9613-49c1aff8ef77.png?width=208&height=416)
Press the required Google account.
![](http://wmstatic.global.ssl.fastly.net/ml/7060324-f-e60355d4-23a7-449c-9416-8315d0525d78.png?width=208&height=416)
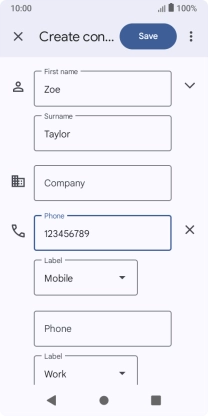
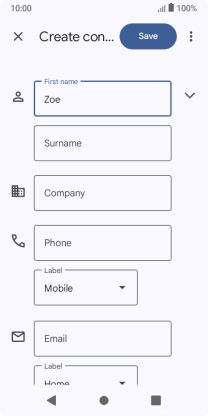
4. Enter name
Press First name and key in the required first name.
![](http://wmstatic.global.ssl.fastly.net/ml/7060324-f-56772c18-96c4-45ed-9613-49c1aff8ef77.png?width=208&height=416)
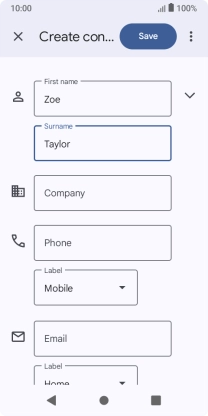
Press Surname and key in the required last name.
![](http://wmstatic.global.ssl.fastly.net/ml/7060324-f-e9f4a9dd-b514-44de-8bc0-1427516ae072.png?width=208&height=416)
5. Enter phone number
Press Phone and key in the required phone number.
Follow the instructions on the screen to add more information such as email address and date of birth.
![](http://wmstatic.global.ssl.fastly.net/ml/7060324-f-019131c8-379a-40b0-a699-39364caf6ce3.png?width=208&height=416)
6. Save contact
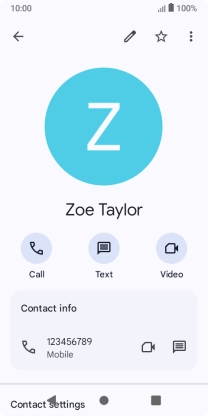
Press Save.
![](http://wmstatic.global.ssl.fastly.net/ml/7060324-f-f39ecf9a-58d5-4765-95d8-744f28ae3d09.png?width=208&height=416)
7. Return to the home screen
Press the Home key to return to the home screen.
![](http://wmstatic.global.ssl.fastly.net/ml/7060324-f-10ca0a36-061d-40b8-a07e-9a992ee31018.png?width=208&height=416)